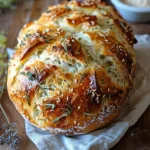
Introduction to Garlic Herb Braided Bread
If you’re looking to impress your friends or simply elevate your dinner table, Garlic Herb Braided Bread is the stunning loaf you need to bake today. This beautiful, homemade bread is not only a feast for the eyes but also a delight for the palate. Its rich, garlicky aroma wafts through the kitchen, drawing everyone in like a magnet. Whether you’re an experienced baker or a kitchen newbie, this recipe will work its magic—with minimal effort!
Why Bake This Stunning Loaf?
So, why should you consider baking this Garlic Herb Braided Bread? There are genuinely 7 flavorful reasons to give it a try!
-
Versatile Pairing: This bread pairs beautifully with soups, salads, or even as a savory side for your favorite protein dishes. Imagine serving it alongside a hearty bowl of chicken noodle soup or with turkey bacon at brunch!
-
Impressive Presentation: The braided design elevates the traditional loaf, making it an ideal centerpiece for any gathering. Friends will think you’re a professional baker!
-
Customizable Flavor: Feel free to experiment with different herbs and spices. Rosemary, thyme, or even a hint of Parmesan can take this loaf to another level.
-
Healthier Alternative: By making it at home, you control the ingredients. A little olive oil instead of butter and whole grain flour can add a nutritional boost.
-
Engaging Process: The braiding technique is not only fun to do but also a meditative experience. Do you find baking therapeutic? This might just become your new favorite hobby!
-
Great for Meal Prep: It freezes beautifully, so you can bake a batch, slice it up, and store it for later. Homemade bread is always a welcome addition to any meal, even after a long day at work.
-
Connection Through Food: Baking together can be a wonderful bonding experience with family or friends. Why not host a baking night? Share the love of good food and create lasting memories!
Intrigued? This loaf is as delicious as it is beautiful. Stick around for the full recipe and discover tips for perfecting your baking skills. There’s nothing quite like the smell of fresh bread in your home! For further inspiration, check out sources such as The Kitchn or Serious Eats that offer incredible tips and baking techniques to broaden your culinary horizons.
Ingredients for Garlic Herb Braided Bread
Creating your own Garlic Herb Braided Bread is not just a task; it’s an experience worth savoring. You’ll need the following ingredients to bring this beauty to life:
- 3 ½ cups all-purpose flour: The base for our dough, ensuring a fluffy texture.
- 1 packet (2 ¼ teaspoons) instant yeast: This little powerhouse makes everything rise delightfully.
- 1 tablespoon sugar: A touch of sweetness to balance the flavors.
- 1 teaspoon salt: Essential for enhancing all those aromatic herbs.
- 1 cup warm water: Activates the yeast and binds your dough together.
- 3 tablespoons olive oil: Adds richness and moisture.
- 3-4 cloves of garlic, minced: The star of the show, delivering that robust flavor.
- 1 tablespoon fresh rosemary, chopped: Earthy and fragrant—perfect alongside garlic!
- 1 tablespoon fresh thyme, chopped: Another aromatic herb that complements the dish beautifully.
These straightforward ingredients are user-friendly yet contribute to an unforgettable taste experience. Interested in adding more flavor? You can include ingredients like Turkey Bacon or Chicken Ham for a savory twist! Baking bread not only fills your home with delightful aromas, but it also creates a connection to tradition—what better reason could there be to try it? For more culinary tips, you might want to check out resources like Bon Appétit. Happy baking!
Preparing Garlic Herb Braided Bread
Baking can be an incredibly rewarding experience, especially when the end result is something as delicious and visually stunning as Garlic Herb Braided Bread. This recipe is sure to be a hit, whether you’re serving it at a dinner party, enjoying it on a quiet evening, or sharing it with friends over a cozy brunch. Let’s dive into the step-by-step process that will guide you through making this flavorful loaf!
Activate the yeast
The first step in our journey is activating the yeast. This is a crucial step because yeast is what makes your bread rise and gives it that wonderful airy texture. You’ll need:
- 1 packet of active dry yeast (about 2 ¼ teaspoons)
- 1 teaspoon of sugar
- 1 cup of warm water (not hot – around 110°F is perfect)
In a small bowl, combine the warm water, sugar, and yeast. Let it sit for about 5-10 minutes. You should see bubbles forming, which indicates that your yeast is alive and ready to work its magic. If you want to learn more about yeast types and how they affect your baking, check out this detailed guide from King Arthur Baking.
Mix and knead the dough
Once your yeast is activated, it’s time to combine all the ingredients. In a large mixing bowl, whisk together:
- 3 ½ to 4 cups of all-purpose flour
- 1 teaspoon of salt
- 2 tablespoons of minced garlic (fresh is best)
- 2 tablespoons of mixed dried herbs (think basil, thyme, or rosemary)
Create a well in the center and pour in your activated yeast mixture. Mix until a shaggy dough forms. Now, flour your workspace and knead the dough for about 8-10 minutes. This is where the magic happens! Kneading develops gluten, giving your bread that perfect chewy texture. If you’re new to this, don’t worry; it can be a little messy, but it’s fun!
Allow the dough to rise
After kneading, place your dough in a lightly oiled bowl, cover it with a clean kitchen towel, and let it rise in a warm place. The ideal rise time is about 1 to 2 hours, or until it has doubled in size. This is a great time to prepare any toppings you might want to have on your bread. Think about what would pair well with this flavorful loaf. Perhaps some olive oil or a light dip?
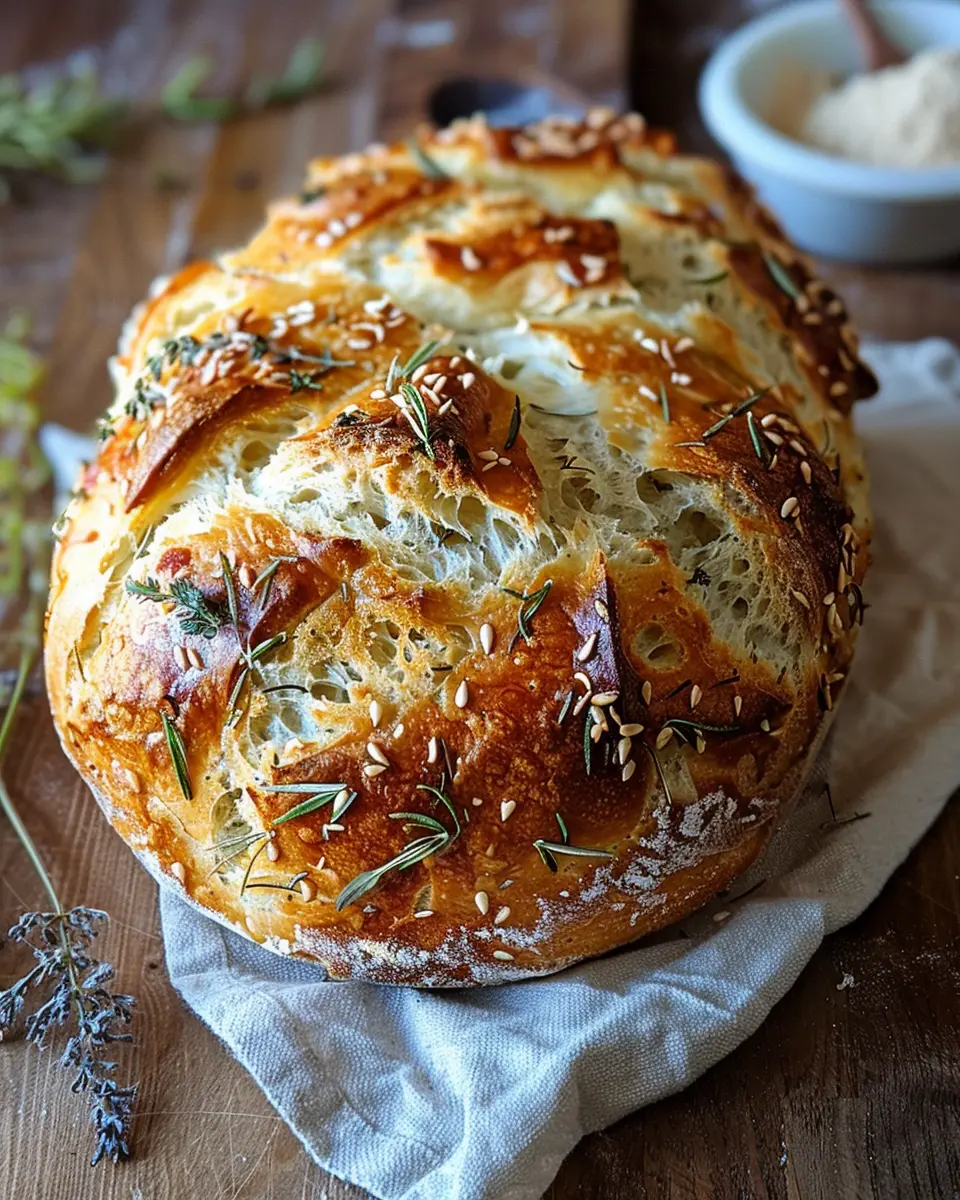
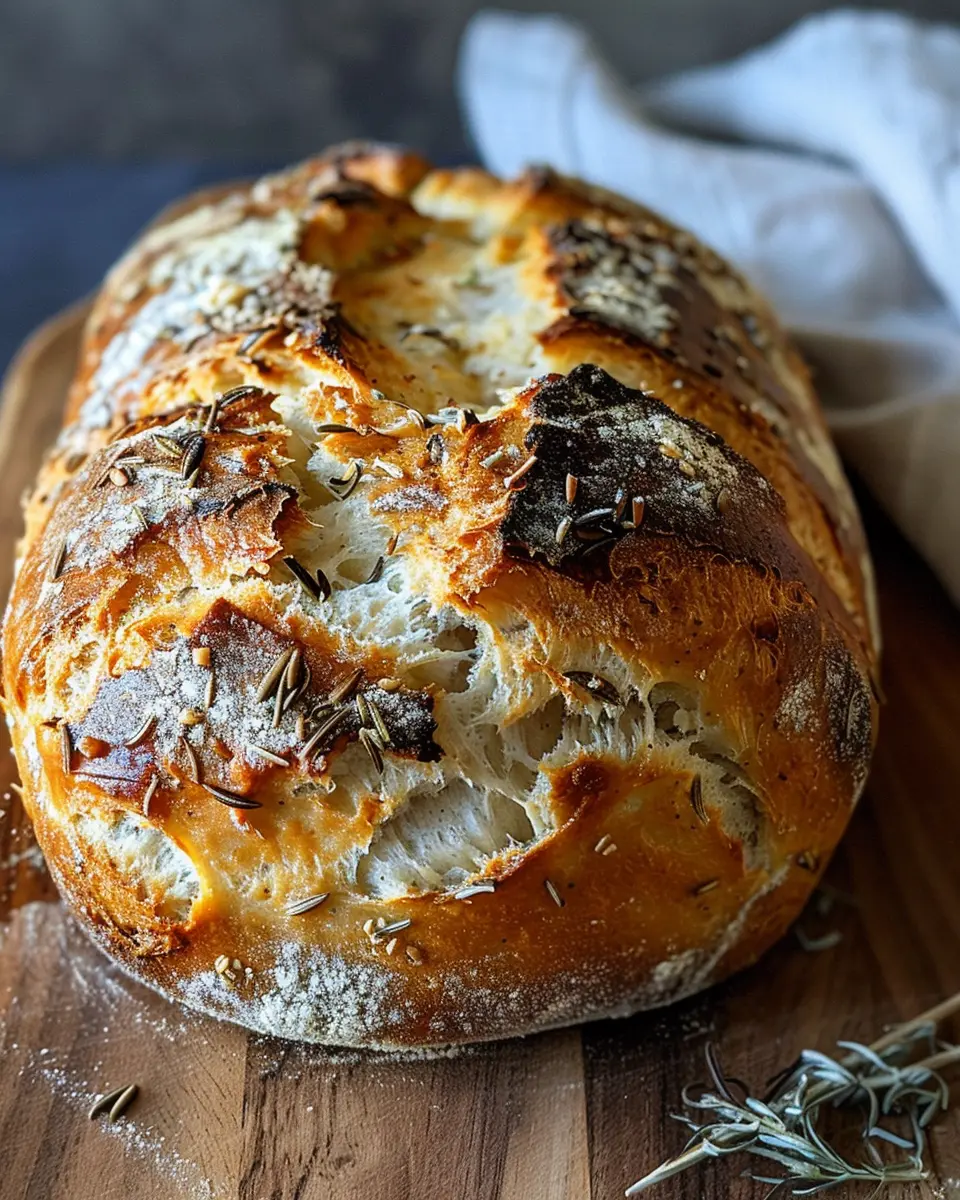
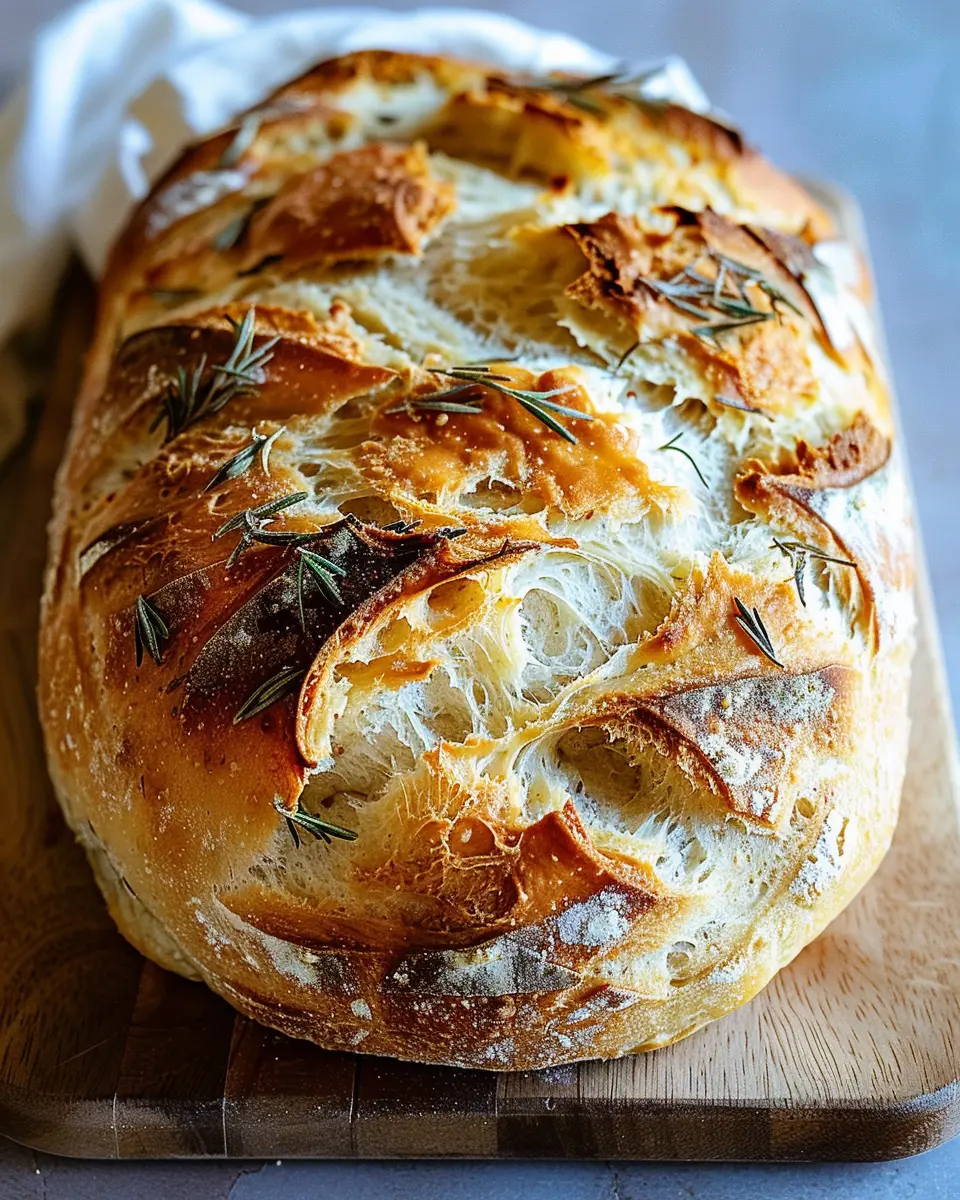
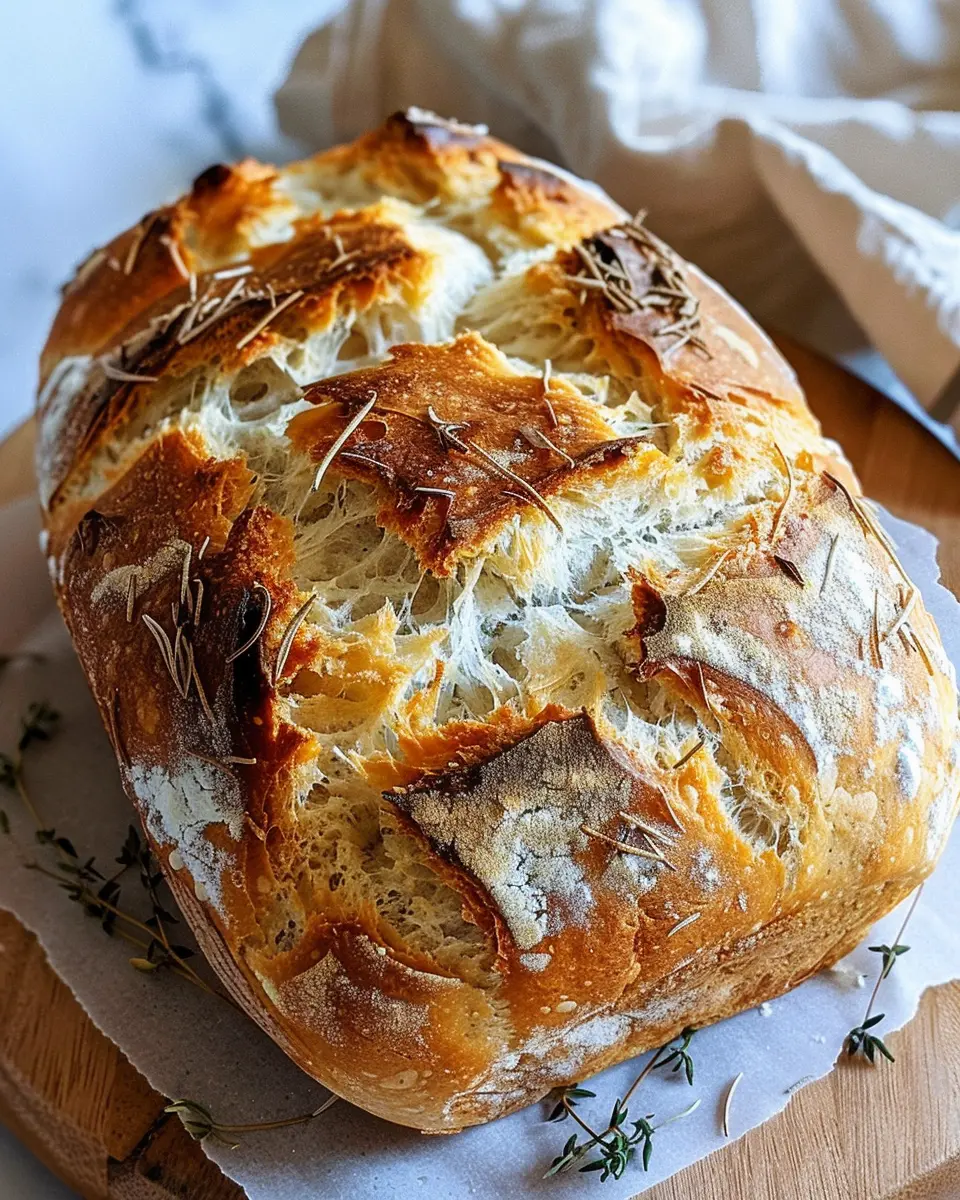
Braid the dough
Once your dough has risen beautifully, it’s time to get creative! Punch it down gently, then divide it into three equal pieces. Roll each piece into a long strand, about 12-14 inches long. Make sure the strands are even for a beautiful braid!
Now, pinch the tops together and start braiding, just like you would with hair. Once you’ve finished braiding, tuck the ends under to secure the shape. Place your braided dough onto a parchment-lined baking sheet. Pro tip: Let it rise again for about 30 minutes. This extra rise will make your bread even fluffier!
Bake to perfection
Preheat your oven to 350°F while your dough is resting. After the second rise, brush your loaf with a mixture of melted butter and minced garlic for an extra burst of flavor. Then, pop it into the preheated oven and bake for about 25-30 minutes until it’s golden brown and sounds hollow when tapped.
Once finished, let it cool on a wire rack before slicing into it. Trust me, the aroma wafting through your kitchen will be hard to resist!
Now that you’ve prepared your Garlic Herb Braided Bread, you may find yourself with 7 flavorful reasons to share this creation—it’s perfect for gatherings, pairs wonderfully with soups, and makes excellent toast for breakfast the next day. Happy baking!
Variations on Garlic Herb Braided Bread
Adding cheeses for a twist
Have you ever considered how a touch of cheese can elevate your Garlic Herb Braided Bread? Imagine biting into a warm, fluffy loaf with melted cheese cascading from the seams. Options like mozzarella, cheddar, or even a blend of Parmesan and goat cheese can add a delightful creaminess and depth of flavor.
A simple suggestion is to incorporate cheese directly into the dough, which adds richness and enhances the chewy texture. Alternatively, you can create a cheesy filling by layering cheese slices between the braids before baking. Don’t forget to sprinkle a little extra cheese on top for that golden crust that speaks to all cheese lovers out there!
Spicy garlic herb twist
For those who crave a kick in their bread, adding a spicy twist is an exciting avenue to explore. Consider mixing crushed red pepper flakes or a dash of cayenne pepper into your herb mixture. This will not only amp up the flavor but also give your bread a delightful warmth.
If you adore heat, try incorporating jalapeños or chili oil into the dough for that extra punch. You can even top the braided loaf with chili-infused oil before baking for an extra layer of flavor.
Whether you choose to indulge in cheesy goodness or embrace the spice, there are endless variations to make this braided bread your own. With these ideas, you’ll discover 7 flavorful reasons to whip up this stunning loaf today. Want more tips? Check out Serious Eats for further inspiration!
Cooking Notes for Garlic Herb Braided Bread
Baking the Garlic Herb Braided Bread is a delightful adventure, and with a few cooking notes, you’ll elevate this loaf from delicious to downright extraordinary. Here are some tips to consider:
Perfecting the Dough
- Knead with Love: When kneading the dough, aim for about 8-10 minutes. This develops the gluten, which gives your bread that lovely chewy texture. If you’re new to baking, think of kneading as giving your dough a little workout!
Flavor Boosters
- Fresh Herbs are Key: If you can, opt for fresh herbs over dried. They make a significant difference in flavor. Rosemary, thyme, and parsley pair exceptionally well with garlic. Check out The Spruce Eats for tips on selecting and using fresh herbs.
Filling Options
- Cheesey Twist: Want a richer bread? A sprinkle of Parmesan cheese in your braid will enhance the flavor profile and create an irresistible crust.
Serving Suggestions
- Dipping Delight: Serve your finished bread with a side of olive oil or a savory herb-infused butter. This not only compliments the flavors but adds a luxurious touch to your dining experience.
Taking these tips into account will ensure your Garlic Herb Braided Bread shines on the table, making it one of 7 flavorful reasons to bake this stunning loaf today. Enjoy your baking journey!
Serving suggestions for Garlic Herb Braided Bread
When it comes to Garlic Herb Braided Bread, the possibilities are endless. This bread is not just beautiful; it’s versatile too! Here are some tasty serving suggestions to elevate your culinary experience.
Pairing with Dips and Spreads
Enjoy this flavorful loaf with a spread of herbed cream cheese or a zesty hummus. These pairings highlight the garlic and herb flavors, creating an irresistible dip experience. For an Italian twist, serve it with a homemade marinara sauce, perfect for scooping!
Sandwich Sensations
Slice this braided bread to create gourmet sandwiches. Think turkey bacon, fresh greens, and ripe tomatoes for a delightful and hearty lunch. Alternatively, use chicken ham with avocado and a drizzle of balsamic vinaigrette for a lip-smacking treat.
Perfect with Soup or Salad
This bread complements a warm, hearty soup or a refreshing salad beautifully! Try pairing it with a creamy tomato basil soup or a light mixed greens salad for a balanced meal.
Subtle yet satisfying, the 7 flavorful reasons to bake this stunning loaf today will transform your mealtime into a delightful experience. Don’t forget to explore more about baking techniques at reputable sources like King Arthur Baking Company for expert insights!
Tips for Making Perfect Garlic Herb Braided Bread
Baking the perfect Garlic Herb Braided Bread may seem daunting, but with a few essential tips, you’ll impress your friends and family in no time. First, ensure your ingredients are at room temperature—this encourages better yeast activity and dough elasticity.
Knead Like a Pro: Don’t be shy about kneading the dough well. Aim for about 8-10 minutes, allowing gluten to develop and create that airy structure we all love. Remember, a well-kneaded dough feels smooth and elastic.
Perfect Braiding Technique: When it comes to braiding, practice makes perfect! Divide your dough into three equal strands. Start in the middle, move the right strand over the middle, then the left strand over the new middle. Repeat this until you reach the end. Being consistent with your braiding will yield a visually stunning loaf that truly showcases your baking prowess.
Flavor Boosting: For deep, rich flavors, let the dough rise in a warm, draft-free area. Consider using a chicken broth instead of water for the dough to infuse it with an extra layer of flavor. This is one of the many 7 flavorful reasons to try this recipe!
Baking Considerations: To achieve golden coloration on your loaf, brush it with an egg wash (1 egg mixed with a tablespoon of water) before baking. This step enhances that gorgeous, professional finish.
With these tips, you’re all set to create a dazzling Garlic Herb Braided Bread that’s sure to impress! Happy baking! For more information on dough techniques, check out King Arthur Baking.
Time breakdown for Garlic Herb Braided Bread
When you decide to whip up this Garlic Herb Braided Bread, it helps to know how your time will be allocated. Here’s a quick guide to breaking down the process:
Preparation time
Set aside about 20 to 30 minutes for the preparation. This includes gathering your ingredients and kneading the dough. It’s important to give your bread the attention it deserves during this stage.
Rising time
Patience is key! Allow the dough to rise for about 1 to 1.5 hours. Don’t rush this step, as it’s crucial for achieving that light and airy texture.
Baking time
Baking will take approximately 25 to 30 minutes. You’ll know it’s done when the crust is golden brown and the aroma fills your kitchen.
Total time
In total, you’re looking at around 2 to 2.5 hours from start to finish. While it may sound lengthy, think of the rewarding experience you’re creating—and the wonderful flavors to enjoy. If you’re curious about other delectable bread options, check out this guide on the science behind baking!
Nutritional Facts for Garlic Herb Braided Bread
When it comes to baking, understanding the nutritional value of your creations can enhance your culinary experience. Garlic Herb Braided Bread is not just a delight for the taste buds, but it also packs a nutritional punch. Here are some key nutritional facts to consider:
Calories
One slice of this savory bread typically contains around 150 calories. While it’s perfect for pairing with soups or salads, being mindful of your portions can help balance your meal without feeling deprived.
Carbohydrates
This bread offers approximately 25 grams of carbohydrates per slice. The blend of flour and fresh herbs not only adds flavor but also satisfies your energy needs, making it an excellent choice for young professionals on the go.
Protein
With about 4 grams of protein per slice, Garlic Herb Braided Bread provides a modest protein boost. Pair it with options like turkey bacon or chicken ham for a deliciously hearty meal that keeps you full longer.
For more insights into the nutritional aspects of homemade bread, you might want to check out resources such as Healthline or Mayo Clinic. These platforms can guide you on how to make mindful choices in your cooking adventures.
FAQs about Garlic Herb Braided Bread
Can I use instant yeast instead of active dry yeast?
Absolutely! You can substitute instant yeast for active dry yeast in this recipe. Instant yeast is more powerful and will rise quicker, so you can skip the proofing step. Just mix it directly into your dry ingredients. For a smoother experience, consider reducing the water slightly since instant yeast absorbs moisture differently. The result will still be a delicious, fluffy loaf that showcases the garlic and herbs beautifully!
How should I store leftovers?
Storing your garlic herb braided bread correctly will ensure you enjoy it for days to come. Wrap the bread in plastic wrap or aluminum foil and keep it at room temperature for up to 3 days. If you’d like to store it for even longer, consider freezing the loaf. Just slice it first, place in a freezer bag, and it can last up to 3 months! To reheat, just pop the slices in a toaster or warm them in the oven for that fresh-baked taste.
What can I serve with garlic herb braided bread?
The versatility of this garlic herb bread opens up a world of serving options. Consider pairing it with:
- Soups: A creamy tomato bisque or a hearty minestrone
- Salads: A classic Caesar or a fresh garden salad
- Dips: Hummus or spinach-artichoke dip can also elevate your spread.
- Breakfast: Enjoy it with Turkey Bacon and scrambled eggs for a delightful brunch.
With these 7 flavorful reasons to bake amidst your culinary explorations, you’ll surely impress guests or treat yourself to an indulgent meal. For more serving ideas, check out this guide on food pairings.
Conclusion on Garlic Herb Braided Bread
Baking your own Garlic Herb Braided Bread can be a delightful adventure, transforming any meal into a culinary experience. With its beautiful braids and aromatic flavors, this bread provides 7 flavorful reasons to gather friends or family around the table. Not only does it make for an impressive centerpiece, but it also pairs perfectly with a hearty bowl of soup or a fresh salad. Plus, the irresistible aroma will have your kitchen buzzing with excitement. For tips on more delicious recipes, you can explore resources such as The Kitchn or Serious Eats. Treat yourself to this stunning loaf and enjoy the praise that follows!
Print7 Flavorful Reasons to Bake This Stunning Loaf with Turkey Bacon
Discover the delightful reasons to bake a loaf infused with turkey bacon that your family will love.
- Prep Time: 10 minutes
- Cook Time: 50 minutes
- Total Time: 1 hour
- Yield: 1 loaf 1x
- Category: Bread
- Method: Baking
- Cuisine: American
- Diet: Meat
Ingredients
- 2 cups all-purpose flour
- 1 cup turkey bacon, chopped
- 1/2 cup shredded cheese
- 1/4 cup green onions, chopped
- 1 tablespoon baking powder
- 1/2 teaspoon salt
- 1 cup milk
- 2 large eggs
Instructions
- Preheat your oven to 350°F (175°C).
- In a mixing bowl, combine the flour, baking powder, and salt.
- In a separate bowl, whisk together the eggs and milk.
- Add the wet ingredients to the dry ingredients and mix until just combined.
- Fold in the turkey bacon, cheese, and green onions.
- Pour the batter into a greased loaf pan.
- Bake for 45-50 minutes or until a toothpick comes out clean.
- Let cool before slicing and serving.
Notes
- Experiment with different herbs for added flavor.
- Serve warm with butter for a delicious treat.
Nutrition
- Serving Size: 1 slice
- Calories: 180
- Sugar: 1g
- Sodium: 350mg
- Fat: 8g
- Saturated Fat: 3g
- Unsaturated Fat: 4g
- Trans Fat: 0g
- Carbohydrates: 22g
- Fiber: 1g
- Protein: 8g
- Cholesterol: 70mg
Keywords: turkey bacon, loaf, baking, savory bread


