Introduction to Red Velvet Oreo Cheesecake
If you’re looking for a dessert that will impress both visually and in taste, then the red velvet Oreo cheesecake is where you should focus your attention. This delightful treat combines the classic flavors of red velvet cake with the creamy richness of cheesecake, all while being complemented by the crunch of Oreo cookies. It’s a fusion that simply sings when you take that first heavenly bite.
What makes red velvet Oreo cheesecake a delightful treat?
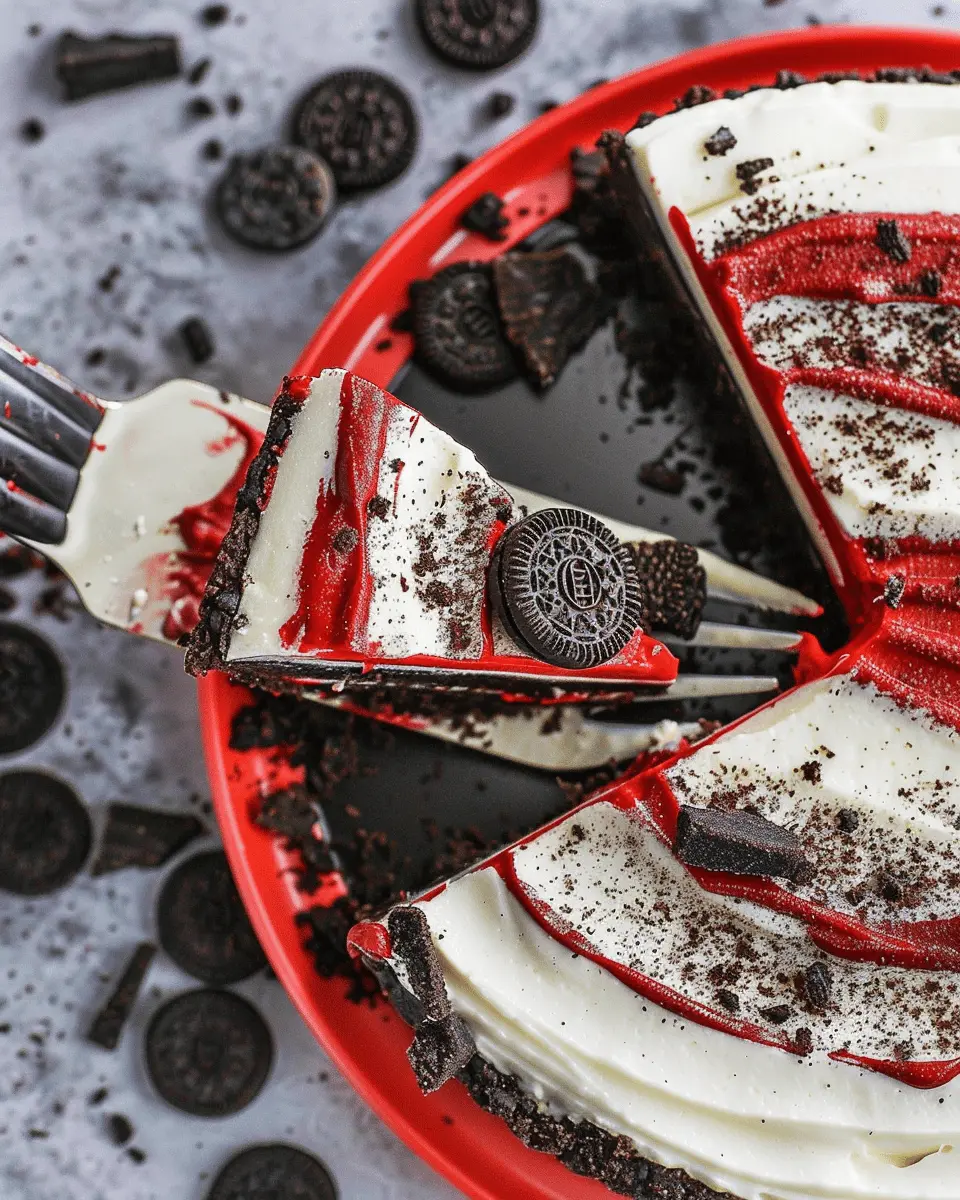
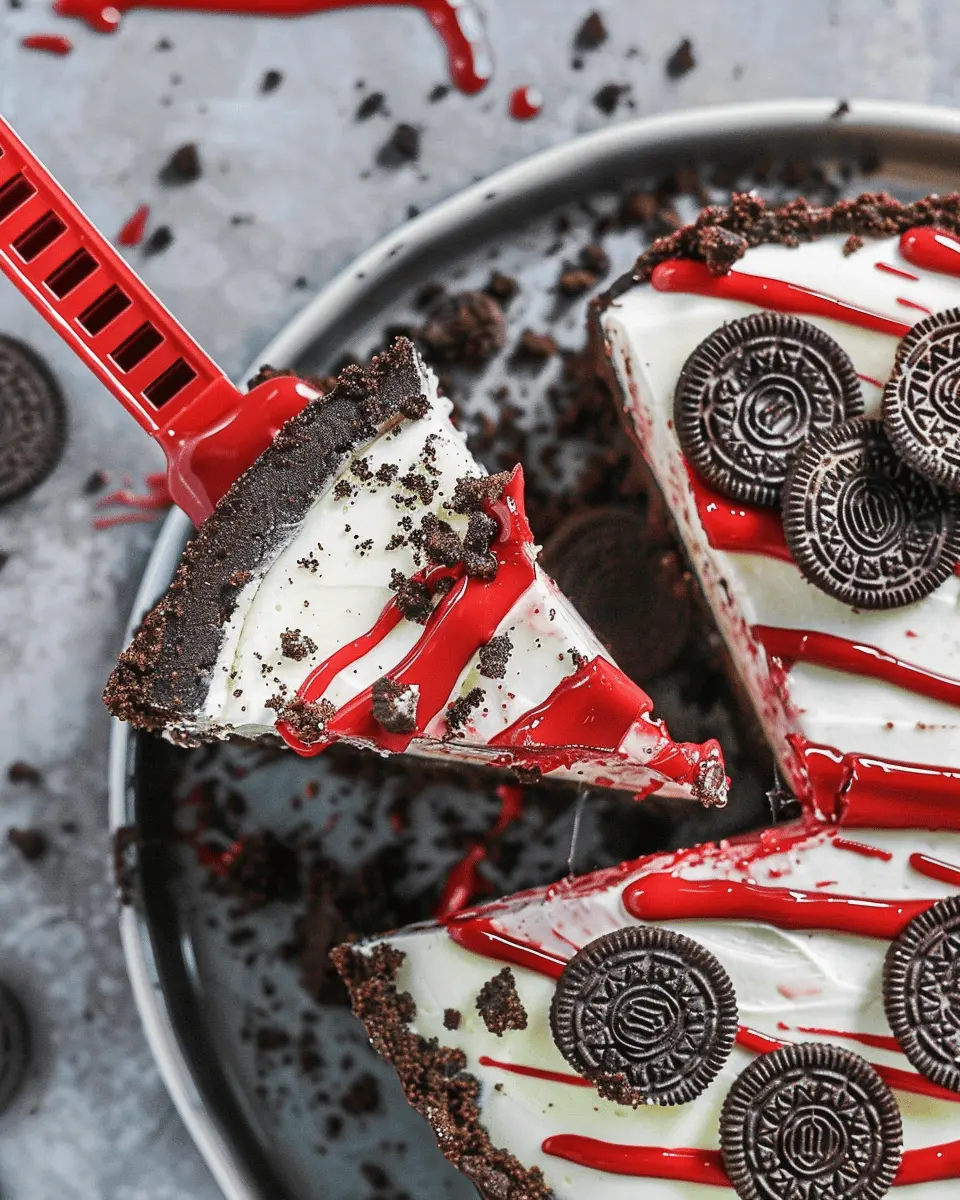
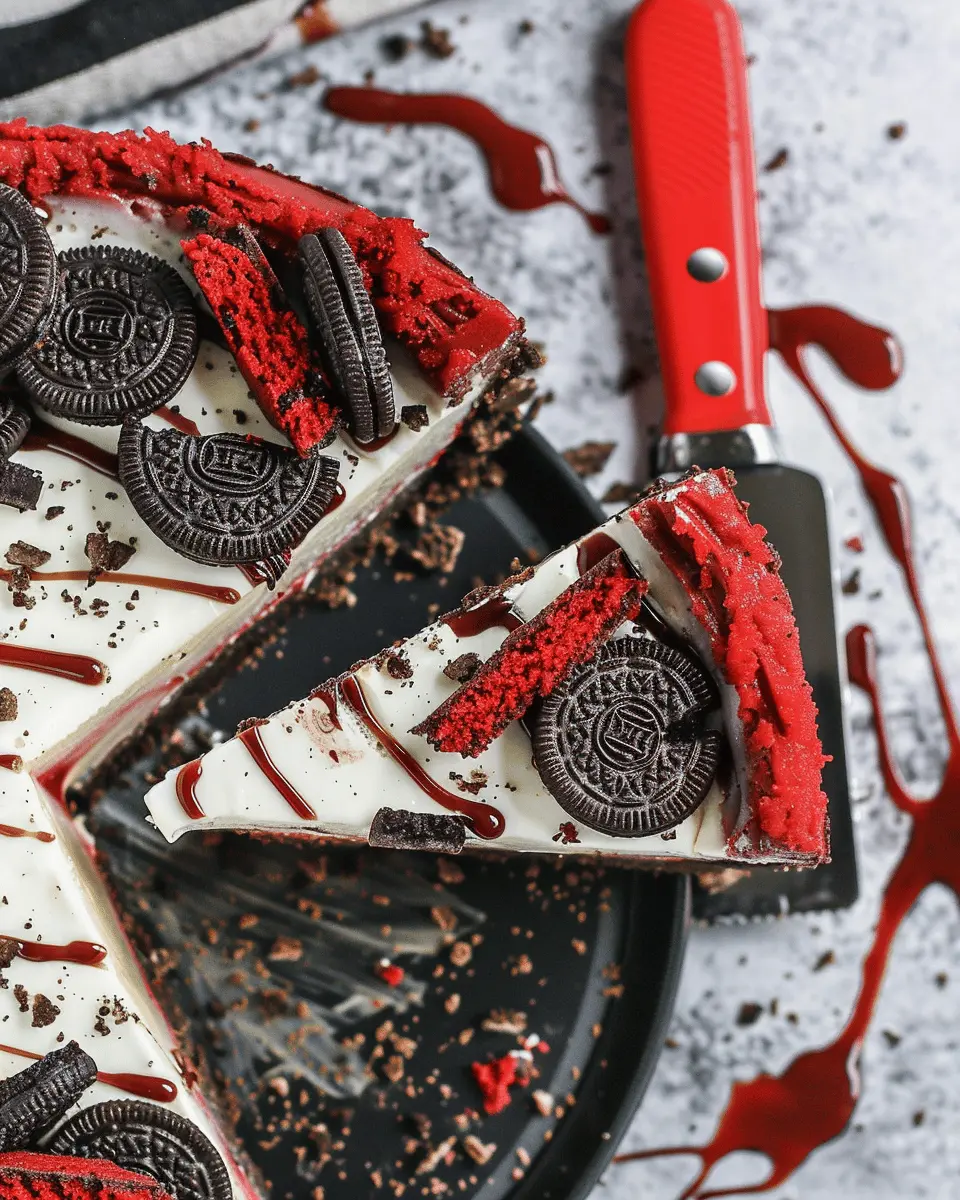
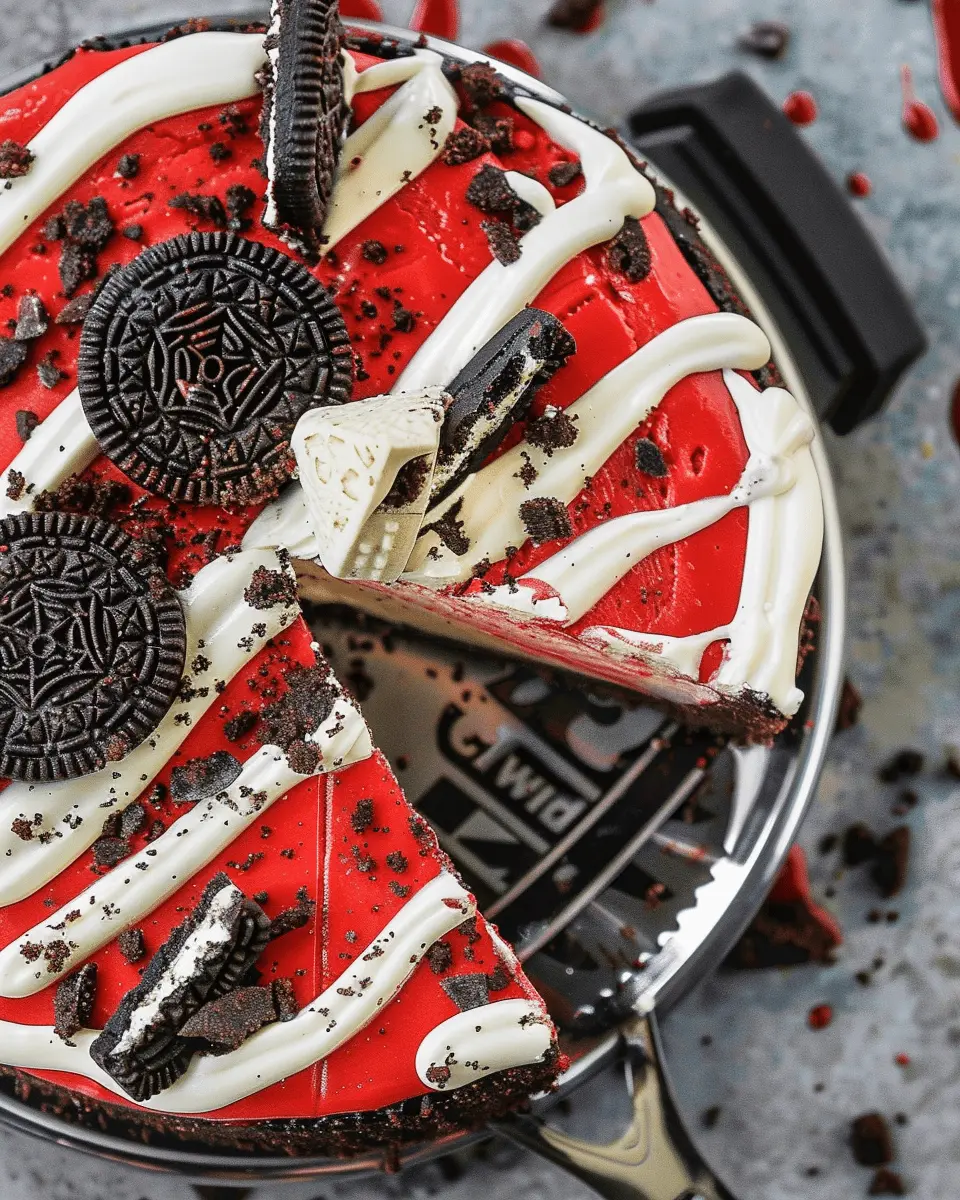
At its core, the red velvet Oreo cheesecake is more than just a dessert; it’s an experience. The striking red hue elevates any occasion, making it perfect for celebrations like birthdays or holidays. Did you know that the red color in red velvet cake originally came from cocoa powder’s chemical reaction with acidic ingredients? This fun little fact adds a layer of intrigue to this beloved dessert!
Here’s why this cheesecake deserves a spot on your dessert table:
-
Flavor Harmony: The buttery and slightly chocolatey flavor of the red velvet base pairs beautifully with the creamy vanilla filling and the crunchy chocolatey notes of Oreos, creating a perfect balance of taste.
-
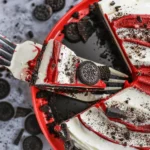
Visual Appeal: The vibrant red adds a stunning contrast to the white cheesecake layer, making it a showstopper whether you’re serving it at a cozy dinner or a lavish party.
-
Texture Variety: The smooth cheesecake filling melts in your mouth while the crushed Oreo crust offers a satisfying crunch, making every bite an adventure for your taste buds.
-
Easy to Make: You don’t need to be a baking expert to whip this up! With just a handful of ingredients and a couple of simple steps, you can impress your friends and family with a stunning dessert they’ll rave about.
For more baking inspiration, you might find it helpful to check out sources like The Spruce Eats for tips on crafting the perfect cheesecake.
Are you ready to dive into the luscious world of red velvet Oreo cheesecake? It’s time to gather your ingredients and create something extraordinary that will not only satisfy your sweet tooth but also leave others asking for seconds.
Ingredients for Red Velvet Oreo Cheesecake
Creating a mouthwatering Red Velvet Oreo Cheesecake isn’t just about the final product; it’s also about the quality and taste of each ingredient. Let’s dive into what you’ll need for this delightful treat!
Key Ingredients for the Crust
The crust sets the foundation for your cheesecake, and you’ll want it to be both delicious and sturdy.
- Oreo cookies: Use whole cookies for that rich chocolate flavor. You can also go for the red velvet variety to enhance the theme!
- Butter: Unsalted works best; it helps bind the crust for a perfect crunch.
Filling Ingredients
The filling is where the magic truly happens. Here’s what you’ll need:
- Cream cheese: Opt for full-fat to achieve that smooth, creamy texture.
- Sugar: Granulated sugar will work wonders in sweetening the cheesecake.
- Sour cream: This adds a tangy flavor dimension.
- Eggs: Large eggs give stability and richness to your filling.
- Red velvet cake mix: This is the secret ingredient that delivers that iconic flavor and color.
Topping Ingredients
No cheesecake is complete without a scrumptious topping!
- Whipped cream: Light and fluffy to counterbalance the dense filling.
- Crushed Oreos: For that crunch and an extra chocolatey touch.
- Chocolate drizzle: A little drizzle of melted chocolate elevates the visual appeal.
With all these ingredients in hand, you’re ready to create a stunning Red Velvet Oreo Cheesecake that will impress your friends and satisfy your sweet cravings! For more tips on baking essentials, check out this resource from Serious Eats. Happy baking!
Step-by-step Preparation for Red Velvet Oreo Cheesecake
Creating a red velvet Oreo cheesecake combines two beloved desserts into one irresistible treat. If you’re ready to dive into this delicious adventure, follow these simple steps. Let’s get started!
Gather Your Ingredients
Before baking, it’s essential to collect all your ingredients to streamline the process. Here’s what you’ll need:
-
For the crust:
-
24 Oreo cookies (crushed)
-
5 tablespoons unsalted butter (melted)
-
For the cheesecake filling:
-
16 ounces cream cheese (softened at room temperature)
-
1 cup granulated sugar
-
2 large eggs
-
1 teaspoon vanilla extract
-
1 cup sour cream
-
2 tablespoons all-purpose flour
-
2 tablespoons cocoa powder
-
1 tablespoon red food coloring
Feeling unprepared can ruin the fun of baking; take a moment to gather these ingredients and maybe even check out this guide on how to prep your kitchen for baking.
Prepare the Crust
Let’s set the stage for our cheesecake by preparing the crust. It’s incredibly easy!
- Preheat your oven to 350°F (175°C).
- In a mixing bowl, combine the crushed Oreo cookies with melted butter.
- Press this mixture firmly into the bottom of a 9-inch springform pan.
- Bake for about 10 minutes and then let it cool.
This crust serves as the perfect crunchy base for your red velvet Oreo cheesecake and adds that chocolatey crunch every dessert needs.
Make the Red Velvet Cheesecake Filling
Now onto the fun part—making the cheesecake filling!
- In a large bowl, beat the softened cream cheese until smooth and creamy.
- Gradually add the sugar, mixing until fully incorporated.
- Add the eggs one at a time, beating well after each addition.
- Mix in the vanilla extract, sour cream, all-purpose flour, cocoa powder, and red food coloring.
The red food coloring is what gives this cheesecake that stunning red hue, making it a perfect dessert for special occasions.
Combine and Blend
It’s getting exciting!
- Once your filling is blended to a creamy consistency, gently fold in half of the reserved crushed Oreos.
- Make sure everything is well combined and smooth.
This is the moment when the cheesecake transforms into a rich delight, where the chocolatey undertones of the Oreos beautifully marry with the velvety filling.
Bake the Cheesecake
Now it’s time to bake your creation!
- Pour the cheesecake filling over your prepared crust and smooth the top with a spatula.
- Bake for about 50-60 minutes or until the edges look set but the center is slightly jiggly.
- Turn off the oven, crack the door open, and allow the cheesecake to cool in the oven for about an hour.
This gentle cooling process helps prevent cracks on the surface—essential for maintaining its beautiful appearance!
Cool and Chill the Cheesecake
Patience is key here.
- Once the cheesecake has cooled slightly, transfer it to the fridge and chill for at least 4 hours, ideally overnight.
- Before serving, top with remaining Oreo crumbs or fresh whipped cream for a stunning presentation.
Chilling allows the flavors to meld beautifully, creating a cheesecake that’s rich in taste and texture.
So, there you have it! Follow this step-by-step guide, and you’ll whip up a delightful red velvet Oreo cheesecake that’s sure to impress. Enjoy your baking, and don’t forget to share your creations with friends or family. Happy baking!
Variations on Red Velvet Oreo Cheesecake
If you’re already a fan of red velvet oreo cheesecake, why stop at just one version? Here are some delightful variations that will keep your taste buds dancing and impress anyone who tries them!
Red Velvet Cheesecake Bars
These cheesecake bars transform the classic red velvet oreo cheesecake into shareable bites. Perfect for parties or as a pre-work snack, they’re easy to cut into portions and are so much fun to eat.
- Ingredients: You’ll need a straightforward crust made from crushed Oreos and melted butter, topped with a rich cream cheese filling.
- Tip: Add a touch of cocoa powder to the filling for a deeper chocolate flavor.
For a quick recipe guide, check out Food Network for some ideas!
Mini Red Velvet Cheesecakes
Miniatures are all the rage, and these mini red velvet cheesecakes are no exception. They’re adorable and perfect for events where you want to indulge without overdoing it.
- Baking Method: Use a muffin tin lined with cupcake liners for easy removal. Fill them with your cheesecake batter, topping each with a mini Oreo before they go into the oven.
- Serving suggestion: Drizzle some cream cheese frosting on top after they cool for an extra treat.
Not just tasty, these mini delights also allow for creativity—play around with different toppings or presentation styles to suit your occasion!
With these variations on the classic red velvet oreo cheesecake, you’ll have options that fit any queue of guests or your personal cravings. So, which one will you try first?
Cooking Tips and Notes for Red Velvet Oreo Cheesecake
Tips for the Perfect Crust
Creating a standout crust for your red velvet oreo cheesecake is essential. Here are some tips to make it just right:
- Use Fresh Ingredients: Ensure your Oreo cookies are fresh for maximum flavor. Stale cookies can lead to a less-than-ideal texture.
- Melted Butter: Combine your crushed Oreos with melted butter. This binds the crumbs together and keeps them from crumbling apart.
- Press Firmly: When pressing the crust mixture into your pan, use the flat bottom of a measuring cup to pack it tightly. This leads to a firmer crust that holds up during slicing.
Notes on Achieving the Ideal Cheesecake Texture
The texture of your red velvet oreo cheesecake can make or break your dessert. Here’s how to achieve that creamy, dreamy finish:
- Room Temperature Ingredients: Make sure your cream cheese and sour cream are at room temperature. This prevents lumps and promotes a silkier texture.
- Don’t Overmix: When combining your ingredients, mix just until smooth. Overmixing can add air into the batter, leading to cracks during baking.
- Water Bath Baking: Consider baking your cheesecake in a water bath. This gentle cooking method helps maintain moisture and prevents cracking.
For more baking tips, check out the Kitchn’s guide on cheesecakes for expert advice. Experiment and enjoy creating your delicious red velvet oreo cheesecake!
Serving Suggestions for Red Velvet Oreo Cheesecake
Garnishing Ideas
Elevate your red velvet Oreo cheesecake with some delightful garnishes. Here are a few ideas to inspire your creativity:
- Whipped Cream: A cloud of freshly whipped cream adds a fluffy texture and balances the richness.
- Chocolate Drizzle: A drizzle of dark or white chocolate not only looks stunning but enhances the chocolate flavor of the Oreos.
- Fresh Berries: Strawberries or raspberries provide a fruity contrast, making each bite refreshing and vibrant.
- Oreo Crumbles: For added crunch, sprinkle some crushed Oreos on top—you can never have too many!
Pairing Suggestions for the Perfect Dessert Spread
To create a dessert spread that compliments your red velvet Oreo cheesecake, consider these pairing suggestions:
- Coffee or Tea: A rich cup of coffee or a soothing herbal tea can balance the sweetness beautifully.
- Fruit Sorbet: A scoop of raspberry or lemon sorbet adds a tangy contrast that’s simply delightful.
- Cheese Platter: Balance the sweetness with a cheese platter that features creamy brie or tangy goat cheese—trust me, it works wonders!
Why not experiment with these ideas at your next gathering? They’ll make the red velvet Oreo cheesecake the highlight of your dessert table. For more tips on hosting and dessert pairings, check out this helpful guide.
The right garnishes and pairings can transform an already delicious red velvet Oreo cheesecake into an unforgettable experience. Enjoy the indulgence!
Time Breakdown for Red Velvet Oreo Cheesecake
When you’re craving a decadent dessert, the red velvet Oreo cheesecake is a fantastic choice! Here’s how you can manage your time effectively while whipping up this delicious treat.
Preparation Time
First things first, let’s talk prep. You’ll want to set aside about 30 minutes for gathering your ingredients, mixing the crust, and preparing the cheesecake batter. It’s all about ensuring your cream cheese is softened and the Oreos are crushed just right!
Baking Time
Once everything is prepped, the red velvet Oreo cheesecake will need to be in the oven for 60 minutes. Since it’s a cheesecake, it’s crucial to bake it slowly to achieve that perfect creamy texture. Trust the process!
Total Time
In total, you’re looking at 90 minutes, plus any additional cooling time. Make sure to let it chill in the fridge for at least four hours before serving—this is where the magic really happens!
If you’re interested in some variations, check out some cheesecake tips from professionals that could elevate your dessert game even further! Enjoy the process, and happy baking!
Nutritional Facts for Red Velvet Oreo Cheesecake
Calories per serving
Every slice of this delectable red velvet Oreo cheesecake packs a punch of flavor at approximately 300-350 calories. It’s indulgent yet satisfying, perfect for those moments when you crave something sweet without overdoing it. While it’s a treat, being mindful of portion sizes can help you enjoy it guilt-free!
Protein content
In a typical serving, you’ll find around 5 grams of protein. While it might not be a protein powerhouse, combining this dessert with a protein-rich meal earlier in the day can balance out your intake. Plus, who doesn’t love a little cheesecake with a side of protein shake?
Key nutrients to consider
When diving into this scrumptious dessert, consider the following nutrients:
- Calcium: Essential for strong bones, thanks to the cream cheese.
- Vitamin A: Contributes to eye health, derived from the velvet colorings used.
- Iron: Found in the chocolate and Oreo crust, it’s necessary for energy production.
For further reading on the nutritional benefits of cheesecake, check out Healthline’s article on dairy sources. Remember, balance is key! Enjoy every bite, but keep in mind how this fits into your overall dietary goals.
FAQs about Red Velvet Oreo Cheesecake
Can I make this cheesecake gluten-free?
Absolutely! To create a gluten-free red velvet Oreo cheesecake, simply replace the traditional crushed Oreo cookies with a gluten-free version. Many brands offer gluten-free Oreos that maintain that signature taste. Additionally, check the cheesecake mix-ins and crust ingredients to ensure they are gluten-free. Baking should be inclusive, so you can enjoy this indulgent dessert no matter your dietary needs!
How do I store leftover cheesecake?
Proper storage is key to keeping your red velvet Oreo cheesecake fresh! Wrap each slice in plastic wrap or foil, or place it in an airtight container. This will help retain its creamy texture and flavor. Store the cheesecake in the refrigerator for up to 5 days. If you’re feeling adventurous, you can even freeze it! Just make sure to cover it tightly and consume it within 2 to 3 months for the best quality.
Can I prepare this cheesecake in advance?
Definitely! The red velvet Oreo cheesecake is an excellent make-ahead treat. In fact, it often tastes even better the next day after the flavors have melded together! You can prepare the cheesecake a day or two in advance, just be sure to store it properly. This will not only save you time but also allows you to impress your guests with minimal last-minute fuss.
When it comes to baking, I’ve often found that preparing in advance gives me the confidence to explore other recipes or spend quality time with friends. For more tips on make-ahead desserts, check out resources from the American Institute of Baking to elevate your baking skills.
Conclusion on Red Velvet Oreo Cheesecake
In summary, the red velvet Oreo cheesecake is not just a dessert; it’s an experience worth savoring. With its luscious blend of creamy cheesecake and decadent red velvet cake, this treat offers a delightful escape from the daily grind. For young professionals juggling careers and social commitments, whipping up this cheesecake makes for the perfect stress-reliever and conversation starter at gatherings.
Why You Should Make This Dessert
- Impressive Yet Simple: A delicious way to impress friends without spending hours in the kitchen.
- Versatile: Perfect for celebrations, casual dinners, or simply a well-deserved treat after a long week.
- Fun and Flavorful: The unique flavors and vibrant colors make it a feast for the eyes as well as the palate.
Explore how easy it is to indulge with this remarkable dessert that can easily become your go-to recipe. Feel free to check out additional recipes for inspiration on baking from sites like Food Network or Bon Appétit, where you’ll find more delectable desserts to experiment with. Happy baking!
PrintRed Velvet Oreo Cheesecake: The Best Indulgent Treat at Home
A delicious and indulgent treat that combines the classic flavors of red velvet cake with creamy cheesecake and crunchy Oreo cookies.
- Prep Time: 20 minutes
- Cook Time: 35 minutes
- Total Time: 4 hours 55 minutes
- Yield: 8 servings 1x
- Category: dessert
- Method: baking
- Cuisine: American
- Diet: vegetarian
Ingredients
- 2 cups red velvet cake mix
- 1 cup crushed Oreos
- 1 cup cream cheese, softened
- 1 cup heavy cream
- 1/2 cup sugar
- 1 teaspoon vanilla extract
- 2 large eggs
Instructions
- Preheat your oven to 350°F (175°C).
- In a large bowl, combine the red velvet cake mix, crushed Oreos, cream cheese, heavy cream, sugar, vanilla extract, and eggs. Mix until smooth.
- Pour the mixture into a greased cheesecake pan.
- Bake for 30-35 minutes, or until a toothpick inserted in the center comes out clean.
- Allow to cool, then refrigerate for at least 4 hours before serving.
Notes
- For best results, let the cheesecake chill overnight.
- Top with whipped cream and additional crushed Oreos before serving.
Nutrition
- Serving Size: 1 slice
- Calories: 450
- Sugar: 30g
- Sodium: 200mg
- Fat: 25g
- Saturated Fat: 15g
- Unsaturated Fat: 8g
- Trans Fat: 0g
- Carbohydrates: 50g
- Fiber: 2g
- Protein: 6g
- Cholesterol: 80mg
Keywords: Red Velvet Oreo Cheesecake, cheesecake, red velvet, dessert


