Introduction to Pizza Skulls
What are Pizza Skulls and why you’ll love them?
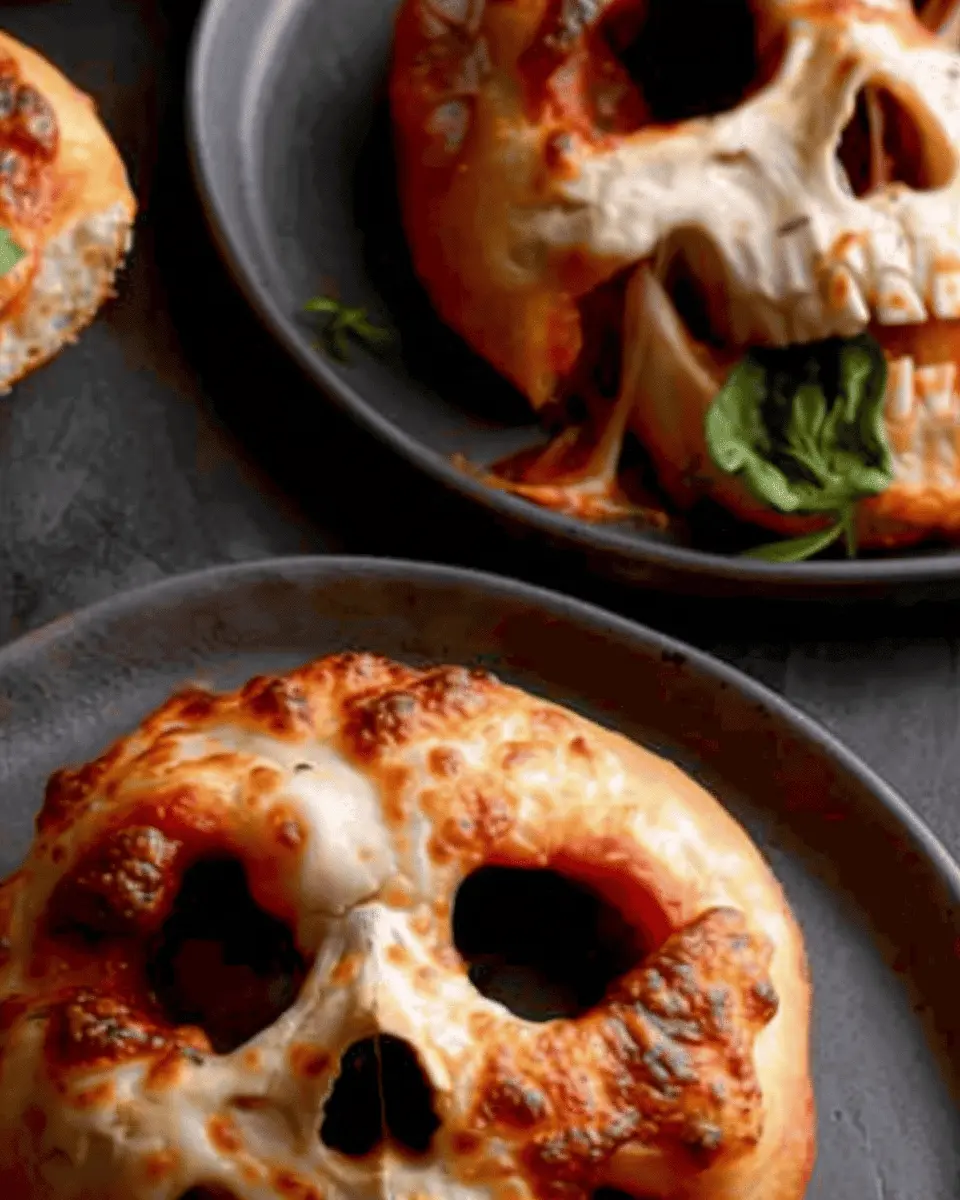
If you’re thinking about a fun, whimsical twist on classic pizza, let me introduce you to pizza skulls. Imagine crunchy, golden-brown dough enveloping your favorite pizza fillings, all shaped like tiny skulls. Honestly, what’s not to love? They’re not just a feast for the eyes; they also pack a punch of flavor and creativity that’s perfect for any occasion—from cozy movie nights to Halloween parties.
Valentine’s Day might be all about romance, but you can easily charm your friends and family with a batch of these playful snacks. Combine a variety of delicious fillings such as Turkey Bacon, Chicken Ham, and gooey cheese with fresh herbs. You can even get creative by adding your favorite veggies or condiments like pesto or marinara. Everyone appreciates a good homemade meal, and these delightful morsels take it to another level. Not to mention, serving them up will surely make you the life of the party!
Now, you might be wondering how these fun snacks stack up health-wise. According to the USDA, pizza can provide a balanced meal if you customize its ingredients! By incorporating lean proteins, like Turkey Bacon and a mix of colorful vegetables, you’re working towards having a tasty dish that’s still nutritious. For those looking for vegetarian options, feel free to swap the proteins out for mushrooms or spinach. The possibilities are amazing!
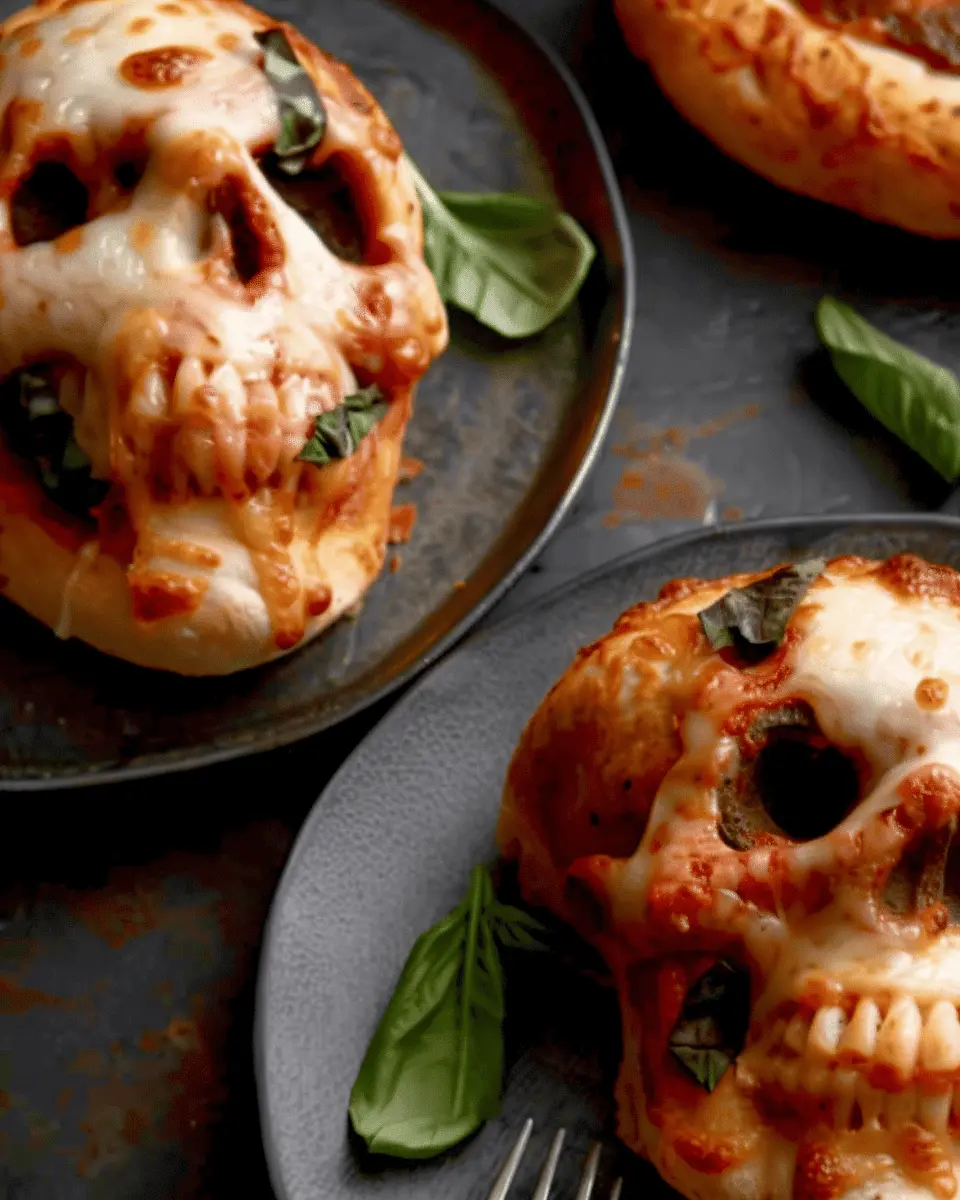
In addition to their delightful appearance, pizza skulls offer an interactive eating experience. Just think about it: the fun crossover between food and a friendly Halloween vibe that appeals to both kids and adults. Plus, they’re shareable! Set them out on a platter, and watch as your friends grab their favorite skulls, sparking laughter and conversation.
Ready to roll up those sleeves and dive into this culinary adventure? With a little creativity and some essential ingredients, you’re on your way to mastering the art of pizza skulls. Now, let’s get cooking! Check out this guide to perfecting pizza dough as we prepare to craft these delicious treats.

Ingredients for Pizza Skulls
Creating mouth-watering pizza skulls requires just a few simple ingredients that you likely already have in your pantry or fridge. Here’s a cozy lineup that brings comfort food into a fun, festive shape!
Dough Delight
- 1 package of refrigerated pizza dough (store-bought or homemade)
- Flour for dusting (don’t skip this for easy handling!)
Flavorful Fillers
- 1 cup of shredded mozzarella cheese (because who can resist that melty goodness?)
- ½ cup of turkey bacon, cooked and chopped
- ½ cup of chicken ham, diced
- ½ cup of cooked ground beef (for a hearty punch!)
- ½ cup of your favorite pizza sauce (homemade or jarred, it all works here)
Extra Toppings
- ¼ cup of sliced black olives
- ¼ teaspoon of Italian seasoning (for that aromatic kick)
- A pinch of salt and pepper to taste
With these ingredients for pizza skulls, you’re all set to mix and match flavors! Consider exploring more ideas at Serious Eats or Food Network for inspiration. Happy cooking!
Step-by-Step Preparation for Pizza Skulls
Creating fun and delicious pizza skulls is an excellent way to bring a bit of whimsy to your meal. Whether you’re hosting a spooky-themed dinner, a casual get-together with friends, or simply seeking a unique culinary experience, these savory delights are perfect. Let’s break down the preparation into easy-to-follow steps.
Gather Your Ingredients
Before diving into the baking process, make sure you have all your ingredients on hand. Here’s what you’ll need:
- Pizza dough (store-bought or homemade)
- Pizza sauce (go for your preferred brand or make your own)
- Cheese (mozzarella is classic, but feel free to experiment)
- Toppings (think turkey bacon, chicken ham, veggies, pepperoni, or even beef)
- Herbs and spices (like oregano, basil, and garlic powder for that extra kick)
Having everything laid out on your kitchen counter makes for a smoother cooking experience. Plus, it’s always fun to visually see your colorful ingredients before they take shape as delicious pizza skulls.
Preheat and Prepare the Baking Pan
Next up, while you’re prepping, preheat your oven to 400°F (200°C). This temperature is key for achieving a nice, golden crust.
Prepare your baking pan, ideally a skull mold, if you have one — but don’t worry if you don’t! A regular muffin tin will do just fine. Either way, grease the molds with a bit of cooking spray or olive oil to prevent sticking.
Roll Out the Pizza Dough
Once your oven is preheated, it’s time to roll out the pizza dough. Dust your countertop with flour and use a rolling pin to stretch the dough to about ¼ inch thick. If you’re feeling adventurous, why not try using a fun rolling pin with designs? This little extra touch can amp up the aesthetics of your pizza skulls.
Once rolled, use a knife or round cutter to create circles that will fit comfortably in your skull molds or muffin tin.
Fill the Skull Molds with Sauce and Toppings
Now comes the fun part! Start by spreading a spoonful of pizza sauce onto each piece of dough. Don’t be shy — let that sauce flow! Then, layer on your chosen toppings. Think beyond the norm; combine turkey bacon with some fresh veggies, or try a mix of cheeses for more flavor.
Make sure not to overfill, or you’ll create a gooey mess when baking (and no one wants that). A good rule of thumb is to leave a little room for the upper crust.
Seal the Pizza Skulls
After filling the molds, take another circle of dough and place it on top of the filled one. Press the edges together to seal them tight — this keeps all that delicious filling from leaking out during baking. If you’re feeling decorative, you can use a fork to crimp the edges for that extra touch of flair.
Bake Them to Perfection
Place your pizza skulls (or muffin tin) in the preheated oven and let them bake for about 15-20 minutes. Keep an eye on them; you want that glorious golden color but not burnt edges! The aroma of the melting cheese and baked dough will fill your kitchen before you know it.
Let Them Rest and Serve
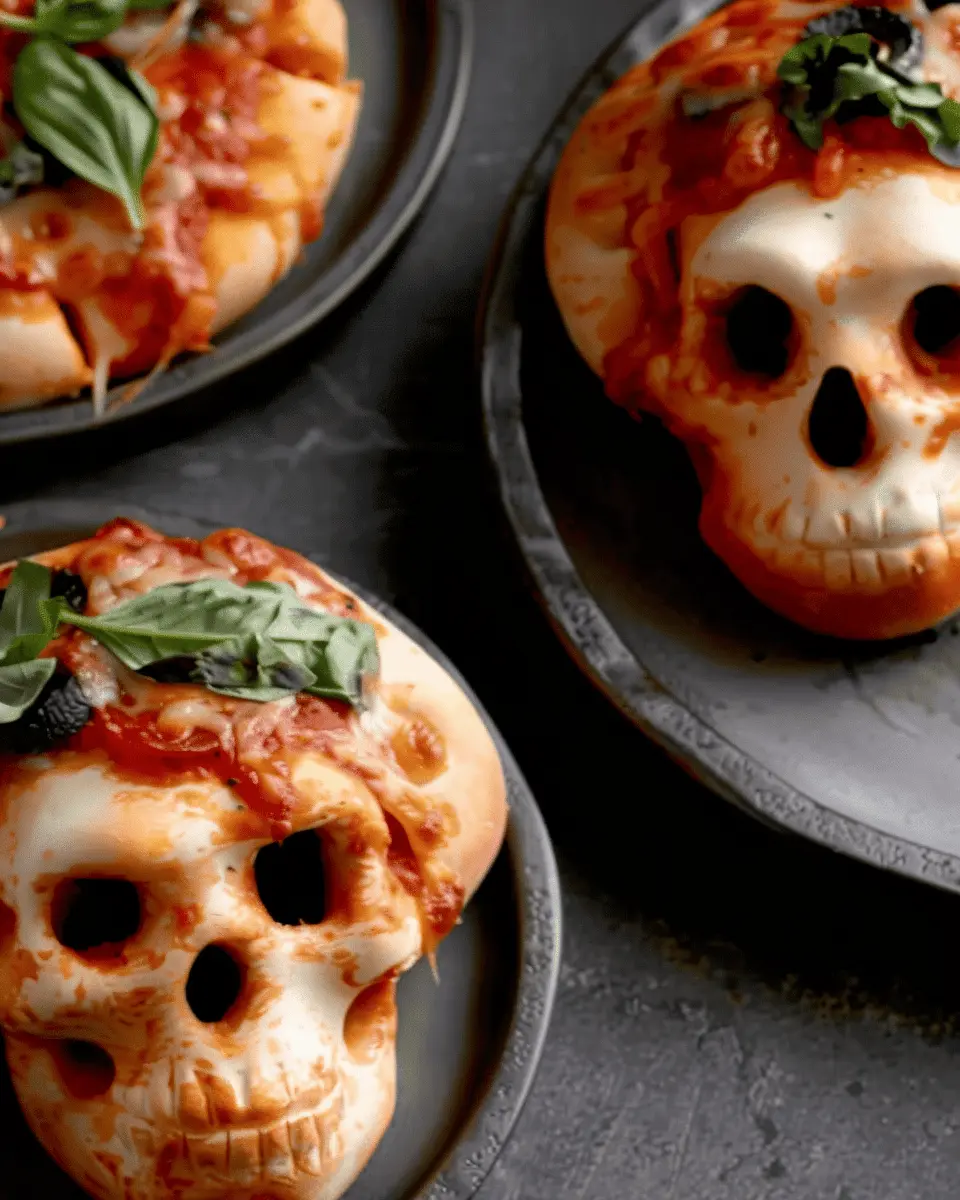
Once they’re out of the oven and cooled for a few minutes, your pizza skulls are ready to be devoured! Allow them to rest for a few minutes to avoid that molten cheese burn. Consider serving them with extra marinara sauce on the side for dipping — trust me, it’s a game changer.
Don’t forget to snap a picture of your beautiful pizza skulls to share with friends and family. Enjoy your delicious creation, and happy cooking! If you’re looking for more fun recipes, check out sites like Food Network or Serious Eats for inspiration.
Variations on Pizza Skulls
When it comes to making pizza skulls, the sky’s the limit. You can easily tailor these delightful treats to suit your taste and dietary preferences. Here’s how to explore some delicious variations!
Vegetarian Pizza Skulls
For those who prefer a meat-free option, vegetarian pizza skulls can be just as satisfying. Load them with an assortment of colorful veggies like bell peppers, mushrooms, and spinach. Adding some ricotta or feta cheese can enhance the creaminess, while a sprinkle of mozzarella on top provides that gooey, cheesy wonder we all crave. You might even consider adding a generous amount of fresh herbs like basil or oregano to elevate the flavor. Want a good topping inspiration? Check out this vegetable pizza recipe for ideas!
Meat Lover’s Pizza Skulls
If you’re all about that protein punch, then meat lover’s pizza skulls are calling your name. Fill your dough with a hearty mix of Turkey Bacon, Chicken Ham, and beef, topped with loads of gooey cheese. The combination of flavors brings an incredible umami experience that’s hard to resist. Want to spice it up? Toss in some pepperoni or a hint of smoked sausage for an extra flavor kick.
Spicy Pizza Skulls
For those who like it hot, why not create pizza skulls with a spicy twist? A dash of crushed red pepper flakes or jalapeños adds a fiery kick. Pair it with spicy Italian sausage or add chipotle sauce for that smoky heat. If you want to take it even further, serve these spicy delights with a side of ranch dressing or cooling sour cream to balance the heat.
Whatever your preference, pizza skulls are versatile enough to satisfy any craving! Experiment with different fillings, and don’t forget to share your creations with friends—they’ll love getting in on the fun!
Cooking Tips and Notes for Pizza Skulls
Tips for Working with Dough
When making pizza skulls, handling the dough properly can make all the difference. Ensure your workspace is well-floured to prevent sticking, and relax the dough by letting it rest for about 15 minutes before rolling it out. This gives the gluten a chance to relax, making it easier to shape. If you’re new to dough, a great resource is King Arthur Baking, which offers fantastic tips on working with various types of dough.
How to Avoid Overfilling
A common pitfall when assembling your pizza skulls is overfilling. Stick to a tablespoon or so of filling for each skull; too much can cause them to burst during baking. Think about how delicious it is to have the perfect balance of crust and gooey filling—i.e., a flavorful bite without the mess!
Storage Hints for Leftovers
If you’re lucky enough to have extras, cooling your pizza skulls completely before storing ensures they stay fresh. Place them in an airtight container in the fridge for up to three days. For longer storage, consider freezing them—just make sure they’re tightly wrapped to avoid freezer burn. Reheat in the oven for that fresh-baked taste!
Remember, experimenting is part of the fun—feel free to adjust fillings based on your mood or what’s available in your pantry!
Serving Suggestions for Pizza Skulls
Pairing with Marinara Sauce
What pairs better with pizza skulls than a rich, zesty marinara sauce? This classic combination not only boosts flavor but also adds an element of fun to your meal. Consider warming the marinara on the stovetop and serving it in small bowls for dipping. If you’re feeling adventurous, try adding some freshly chopped basil or a sprinkle of red pepper flakes to the sauce for an extra kick. Did you know marinara sauce is famous for its antioxidant properties, thanks to the tomatoes? It’s a win-win for flavor and health!
Creative Presentation Ideas
Presentation can elevate your pizza skulls from ordinary to extraordinary. Here are some fun ideas to try:
- Skull Platter: Arrange your pizza skulls on a platter shaped like a skull for a themed dinner party.
- Bento Box Style: For a more casual setting, use a bento box to separate your pizza skulls, marinara, and a side of fresh veggies.
- DIY Pizza Skull Bar: Set up a toppings station where guests can customize their own fillings. Think turkey bacon, chicken ham, or beef and a variety of cheeses!
By incorporating these presentation styles, you’re sure to impress your guests and make mealtime something to remember. For more inspiration, check out this guide on creative food presentation.
Try these serving suggestions to enjoy your pizza skulls in a way that’s both delicious and visually appealing!
Time Breakdown for Making Pizza Skulls
Preparation Time
Getting ready to make your pizza skulls is half the fun! Set aside about 20 minutes to gather your ingredients and roll out your dough. This is a great time to let your creativity shine—consider adding your favorite toppings, like turkey bacon or chicken ham. Don’t forget to preheat the oven while you prepare!
Cooking Time
Cooking those delightful pizza skulls will take approximately 15 to 20 minutes. It’s important to keep an eye on them to avoid overbaking; you want that perfect golden brown finish!
Total Time
In total, you’re looking at around 40 minutes from start to finish. If you’re itching for something different to serve, consider pairing them with a fresh salad or a homemade dipping sauce. Trust me, your taste buds will thank you!
For more information on cooking techniques and recipe variations, check out resources like Serious Eats or Food Network.
Nutritional Facts for Pizza Skulls
Calories per skull
If you’re wondering about the caloric content of these delicious pizza skulls, each serving packs in approximately 150-200 calories, depending on the ingredients you choose. This makes them a fun, satisfying snack or meal option that won’t derail your healthy eating goals.
Protein and other nutrients
Loaded with flavor and essential nutrients, pizza skulls are a great way to enjoy protein and other vital components. Each skull contains about:
- Protein: Roughly 8 grams, especially if you include ingredients like Turkey Bacon and Chicken Ham.
- Fiber: Thanks to the dough and any veggies you add, providing crucial digestive health benefits.
- Vitamins and Minerals: Toppings such as bell peppers, onions, and cheese deliver a boost of calcium and vitamins A and C.
When balancing your diet, these little bites of joy not only satisfy your cravings but also offer nutritional value. Curious about how to make healthier choices? Take a peek at this guide on nutrition for some tips!
FAQs about Pizza Skulls
Can I use homemade pizza dough?
Absolutely! In fact, using homemade pizza dough can elevate your pizza skulls to a whole new level. Creating your own dough allows you to control the ingredients and tailor flavors to your liking. For a simple yet delicious recipe, consider checking out resources like King Arthur Baking or Allrecipes, which provide step-by-step guides. Just ensure your dough is pliable enough to mold around your fillings!
What should I do if my pizza skulls leak?
It’s not uncommon for pizza skulls to leak during baking, especially if they’ve been overstuffed. If you find yourself in this situation, don’t panic! A few strategies include:
- Seal the edges: Make sure to properly pinch and seal the dough to prevent leakage.
- Use a thicker filling: Ensure your pizza fillings are not too runny. Ingredients like shredded cheese and cooked meats can provide structure.
- Baking sheet: Place your pizza skulls on a lined baking sheet to catch any drips.
How can I customize my pizza fillings?
The beauty of pizza skulls lies in their versatility. Feel free to mix and match ingredients based on your personal taste. Consider these options for fun customizations:
- Cheeses: Mozzarella, cheddar, or a smoky gouda can all work beautifully.
- Meat options: Switch in Turkey Bacon or Chicken Ham for a leaner protein option.
- Veggie add-ins: Don’t forget to load up on colorful veggies like bell peppers or spinach for added nutrition.
With those tips up your sleeve, you’re ready to create irresistibly delicious pizza skulls! If you have more questions, don’t hesitate to reach out or check out expert resources!
Conclusion on Pizza Skulls
Recap of why to try making Pizza Skulls and enjoy!
Making pizza skulls is not just about delicious comfort food; it’s an adventurous way to engage your creativity in the kitchen. By leveraging delightful fillings like Turkey Bacon, Chicken Ham, and an array of your favorite cheeses, you’re crafting a culinary experience that’s both personal and memorable. They’re perfect for gatherings or a casual night in, bringing a fun twist to your typical pizza night.
So why not roll up your sleeves and give these a try? They’re not just nourishing; they’re sure to spark joy and keep everyone coming back for more! For more inspiration and tips, check out Serious Eats or Epicurious to take your pizza-making skills to the next level!
PrintPizza skulls: Easy and Indulgent Treats for the Whole Family

These pizza skulls are a fun and delicious way to enjoy a classic favorite in a unique shape that the whole family will love.
- Prep Time: 20 minutes
- Cook Time: 20 minutes
- Total Time: 40 minutes
- Yield: 12 skulls 1x
- Category: Snack
- Method: Baking
- Cuisine: Italian
Ingredients
- 2 cups all-purpose flour
- 1 tablespoon sugar
- 1 teaspoon salt
- 1 tablespoon active dry yeast
- 1 cup warm water
- 1 tablespoon olive oil
- 1 cup pizza sauce
- 1 1/2 cups shredded mozzarella cheese
- 1/2 cup sliced pepperoni
Instructions
- In a large bowl, combine warm water, sugar, and yeast. Let it sit for about 5 minutes until foamy.
- Add flour, salt, and olive oil to the yeast mixture. Knead until smooth.
- Cover the dough and let it rise in a warm place for about 1 hour.
- Preheat the oven to 375°F (190°C).
- Roll out the dough and cut into skull shapes using a cookie cutter.
- Place half of the skulls on a baking sheet. Add sauce, cheese, and pepperoni, then place the remaining skulls on top.
- Bake for 15-20 minutes until golden brown.
- Let cool slightly before serving.
Notes
- Try adding different toppings like vegetables or different types of cheese.
Nutrition
- Serving Size: 1 skull
- Calories: 250
- Sugar: 2g
- Sodium: 400mg
- Fat: 10g
- Saturated Fat: 4g
- Unsaturated Fat: 5g
- Trans Fat: 0g
- Carbohydrates: 30g
- Fiber: 1g
- Protein: 10g
- Cholesterol: 20mg
Keywords: Pizza Skulls, family treats, easy recipes


