Introduction to Halloween Cheesecake
As the leaves start to turn and a crisp chill fills the air, many of us are drawn to the comforting flavors of fall. Among the treasures of the season, Halloween cheesecake stands out as a celebration of rich flavors, festive aesthetics, and indulgent texture. But why is this delightful dessert the ultimate fall treat?
Why Halloween Cheesecake is the Ultimate Fall Treat
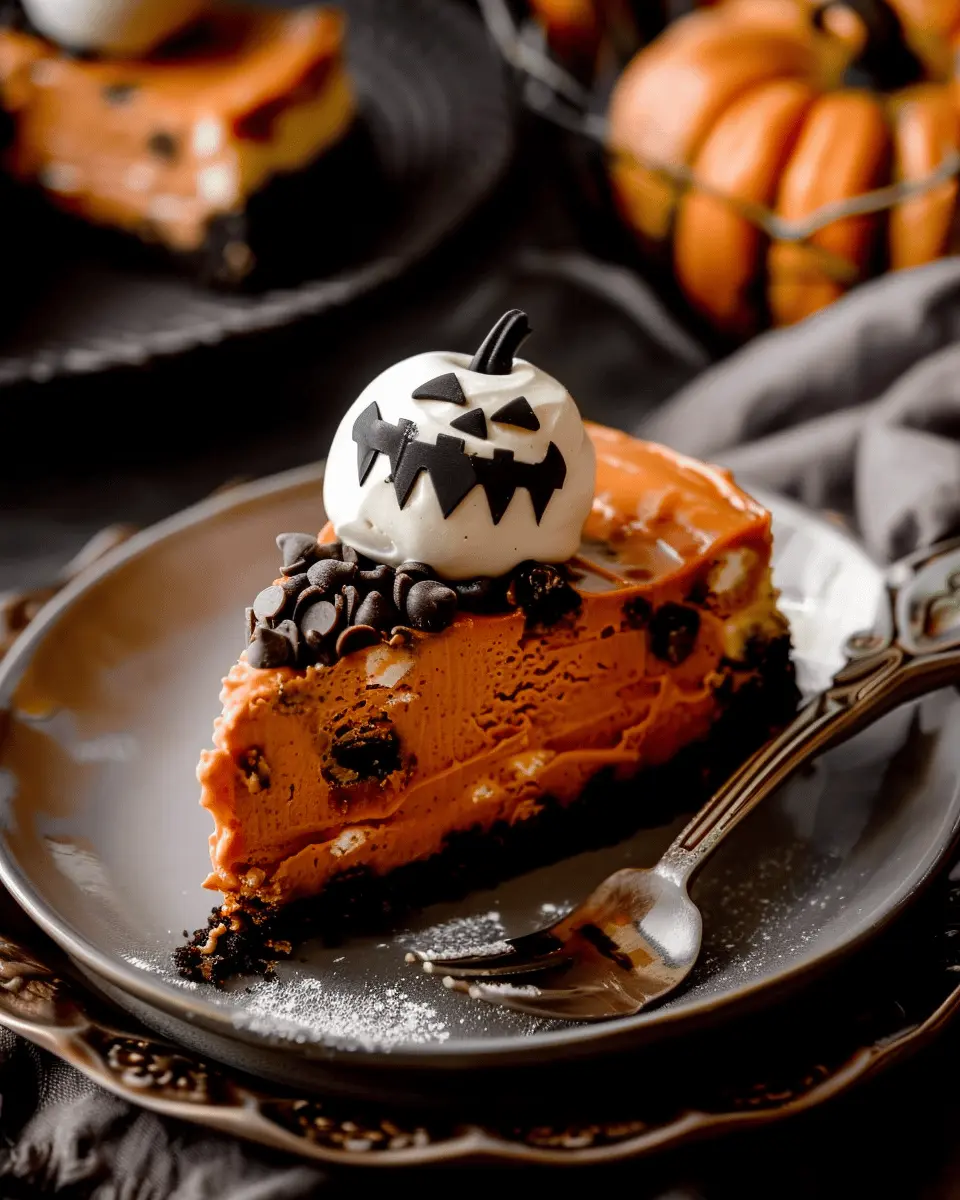
When you think of Halloween, images of pumpkins, spooky decorations, and family gatherings come to mind. Halloween cheesecake effortlessly encapsulates all of these elements, turning your dessert into the centerpiece of your festivities. The creamy texture complemented by seasonal flavors like pumpkin spice makes it a favorite among adults and kids alike. Who can resist a sweet slice of heaven topped with a dash of whipped cream or drizzled with chocolate?
Moreover, cheesecake itself has a unique versatility. You can prepare variations that reflect your personal taste or dietary needs—think of using a gluten-free crust or incorporating different spices. This adaptability means that everyone can enjoy this dessert, whether they prefer classic flavors or something a little more adventurous.
From my own experience, hosting Halloween gatherings always included a show-stopping dessert. I whipped up a spooky Halloween cheesecake, and that stellar moment when everyone ooh and ahh over the first slice? Priceless! Just picture your friends and family marveling at a beautifully decorated cheesecake, complete with fun toppings like ghostly meringues or edible sprinkles.
Halloween also brings a more playful approach to decorating your desserts. This dessert offers endless possibilities for creativity! Consider adding a drizzle of caramel sauce for that spooky effect, or incorporating vibrant food coloring to achieve a ghoulish green hue. The Instagram-worthy potential is undeniable.
If you’re intrigued and want to learn how to whip up your very own Halloween cheesecake, you’re in for a delicious experience. Check out fantastic resources like Bon Appétit or Allrecipes for tips and variations that inspire your culinary creativity. Get ready for a captivating autumn treat that’s sure to delight and impress!
Ingredients for Halloween Cheesecake
Creating the perfect Halloween Cheesecake starts with selecting the right ingredients. Let’s break it down into three essential categories.
Key Ingredients for the Oreo Crust
The crust is the foundation of any great cheesecake, and for this spooky treat, you’ll want a crunchy, chocolatey base. Gather the following:
- Oreo Cookies (about 24, crushed) – For that authentic cookie flavor.
- Butter (5 tablespoons, melted) – This binds those crumbs together perfectly.
Essential Ingredients for the Cheesecake Filling
The filling is where the magic truly happens! You’ll need:
- Cream Cheese (4 packages, softened) – The creamy backbone of the cheesecake.
- Granulated Sugar (1 cup) – For just the right amount of sweetness.
- Sour Cream (1 cup) – Adds a tangy richness that balances the flavors.
- Vanilla Extract (2 teaspoons) – Enhances the overall taste.
Whipped Cream Ghosts Ingredients
To add a fun twist to your Halloween Cheesecake, let’s make some adorable whipped cream ghosts:
- Heavy Whipping Cream (1 cup) – For that fluffy texture.
- Powdered Sugar (2 tablespoons) – Sweetens up your whip.
- Chocolate Chips (for eyes) – Because every ghost needs personality!
Gather these ingredients, and you’ll be ready to enchant everyone at your Halloween gathering. For more tips on cheesecake perfection, check out resources on Epicurious or Food Network. Happy baking!
Preparing Halloween Cheesecake
When the spooky season rolls around, there’s nothing quite like indulging in a Halloween Cheesecake to get everyone in the festive spirit. This creamy delight is not only a treat for the taste buds but also a feast for the eyes, adorned with playful decorations that scream autumn fun. Let’s take a step-by-step journey to create this hauntingly delicious dessert!
Step 1: Prepare the Oreo Crust
The foundation of your Halloween Cheesecake begins with a buttery Oreo crust that perfectly complements the creamy filling. To start:
- Ingredients: You’ll need about 24 Oreo cookies and 5 tablespoons of melted butter.
- Instructions:
- Preheat your oven to 350°F (175°C).
- Crush the Oreo cookies into fine crumbs. This can be done easily in a food processor, or you can place them in a zip-lock bag and smash them with a rolling pin.
- In a mixing bowl, combine the cookies with the melted butter until evenly coated.
- Press the mixture firmly into the bottom of a 9-inch springform pan. Use the bottom of a glass to ensure it’s packed tightly.
The goal here is to create a deliciously firm base that will hold everything together during baking.
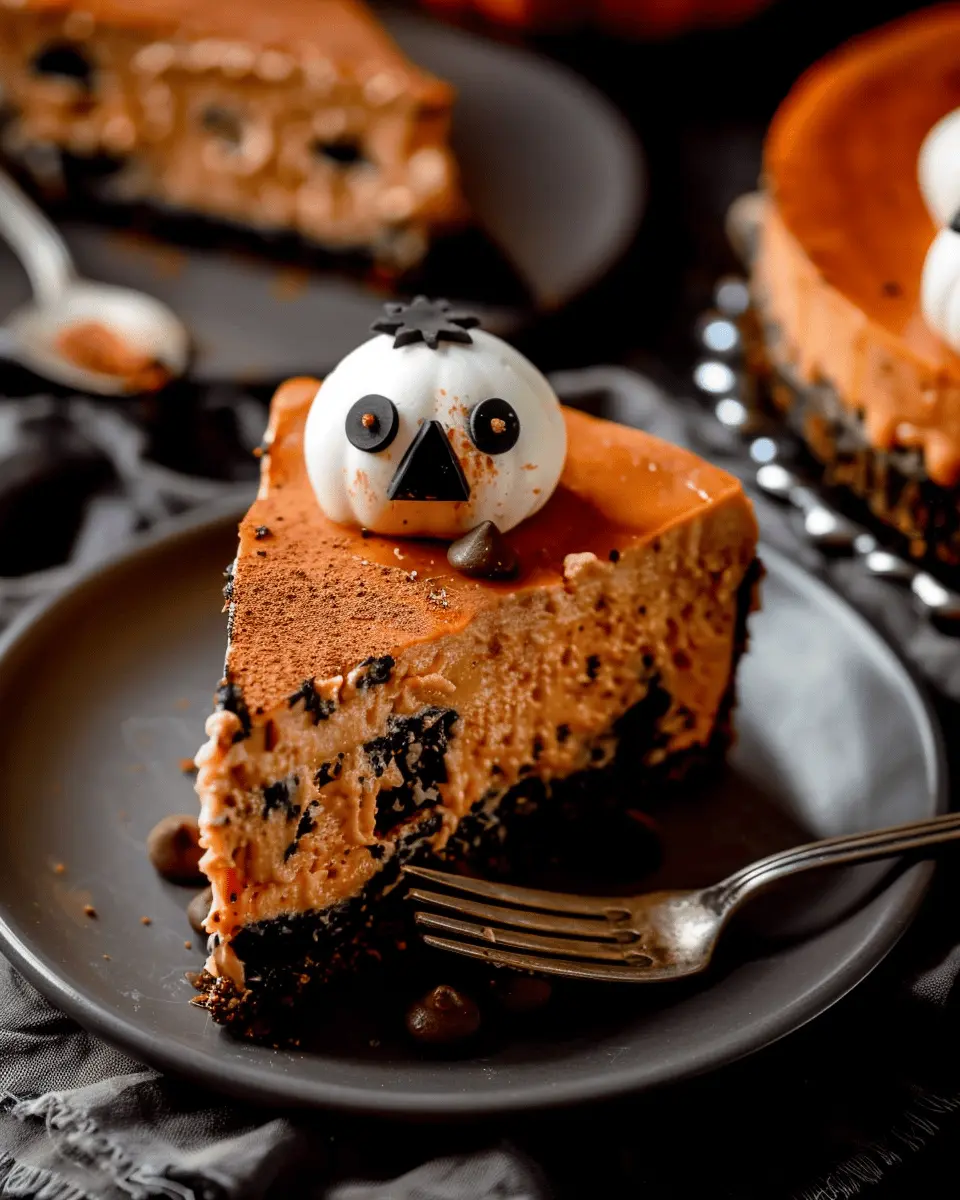
Step 2: Mix the Cookies & Cream Cheesecake Filling
Now that your crust is ready, it’s time to whip up a creamy, dreamy filling. This filling features rich cream cheese and crushed Oreos for that cookies-and-cream vibe.
- Ingredients: You’ll need 4 packages (8 ounces each) of cream cheese, 1 ¼ cups of sugar, 1 teaspoon of vanilla extract, 4 large eggs, and 8 crushed Oreo cookies.
- Instructions:
- In a large bowl, beat the cream cheese until smooth.
- Gradually add sugar, mixing until well incorporated.
- Add the vanilla, then add the eggs one at a time, mixing well after each addition.
- Gently fold in the crushed Oreos to maintain that delightful texture.
Trust me, you’ll want to sample this filling before baking!
Step 3: Create a Water Bath for Baking
A water bath might sound complex, but it’s crucial for achieving that perfect creamy texture in your Halloween Cheesecake. It prevents cracks and helps the cheesecake bake evenly.
- Instructions:
- Wrap the bottom of your springform pan with aluminum foil to prevent any water from seeping in.
- Place the pan in a larger roasting pan.
- Fill the larger pan with hot water until it reaches about halfway up the sides of the cheesecake pan.
This technique is a game changer for baking cheesecakes, making them unbelievably smooth and creamy.
Step 4: Bake the Cheesecake to Perfection
With everything in place, it’s time to bake!
- Instructions:
- Place the pan in your preheated oven and bake for about 50-60 minutes, or until the edges are set, but the center still has a slight jiggle.
- Once baked, turn off the oven and crack the oven door open. Let the cheesecake cool in the oven for about an hour to prevent any sudden temperature changes.
This gentle cooling method helps to avoid those dreaded cracks on the surface.
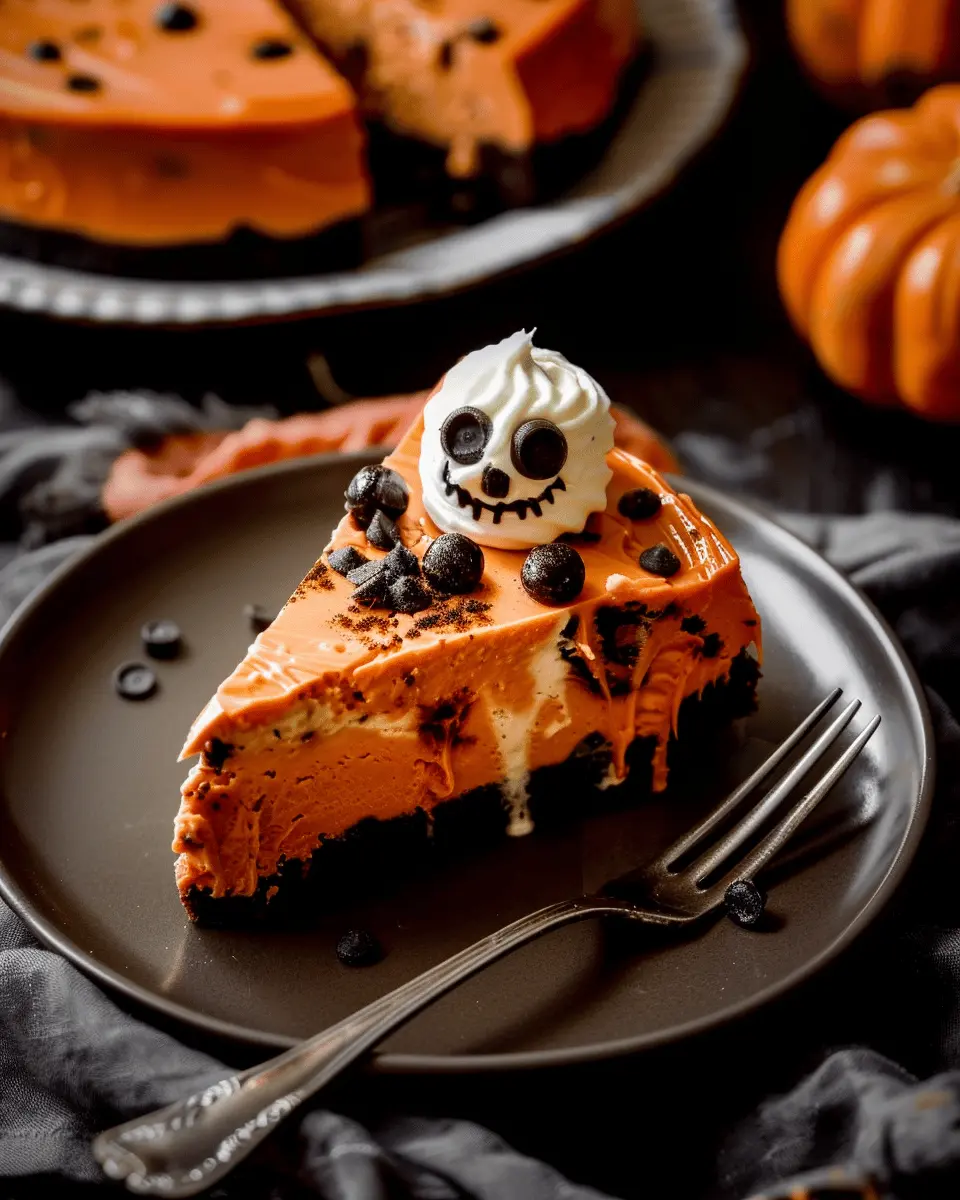
Step 5: Chill and Decorate with Whipped Cream Ghosts
After your Halloween Cheesecake has cooled, it’s time for the grand finale: chilling and decorating!
- Instructions:
- Refrigerate the cheesecake for at least 4 hours, or overnight if possible, to allow it to set fully.
- Once cooled, it’s decorating time! Make whipped cream by beating heavy cream with powdered sugar until soft peaks form.
- Use a piping bag to create ghostly figures on top of your cheesecake. Add chocolate chip eyes for extra character.
These little whipped cream ghosts will certainly add a festive touch, enticing everyone to indulge in this wonderful Halloween treat.
Now your Halloween Cheesecake is ready to shine at any spooky gathering! For more innovative recipes, check out Cooking Light’s Cheesecake Tips to ensure your dessert creation skills are top-notch. Enjoy the seasonal festivities, and happy baking!
Variations on Halloween Cheesecake
When it comes to crafting the ultimate Halloween cheesecake, the possibilities are nearly endless. Here are some delightful variations and customization options to elevate your spooky dessert game.
Classic Oreo Cheesecake Variation
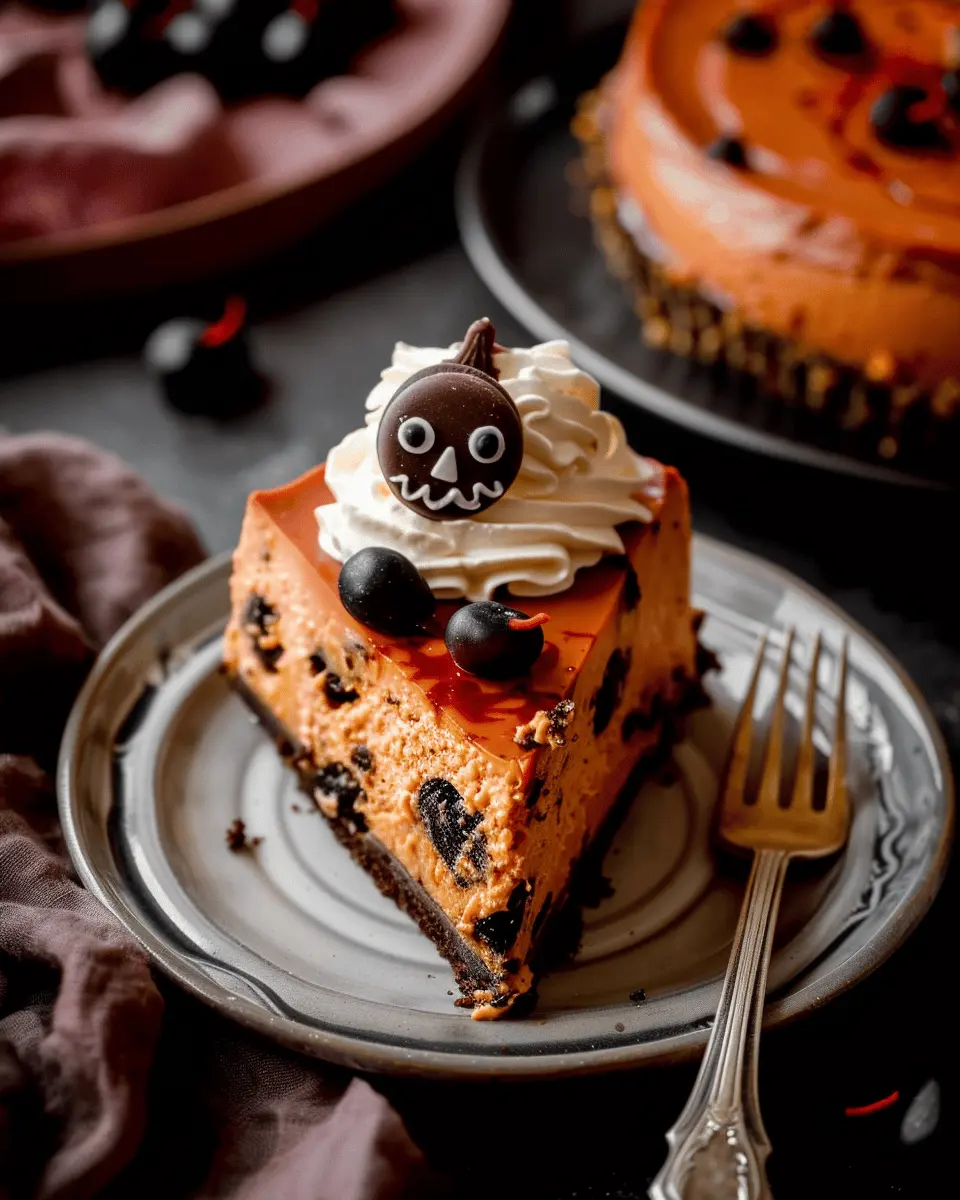
If you’re a fan of the classic Oreo flavor, why not incorporate it into your Halloween cheesecake? Start with an Oreo crust by blending crushed cookies with melted butter, creating a deliciously rich base. For the filling, mix cream cheese, sugar, and vanilla extract until smooth, then fold in coarsely crushed Oreos for that perfect crunchy texture. To enhance the festive vibe, you can top it with whipped cream and sprinkle some extra Oreo crumbs or edible pumpkin spice on top. This decadent twist is sure to result in rave reviews!
Alternative Gel Food Coloring for Customization
Looking to customize your Halloween cheesecake? Gel food coloring is a fantastic option. Unlike liquid food coloring, gels provide vibrant hues without altering the consistency of your batter. Choose classic Halloween colors like orange and black to swirl through your cheesecake or create a marbled effect. Simply add a few drops of gel coloring to your batter before pouring it into the crust, and use a skewer to create swirls for a striking visual impact.
To learn more about using food coloring effectively, check out this helpful guide from The Spruce Eats.
Your Halloween cheesecake can be as unique as your imagination allows! So why not experiment with flavors and colors that reflect the spirit of the season? A bit of creativity can transform your dessert from ordinary to extraordinary—almost as captivating as the Halloween festivities themselves.
Cooking Tips and Notes for Halloween Cheesecake
Avoiding Cracks and Air Bubbles
Creating the perfect Halloween cheesecake requires a bit of finesse to avoid those pesky cracks. To minimize the risk, make sure your cream cheese is at room temperature; this ensures a smoother batter. Also, mix on low speed—overmixing can introduce air bubbles that lead to cracks. A simple tip? Tap your cheesecake pan gently on the countertop before baking to release any trapped air.
Best Practices for Using a Water Bath
A water bath is a fantastic technique for baking your Halloween cheesecake evenly. Wrap your springform pan tightly in aluminum foil to prevent leaks. Place the wrapped pan in a larger baking dish, then fill it halfway with hot water before placing it in the oven. This method helps regulate the temperature and results in a creamy texture.
If you’re looking for more tips, check out this pie baking guide for additional insights on baking your cheesecake to perfection! Remember, practice makes perfect, so don’t worry if it doesn’t turn out just right the first time. Happy baking!
Serving Suggestions for Halloween Cheesecake
Creative Ways to Serve Your Cheesecake
When it comes to presenting your Halloween Cheesecake, creativity is key! Consider placing slices on a platter decorated with mini pumpkins or edible spiderwebs made from melted white chocolate. For an interactive twist, create a “build-your-own cheesecake” station with toppings like crushed graham crackers, chocolate shavings, and spooky sprinkles. You could even use cookie cutters to carve fun shapes from pieces of the cheesecake for an extra festive touch.
Ideal Pairings for a Spooky Dessert Table
To elevate your Halloween Cheesecake, think about pairing it with:
- Fresh Berries: Strawberries and blackberries not only add color but also a refreshing contrast to the richness of the cheese.
- Chilled Apple Cider: Replace traditional drinks with apple cider for a warming touch—its spices enhance the flavors of your dessert.
- Ginger Snaps: The crunch of this classic cookie can offer a delightful zing that complements the cheesecake’s creamy texture.
By thoughtfully presenting and pairing your cheesecake, you’re sure to impress your guests. For more tips on dessert presentations, check out resources like Epicurious or Food Network. Happy haunting!
Time Breakdown for Halloween Cheesecake
Preparation Time
Getting your Halloween Cheesecake ready is a breeze! Set aside about 20-30 minutes to gather your ingredients and mix the creamy filling. This is the time to unleash your inner chef; how about putting on a fun Halloween playlist to get in the mood?
Baking Time
Once you’ve prepared your cheesecake, pop it in the oven. Baking typically takes around 50-60 minutes. Pro tip: Keep an eye on your cheesecake to ensure it doesn’t overbake, as that can lead to cracks.
Cooling Time
Don’t rush this crucial step! Let your cheesecake cool for at least 4 hours or ideally overnight in the fridge. This waiting period allows the flavors to meld and creates a deliciously rich texture. For all the details, check out this helpful guide on cheesecake cooling techniques!
With this time breakdown, you’re all set to create a spooktacular dessert that’ll impress your Halloween guests.
Nutritional Facts for Halloween Cheesecake
Calories and Macronutrient Breakdown
When indulging in a slice of Halloween Cheesecake, it’s good to know what you’re getting. A typical slice contains around 300-400 calories, depending on the ingredients used. Here’s a quick overview of its macronutrient makeup:
- Fat: 20-25g (mostly from cream cheese)
- Carbohydrates: 30-40g (thanks to the sugar and crust)
- Protein: 5-7g (from the cheese)
For those conscious of their dietary intake, it’s essential to enjoy this treat in moderation.
Tips for Lightening Up Your Cheesecake
Want to enjoy your Halloween Cheesecake without the guilt? Try these simple swaps:
- Cream Cheese: Opt for reduced-fat cream cheese for a lighter option.
- Sweeteners: Consider using natural sweeteners like stevia or honey to cut back on sugar.
- Crust: Use whole-grain graham crackers or nuts for a healthier crust alternative.
Creating a lighter version allows you to indulge without sacrificing flavor, ensuring your Halloween remains festive and delicious! For more healthy dessert ideas, check out resources like the American Heart Association.
As you savor each bite, remember that it’s all about balance. Enjoy your Halloween Cheesecake as part of a festive occasion while being mindful of your choices!
FAQs about Halloween Cheesecake
Can I use low-fat cream cheese for this recipe?
Absolutely! If you’re looking to lighten up your Halloween Cheesecake, low-fat cream cheese can be an excellent substitute. However, keep in mind that this might slightly affect the creaminess and texture of your cheesecake. For a great balance, consider combining low-fat cream cheese with a bit of full-fat cream cheese to maintain that rich flavor while still being a bit healthier.
How do I store leftover Halloween Cheesecake?
Storing your delicious Halloween Cheesecake is quite simple!
- Refrigerate: Cover any leftovers with plastic wrap or store in an airtight container and keep in the fridge. This will maintain its freshness for up to five days.
- Freeze: If you need to store it longer, you can freeze individual slices. Just wrap each slice tightly in plastic wrap and then place them in a freezer-safe container. When you’re ready to indulge, thaw them in the fridge overnight.
What can I substitute for Oreos if I don’t have any?
No Oreos? No problem! You can use several alternatives to create a fantastic crust for your Halloween Cheesecake. Some great substitutes include:
- Graham crackers: A classic choice that offers a milder flavor.
- Peanut butter cookies: For a nutty twist, choose these!
- Chocolate wafer cookies: They can give you that chocolatey essence similar to Oreos.
Feel free to get creative and experiment with what you have on hand! You can visit resources like Serious Eats for more ideas on cheesecake bases and crusts. Happy baking!
Conclusion on Halloween Cheesecake
Embrace the Spooky Season with a Slice of Cheesecake
As the leaves turn and the shadows grow longer, there’s no better time to indulge in a delicious Halloween Cheesecake. This delightful treat not only satisfies your sweet tooth but also adds a festive touch to your gatherings. Imagine sharing a slice with friends, each bite bursting with flavors that evoke the spirit of the season.
Creating this cheesecake is simpler than you might think, allowing even novice bakers to impress their guests. Plus, with its vibrant colors and spooky decorations, your dessert table will be the talk of the party. So, gather your ingredients, put on your favorite spooky tunes, and let your creativity shine!
For more holiday inspiration, check out these ideas for fall desserts to keep the celebration going. Happy baking!
PrintHalloween Cheesecake: The Best Indulgent Treat for Spooky Nights
A delicious Halloween cheesecake that will delight your guests with its rich flavor and festive appearance.
- Prep Time: 15 minutes
- Cook Time: 70 minutes
- Total Time: 4 hours 15 minutes
- Yield: 12 servings 1x
- Category: Dessert
- Method: Baking
- Cuisine: American
- Diet: Vegetarian
Ingredients
- 1 1/2 cups graham cracker crumbs
- 1/2 cup unsalted butter, melted
- 2 cups cream cheese, softened
- 1 cup granulated sugar
- 3 large eggs
- 1 teaspoon vanilla extract
- 1 cup pumpkin puree
- 1 teaspoon ground cinnamon
- 1/2 teaspoon ground nutmeg
- 1/4 teaspoon ground ginger
- 1/2 cup sour cream
- 1 cup whipped cream, for topping
- 1/4 cup chocolate shavings, for garnish
Instructions
- Preheat the oven to 325°F (163°C).
- In a bowl, mix graham cracker crumbs with melted butter and press into the bottom of a springform pan.
- In a large bowl, beat cream cheese and sugar until smooth.
- Add eggs one at a time, mixing well after each addition.
- Stir in vanilla, pumpkin puree, and spices until combined.
- Pour the cheesecake mixture over the crust and smooth the top.
- Bake for 60-70 minutes or until the center is set.
- Let cool and then refrigerate for at least 4 hours before serving.
- Top with whipped cream and garnish with chocolate shavings before serving.
Notes
- Allow the cheesecake to chill overnight for the best flavor.
- Use a water bath for a creamier texture.
Nutrition
- Serving Size: 1 slice
- Calories: 350
- Sugar: 25g
- Sodium: 300mg
- Fat: 22g
- Saturated Fat: 13g
- Unsaturated Fat: 7g
- Trans Fat: 0g
- Carbohydrates: 32g
- Fiber: 1g
- Protein: 5g
- Cholesterol: 85mg
Keywords: Halloween Cheesecake, Halloween dessert, pumpkin cheesecake


