Introduction to Artisan Bread Recipe
The Joy of Homemade Bread
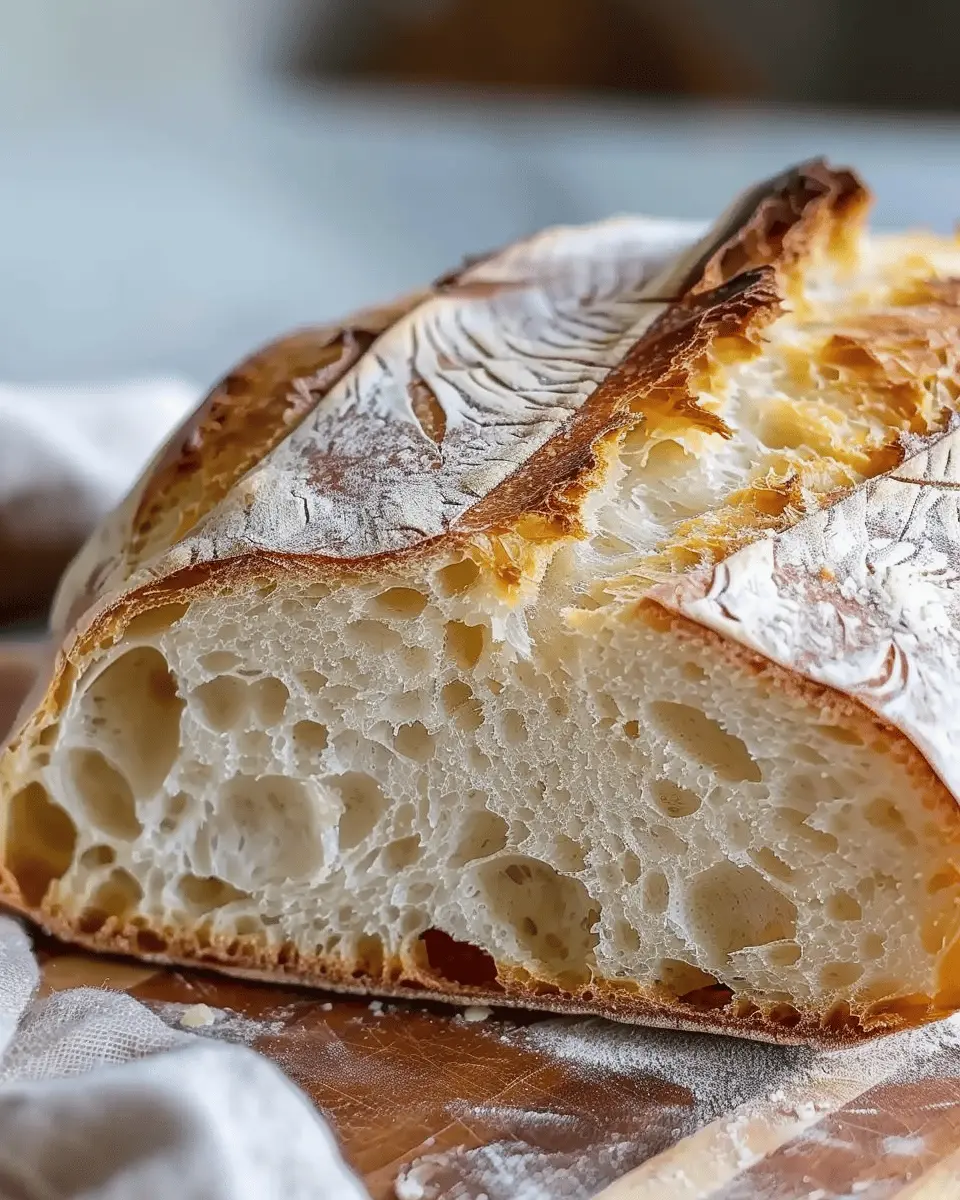
There’s something magical about the aroma of freshly baked artisan bread wafting through your home. Whether you’re a seasoned baker or just starting, the process of making bread from scratch can be incredibly fulfilling. Imagine walking into your kitchen and greeting the warm, comforting scent of crusty bread as it cools on the countertop—it’s a sensory experience unlike any other.
Creating your own artisan bread means you control the ingredients and the process. You can experiment with flavors, adjust textures, and even delve into the wonderful world of fermentation. According to a study published by the Institute of Food Technologists, about 46% of consumers are more likely to appreciate homemade items, contributing to a growing trend in home baking. This isn’t just about food; it’s about crafting an experience.
If you’re like many young professionals today, you might feel overwhelmed by your work schedule. But don’t worry! Making artisan bread doesn’t have to be a daunting task. With just a few essential ingredients—flour, water, salt, and yeast—you’re well on your way. For a deeper dive into the basic principles of bread-making, check out resources such as the King Arthur Baking Company or America’s Test Kitchen, both of which offer fantastic insights and tutorials.
The beauty of an artisan bread recipe lies in its versatility. Want to add seeds for a nutty flavor? Go for it! Prefer experimenting with herbs? Absolutely!
Why You Should Try It
Baking bread isn’t just about the final product; it’s about the journey. You’ll find that kneading dough can be a surprisingly therapeutic experience, a great way to disconnect after a hectic day. Plus, sharing your homemade creation with friends or family can bring a sense of joy and community.
So gather your ingredients, pull up a chair, and let’s get started on this delightful journey of making your very own artisan bread!
![]()
Ingredients for Artisan Bread Recipe
Essential dry ingredients
To make a stellar artisan bread recipe, the foundation starts with your dry ingredients. Here’s what you’ll need:
- Bread flour: This high-protein flour gives your bread that attractive chewy texture. Aim for about 4 cups.
- Salt: A crucial element, it enhances flavor and controls yeast activity. Use around 1.5 teaspoons.
- Active dry yeast: For that beautiful rise, you’ll want 2 teaspoons. Fresh yeast will yield the best results.
These ingredients are where the magic begins, creating that crusty outside and soft inside we all love.
Must-have wet ingredients
Now, let’s move to the wet side of things. It’s not just about hydration but also about flavor:
- Water: This is what brings it all together. Use about 1.5 cups, preferably at room temperature to activate the yeast.
- Olive oil: A tablespoon or two adds richness and depth to your loaf.
By using these simple yet quality ingredients, you’re setting yourself up for baking success. For more tips on choosing the right flour, check out reputable baking sites like King Arthur Baking or BBC Good Food. Happy baking!
Step-by-Step Preparation of Artisan Bread
Making artisan bread at home can be a rewarding experience, and it’s simpler than you might think. The process follows several key steps that transform simple ingredients into crusty, flavorful loaves. Let’s walk through each phase of this delightful journey!
Combine the dry ingredients
First things first: gather your ingredients. For your artisan bread recipe, you’ll need flour, salt, and yeast. Measure out about 3 cups of all-purpose flour and set aside.
- Flour: This forms the backbone of your bread.
- Salt: It enhances flavor and controls yeast activity.
- Yeast: Instant or active dry yeast works well. You’ll need about 1.5 teaspoons.
In a large mixing bowl, combine the flour and salt thoroughly before sprinkling the yeast on top without mixing yet. This layering helps maintain an appropriate balance during the mixing stage. For a detailed breakdown of breads and yeasts, you can check out resources like King Arthur Baking for in-depth information.
Mix in the warm water
Once your dry ingredients are prepped, it’s time to activate the magic. Warm about 1.5 cups of water—aim for a temperature around 110°F (45°C). If it’s too hot, it can kill the yeast; too cold, and it won’t activate successfully.
Carefully pour the warm water into the mixing bowl with your dry ingredients. Using a wooden spoon or spatula, mix until a shaggy dough forms. Don’t worry if it’s a bit messy; that’s what makes it rustic and delightful.
Allow for the first rise
Cover the dough with a clean kitchen towel or plastic wrap. Now, let it sit at room temperature for about 12-18 hours. This long first rise, known as fermentation, is crucial for developing the flavor and texture of your artisan bread.
You can easily squeeze this step into your day—start the process before you go to bed and let it rise overnight!
Shape the dough
After the first rise, you’ll notice the dough has expanded and become bubbly. Sprinkle a little flour onto your countertop and gently turn out the dough. It’s time to shape! Using floured hands, fold the dough over itself a few times, trying to maintain as much of the air as possible.
Shape it into a round or oval loaf, and enjoy the therapeutic nature of this process. The handling of the dough can be quite therapeutic—it’s a wonderful way to connect with your food.
Set for the second rise
Place the shaped dough on a piece of parchment paper. Cover it with a towel again, and let it sit for another 1-2 hours. This shorter rise allows the gluten to relax, ensuring that your bread will be tender yet chewy.
Preheat your oven
While your second rise is underway, preheat your oven to 450°F (232°C). If you want that classic crusty exterior, now’s the time to incorporate a baking stone or an oven-safe pot with a lid. Place it in the oven while it heats up to create a perfect baking environment.
Create steam and bake
Now here comes the fun part! After the second rise, make a few slashes in the top of your loaf with a sharp knife—this allows the steam to escape and creates an attractive design. Carefully transfer the loaf to the preheated pot (or place it directly on the baking stone, if using).
To generate steam, add a cup of hot water to a preheated pan in the oven or quickly spritz the inside of the oven with water. Bake for about 30-35 minutes, or until the bread is a golden-brown color and sounds hollow when tapped on the bottom.
Cool before slicing
After baking, remove your artisan bread from the oven and let it cool on a wire rack for at least 30 minutes. Yes, patience is key! Slicing too soon could lead to a gummy texture, and we want that lovely crust to remain intact.
Once cooled, slice in and enjoy the beautiful aroma of your homemade masterpiece.
Baking artisan bread at home can be a satisfying and delicious endeavor. So roll up your sleeves and embrace the art of bread-making!
Variations on Artisan Bread Recipe
Artisan bread is incredibly versatile, allowing room for creativity! Here are two delightful variations that not only enhance flavor but also cater to different dietary preferences.
Herb-infused artisan bread
Imagine biting into a slice of freshly baked bread, infused with the aromatic essence of herbs. To make your own herb-infused artisan bread, you can simply incorporate a mix of your favorite herbs like rosemary, thyme, or oregano into the dough.
- Herbs to try: Fresh basil adds sweetness, while rosemary contributes a woodsy aroma. Dried spices are also an excellent choice for convenience.
- Method: Add about a tablespoon of the chopped fresh herbs (or a teaspoon of dried) during the initial mixing stage. For an extra burst of flavor, sprinkle additional herbs over the crust just before baking.
- Tip: Pair with olive oil for dipping; it’s a fantastic complement!
For inspiration, check out this guide on cooking with herbs for more flavor ideas.
Whole grain artisan bread
If you’re looking for a heartier option, consider a whole grain artisan bread recipe. Using whole wheat flour not only enhances the texture but also boosts nutritional value.
- Ingredients: Replace half (or all!) of the white flour with whole wheat flour. You can also add seeds like sunflower or flax for additional crunch and health benefits.
- Rise and shine: Whole grain dough might take a bit longer to rise, so be patient; the extra yeast will reward you with a beautiful loaf.
- Nutritional benefits: Whole grains are rich in fiber and can aid digestion, making every bite a wholesome experience.
Check out resources from the Whole Grains Council for a deep dive into the benefits of whole grains.
Experimenting with these variations can elevate your baking game and impress friends at your next gathering!
Cooking Tips and Notes for Artisan Bread
Importance of Slow Rising
When it comes to making an artisan bread recipe, patience truly pays off. Allowing your dough to rise slowly, ideally overnight, promotes better flavor and texture. This slow fermentation process develops complex flavors that a quick rise just can’t replicate. Plus, the longer you let it sit, the easier it is to handle and shape, resulting in that perfect open crumb you crave. As bread expert Peter Reinhart explains, “Long fermentation creates bread with depth and character.”
Secrets to a Perfect Crust
Now, let’s crack the code to that irresistible crust. Here are some tips to elevate your artisan bread:
- Steam is Key: To achieve a crusty exterior, create steam during the first few minutes of baking. This can be done by placing a tray of hot water in the oven or spritzing the dough with water.
- Preheat Properly: Always preheat your oven to ensure the crust starts to form as soon as the dough hits the heat.
- Use a Baking Stone: If you have one, a baking stone can help distribute heat evenly, enhancing the crust’s crispness.
For more tips on baking bread, consider visiting resources like King Arthur Baking or Breadtopia for expert advice. Remember, each loaf is a new adventure—enjoy the process!
Serving Suggestions for Artisan Bread
Pairing with Soups and Salads
One of the best ways to enjoy your artisan bread recipe is by pairing it with warm, comforting soups or crisp, refreshing salads. You can tear off a piece and dip it into a bowl of rich tomato bisque or a hearty vegetable stew. The crusty exterior contrasts perfectly with the smoothness of the soup, creating a delightful experience. If salads are your preference, consider serving your bread alongside a vibrant mixed greens salad topped with avocado and a zesty lemon vinaigrette. This combination not only satisfies your taste buds but also elevates your meal.
Crafting the Perfect Sandwich
Creating a sandwich with artisan bread allows you to get creative! Start with two generous slices of bread and layer in your favorites—think turkey bacon, chicken ham, crisp lettuce, and a smear of aioli or hummus for a flavorful punch. Don’t forget to add some sliced tomatoes and pickles for crunch. Seeking a vegetarian option? Try roasted veggies and feta cheese for a satisfying bite. Whether you’re in a rush at lunchtime or preparing for a picnic, a well-constructed sandwich will always hit the spot!
For some ideas on delicious soup recipes, check out Food Network’s soup collection and get inspired!
Time Breakdown for Artisan Bread
When embarking on your artisan bread recipe, it’s essential to understand how long the entire process will take. While it requires patience, each phase is crucial for achieving that perfect loaf. Let’s break it down:
Preparation Time
Getting your ingredients ready takes about 20-30 minutes. You’ll mix your flour, water, yeast, and salt, ensuring a smooth start to your bread-making adventure.
Rise Time
This is where the magic happens! Allow your dough to rise for 4-6 hours at room temperature. For those who need flexibility, an overnight rise in the fridge can enhance the flavor.
Baking Time
Once risen, bake your loaf for 25-35 minutes. This step creates a crust that’s both beautiful and delicious.
Total Time
In total, you’re looking at 5-8 hours, but much of that is hands-off. With just a little effort, you can savor the incredible taste of homemade artisan bread.
For tips on mastering your technique, check out The Bread Lab for more expertise on fermentation and baking!
Nutritional Facts for Artisan Bread
Calories per serving
When enjoying a slice of homemade artisan bread, you can expect approximately 80-100 calories per serving, depending on the ingredients you choose. This makes it a satisfying yet moderate option for those mindful of their caloric intake.
Nutritional benefits
Let’s dive into what makes this artisan bread recipe not just delicious, but also beneficial:
- Whole Grains: Using whole grain flour increases fiber, aiding digestion and keeping you feeling fuller for longer.
- Minimal Ingredients: Artisan bread typically incorporates fewer additives compared to commercial bread, allowing you to control what you eat.
- Customizable: You can tweak the recipe to include seeds, nuts, or herbs, which offer additional vitamins, minerals, and healthy fats.
Feeling inspired? For more insights on the health benefits of whole grains, check out the Whole Grains Council.
So, the next time you whip up a batch, remember that you’re not just baking; you’re nourishing your body, too!
FAQs about Artisan Bread Recipe
How do I store leftover bread?
Storing your homemade artisan bread properly is key to retaining its deliciousness. To keep it fresh, wrap it in wax paper or a linen cloth, and store it at room temperature for up to three days. If you’ve got more than you can use, consider freezing it! Simply slice the bread, wrap it tightly in plastic wrap, and place it in a freezer bag. When you’re ready to enjoy a slice, pop it in the toaster or let it thaw at room temperature.
Can I use different types of flour?
Absolutely! While a classic artisan bread recipe often calls for all-purpose or bread flour, you can experiment with alternatives to suit your taste. Whole wheat flour adds a lovely nutty flavor, while gluten-free flour blends work great for those needing a gluten-free option. Just keep in mind that different flours will absorb water differently, so you may need to adjust the hydration in your dough.
What if my dough didn’t rise?
It can be disheartening to see your dough sit flat after all that waiting. The most common reason for this is inactive yeast. Be sure to check the expiration date on your yeast packet. Another issue could be the environment; temperature affects rise. Yeast loves warmth, so consider letting your dough rise in a warm place. If your dough still refuses to rise, it might be time to troubleshoot with an expert, or you can refer to resources like King Arthur Baking.
Whether you’re a seasoned baker or new to the game, remember that every loaf is a learning experience!
Conclusion on Artisan Bread Recipe
Embracing the Art of Bread-Making
In the world of culinary delights, nothing quite compares to the joy of baking your own bread. This artisan bread recipe is more than just a set of instructions; it’s an invitation to explore your creativity while filling your kitchen with the warm aroma of freshly baked bread.
As you embrace this craft, remember that each loaf tells a story—your story. Don’t hesitate to experiment with different flours or flavors, like adding herbs or spices. Engaging with the bread-making process can be meditative, and it indeed fosters a sense of achievement.
So, grab your apron, roll up those sleeves, and enjoy each step. You might just find that baking bread becomes one of your favorite pastimes! For more tips and insights into the mesmerizing world of baking, check out King Arthur Baking for expert advice.
PrintArtisan Bread Recipe: The Best Homemade Delight for Food Lovers
Discover the art of making artisan bread at home with this easy recipe that delivers a crusty exterior and a soft, chewy interior.
- Prep Time: 20 minutes
- Cook Time: 45 minutes
- Total Time: 12 hours 5 minutes
- Yield: 1 loaf 1x
- Category: Bread
- Method: Baking
- Cuisine: French
- Diet: Vegetarian
Ingredients
- 4 cups all-purpose flour
- 1 teaspoon salt
- 1 teaspoon sugar
- 1 1/2 teaspoons active dry yeast
- 1 3/4 cups warm water
Instructions
- In a large bowl, combine flour, salt, sugar, and yeast.
- Add warm water to the dry ingredients and mix until combined.
- Cover the bowl with a towel and let it rise for 12-18 hours at room temperature.
- After the dough has risen, preheat your oven to 450°F (230°C) and place a Dutch oven inside to heat.
- Transfer the dough onto a floured surface and shape it into a ball.
- Place the shaped dough onto parchment paper and let it rest for about 30 minutes.
- Remove the hot Dutch oven from the oven and carefully place the dough (and parchment) inside.
- Cover and bake for 30 minutes, then uncover and bake for an additional 15 minutes until golden brown.
Notes
- For best results, use a digital kitchen scale to measure flour.
- Experiment with adding herbs or spices for different flavors.
Nutrition
- Serving Size: 1 slice
- Calories: 120
- Sugar: 0.5 g
- Sodium: 200 mg
- Fat: 0.5 g
- Saturated Fat: 0 g
- Unsaturated Fat: 0 g
- Trans Fat: 0 g
- Carbohydrates: 24 g
- Fiber: 1 g
- Protein: 4 g
- Cholesterol: 0 mg
Keywords: Artisan Bread, Homemade Bread, Baking


