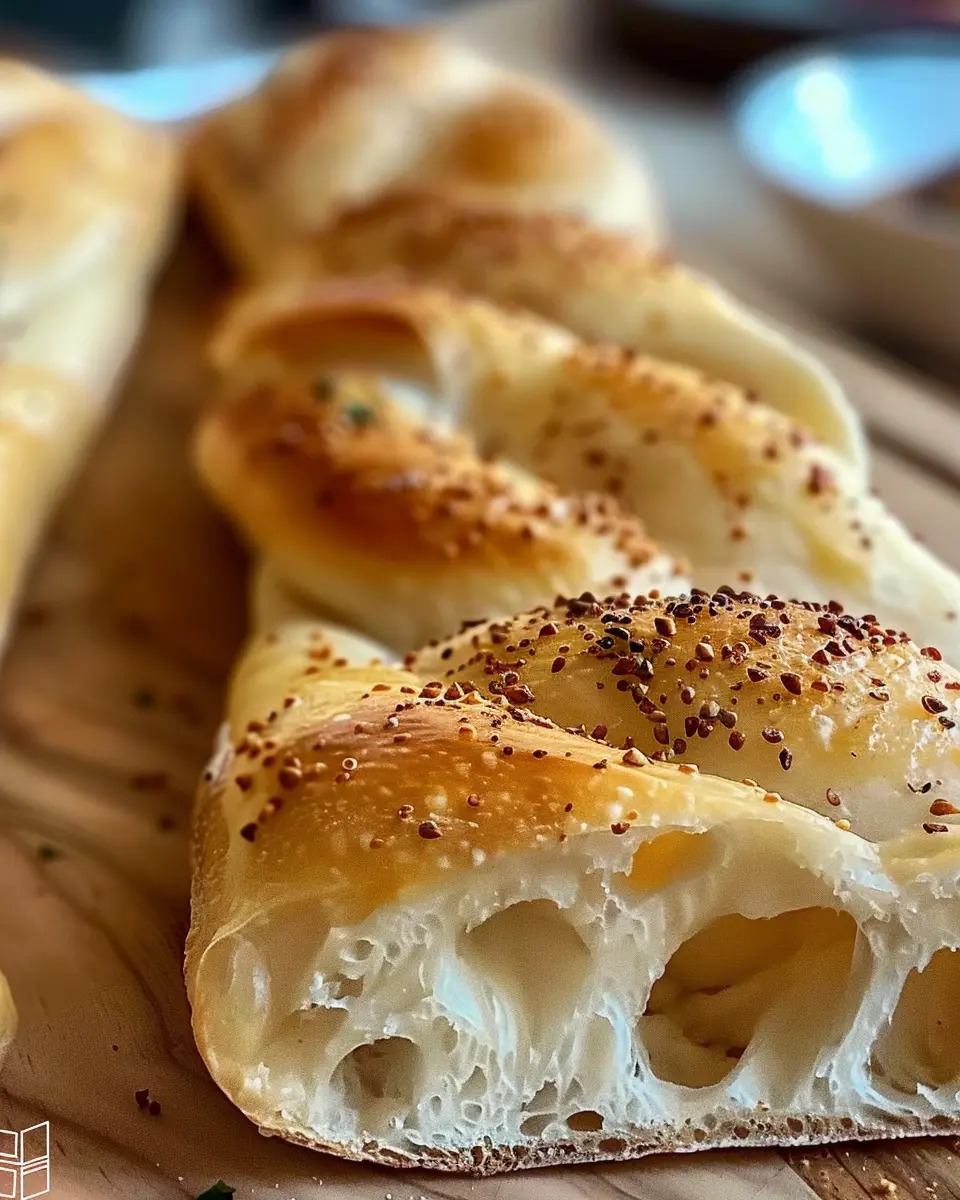
Introduction to No-Oven Turkish Bread
If you’re a busy young professional, you know all too well the struggle of balancing work, social life, and the desire to eat healthily. One fantastic solution that many are discovering is the joy of making homemade bread. It may sound like a time-consuming task, but with our no-oven Turkish bread recipe, you can create warm, fluffy loaves in no time—and without the fuss of traditional baking.
Why Homemade Bread is a Game-Changer for Young Professionals
Let’s face it: after a long day at the office, the last thing many want to do is spend hours in the kitchen. But did you know that making your own bread can actually be more straightforward than you think? With just a few simple ingredients, you can whip up fresh no-oven Turkish bread right on your stovetop. This method not only saves you time but also allows you to customize the flavor profile to your liking.
Think about it—how often do you find yourself reaching for those mass-produced loaves filled with preservatives? According to a study by the American Institute for Cancer Research, homemade bread can be healthier, offering you more control over what goes into your food. You can choose whole grains, herbs, and even incorporate Turkey Bacon or Chicken Ham for added flavor.
Here’s why incorporating this practice into your busy routine is beneficial:
- Healthier Ingredients: You can select the freshest ingredients, avoiding unnecessary additives.
- Cost-Efficient: Buying bread can add up quickly. One batch of homemade no-oven Turkish bread can serve multiple meals.
- Satisfying Process: There’s something immensely rewarding about kneading dough and watching it rise, even if your time is limited. Plus, nothing beats the smell of freshly baked bread wafting through your home.
Embrace the Art of Baking Without the Oven
This no-oven Turkish bread recipe is perfect for any kitchen, no matter how small. It allows you to serve something special during weekend brunch or simply enjoy it with a quick weekday dinner. With that said, stay tuned—we’re about to dive into the delicious details of making your own heavenly no-oven Turkish bread that will impress even the toughest critics.
For those sources mentioned, consider checking out the American Institute for Cancer Research for more insights on healthy eating habits, and unlock a whole new world of flavor on your bread-making journey. Let’s get started!

Ingredients for No-Oven Turkish Bread
Essential ingredients for a perfect flatbread
Creating delicious no-oven Turkish bread starts with simple yet essential ingredients. You’ll need:
- Flour: All-purpose flour works best, giving the bread its chewy texture.
- Water: Use warm water to help activate the yeast.
- Yeast: Instant yeast is your best friend here; it makes the dough rise beautifully.
- Salt: This enhances the flavor, so don’t skip it!
- Olive oil: Adds richness and keeps the bread soft.
These basics form the backbone of your bread. For a personal touch, consider using whole wheat flour for added nutrients, or even rye for a unique flavor twist.
Optional toppings for an extra punch of flavor
Ready to take your no-oven Turkish bread to the next level? Add toppings like:
- Sesame seeds: For a nutty crunch.
- Za’atar spice: This Middle Eastern blend adds a fantastic herbal flavor.
- Fresh herbs: Chopped parsley or cilantro can elevate your bread experience.
- Chili flakes: A little heat can really spice things up.
Feel free to experiment! What unique toppings can you think of? Transform your flatbread into a culinary masterpiece that will impress friends and family. Check out BBC Good Food’s guide on herbs for ideas on choosing the perfect herbs for your bread!
Step-by-step preparation of No-Oven Turkish Bread
Making no-oven Turkish bread is an enjoyable and rewarding experience. With just a few simple steps, you can create delicious, fluffy bread that is perfect for any meal. Let’s dive right in and walk through the preparation process together!
Gather and measure your ingredients
Before you start whipping up your no-oven Turkish bread, gather all your ingredients so you’re fully prepared. Here’s what you’ll need:
- 2 cups of all-purpose flour
- 1 tablespoon of active dry yeast
- 1 teaspoon of salt
- 1 tablespoon of sugar
- 1 cup of warm water (110°F/43°C)
- 1 tablespoon of olive oil
- Optional toppings: sesame seeds, nigella seeds, or fresh herbs
Make sure to measure accurately—this will help you achieve that perfect texture. Enjoy the process of measuring; after all, cooking should be fun! Did you know that using the right flour can make a significant difference? Opt for high-quality all-purpose flour to get the fluffiness you desire.
Mix and knead the dough
Once your ingredients are assembled, it’s time to mix and knead! In a mixing bowl, combine the warm water, active dry yeast, and sugar. Let this mixture sit for about 5 minutes until frothy. This means the yeast is alive and ready to get your dough rising.
Next, add the flour, olive oil, and salt to the mixture. Stir until the ingredients come together into a rough dough. Then, transfer it onto a floured surface and knead for about 10 minutes. Feel the dough transform under your hands—when it’s smooth and elastic, you’re on the right path! If you’re looking for some kneading techniques, check out this comprehensive guide from King Arthur Baking.
Let the dough rise and double in size
Now comes the waiting game! Place your kneaded dough back in the bowl, cover it with a damp cloth or plastic wrap, and let it rest in a warm spot for about 1 hour or until it has doubled in size.
While you wait, why not take a break? Make a cup of tea or coffee, or even prep your favorite toppings. That time you spend waiting makes all the difference in the flavor and texture—trust me!
Shape the bread into flat disks
After your dough has risen beautifully, it’s time to shape it. Punch down the dough gently to release any air bubbles. Divide it into equal parts, depending on how large you want your bread. Roll each piece into a ball and then flatten it into a disk, about 1/2-inch thick.
This step is super satisfying! The flat disks are what will give your no-oven Turkish bread its signature shape. Feel free to make them into different sizes – they can serve as mini flatbreads or a larger side dish for your meals.
Cook the bread in a skillet
Now for the fun part—cooking! Heat a non-stick skillet over medium heat. Once it’s hot, place one flattened disk in the skillet. Cook for about 2-3 minutes on each side until golden brown and puffed. You can experiment a bit: if you want them crispier, leave them a little longer.
Listen to the sound of the bread sizzling; it’s a delightful symphony in the kitchen! Repeat this process for all the disks. You’ll soon be rewarded with a delicious batch of bread that smells heavenly.
Add the finishing touches with butter and toppings
Once your no-oven Turkish bread is cooked, it’s time to elevate it even further. While the bread is still warm, brush on some melted butter for added flavor and richness. If you’re feeling adventurous, sprinkle your choice of toppings over the buttered surface—sesame seeds add a nice crunch, while fresh herbs bring in a touch of brightness.
And there you have it! Your homemade no-oven Turkish bread is ready to be savored. Serve it warm alongside soups, salads, or even sandwiches with turkey bacon or chicken ham. Enjoy and share the love with friends and family—they’ll appreciate your effort!
Variations on No-Oven Turkish Bread
Now that you’ve mastered the art of making no-oven Turkish bread, let’s explore some delicious variations to elevate your baking game. Whether you crave herbed delights or spicy sensations, these tweaks will keep your taste buds dancing.
Herbed Variations for Added Flavor
If you’re looking to enhance the flavor profile of your no-oven Turkish bread, think herbs! Adding fresh or dried herbs can turn your simple bread into a fragrant experience. Consider these options:
- Rosemary: Its earthy flavor pairs beautifully with olive oil. Just sprinkle finely chopped rosemary into your dough.
- Garlic: Incorporate minced garlic for a savory kick. Roasted garlic offers a sweeter touch that balances perfectly.
- Dill and Parsley: Combine both for a fresh, zesty twist. These herbs work wonders, especially if you’re serving the bread with dips or salads.
A great resource for herb pairings can be found on the American Horticultural Society.
Spicy Versions for an Extra Kick
For those who enjoy a bit of heat, try spicing things up with these variations of no-oven Turkish bread:
- Chili Flakes: Add a teaspoon to your dough for subtle warmth. This is perfect, especially when slathered with butter or hummus.
- Cayenne Pepper: For those who really like it hot, cayenne can take your bread to the next level. Just remember, a little goes a long way!
- Jalapeños or Green Chilis: Finely chop and fold into the dough. These add not just heat, but also a wonderful crunch.
No matter which variation you choose, you’ll end up with a delightful twist on classic no-oven Turkish bread. Happy baking!
Cooking tips and notes for No-Oven Turkish Bread
When making no-oven Turkish bread, achieving the right dough texture is crucial for that perfect softness. Here are some tips to keep in mind:
Tips for perfect dough texture
- Use warm water: This activates the yeast more effectively. Aim for about 110°F for optimal results.
- Kneading technique: Knead the dough for at least 8-10 minutes until it’s smooth and elastic. Not kneading enough can result in a dense texture.
- Rest time: Let the dough rise properly in a warm place. A full 1-hour resting period can make a significant difference.
Storage and reheating suggestions
Once you’ve mastered your no-oven Turkish bread, it’s essential to store it correctly to maintain freshness.
- Storage: Wrap the bread in a clean kitchen towel and place it in an airtight container. It can last for about 2-3 days at room temperature.
- Reheating: To bring back that fresh-from-the-pan taste, simply warm the bread in a skillet over low heat for a few minutes. Alternatively, lightly toast it in a toaster for a crispy texture.
If you’re looking for more tips, feel free to check baking resources like King Arthur Baking for bread-making techniques.

Serving suggestions for No-Oven Turkish Bread
Ideal pairings with dips and spreads
Who can resist no-oven Turkish bread when paired with the right spreads? Try serving it with:
- Hummus: A classic pairing, creamy hummus adds a rich, nutty flavor that complements the bread’s texture.
- Labneh: This tangy yogurt cheese drizzled with olive oil makes for a refreshing dip.
- Baba Ganoush: Smoky and savory, this eggplant dip offers a delightful contrast to the bread’s fluffiness.
- Tzatziki: This yogurt-cucumber dip brings a cool finish that’s perfect for warm days.
Creative ways to use leftover bread
Got some leftover no-oven Turkish bread? Don’t throw it out! Here are some inventive ways to use it:
- Bread Pudding: Transform stale bread into a sweet dessert by mixing it with eggs, milk, and your favorite spices.
- Croutons: Cube and toast the bread to create delicious croutons that can add crunch to salads or soups.
- Bruschetta: Slice the bread thinly, toast, and top with fresh tomatoes, basil, and a drizzle of balsamic for a quick appetizer.
With these ideas in mind, your no-oven Turkish bread can remain a star ingredient long after it comes out of the skillet! If you’re curious for more creative recipes, check out this article on innovative uses for leftover bread.
Time breakdown for No-Oven Turkish Bread
Making no-oven Turkish bread is a straightforward and quick process that won’t eat up your day. Here’s how the time adds up:
Preparation time
In about 10-15 minutes, you’ll have all your ingredients measured and ready to go. This is the perfect time to get your favorite playlist rolling or catch up on a quick podcast!
Cooking time
The cooking process takes roughly 10-15 minutes per batch. You’ll want to keep an eye on the heat to ensure a golden-brown crust, which not only tastes great but looks amazing, too.
Total time
Overall, you can whip up this delicious no-oven Turkish bread in about 20-30 minutes from start to finish. Perfect for a last-minute get-together or just a cozy night in with a good book.
For more tips and variations, visit Serious Eats or BBC Good Food for inspiration!
Nutritional facts for No-Oven Turkish Bread
Calories and Serving Size
When enjoying your no-oven Turkish bread, it’s good to know that a standard serving (about one slice) contains approximately 150 calories. This makes it a delicious and relatively low-calorie bread option for any meal or snack. Enjoy it on its own or paired with your favorite spreads for added flavor without the guilt.
Macronutrient Breakdown
In terms of macronutrients, this delightful bread offers a balanced profile:
- Carbohydrates: 30 grams – Providing energy for your day, thanks to the flour used.
- Protein: 5 grams – A nice touch to keep you full, especially if you load it with Turkey Bacon or Chicken Ham.
- Fat: 2 grams – Minimal fat, perfect for those watching their intake.
Feeling inspired to take control of your nutrition? Check out the USDA nutrition database for more insights into the ingredients you love!
This quick, simple recipe is not just about satisfying your taste buds but also nourishing your body. Make your no-oven Turkish bread the star of your next meal!
FAQs about No-Oven Turkish Bread
When it comes to making delicious no-oven Turkish bread, you might have a few questions on your mind. Let’s tackle some of the most common ones!
Can I make this bread gluten-free?
Absolutely! To create a gluten-free version of no-oven Turkish bread, you can substitute regular flour with a gluten-free blend. Look for a blend that includes xanthan gum, which helps mimic the elasticity of gluten. Additionally, flours like almond or coconut can provide unique flavors, but may alter the texture. If you stick with a good all-purpose gluten-free flour, you’ll enjoy a tasty, fluffy bread without the gluten!
What can I use instead of instant yeast?
If you’re out of instant yeast, don’t fret! Active dry yeast works perfectly as a substitute. Just remember to activate it in warm water with a touch of sugar before mixing it into your dough. Alternatively, you can use baking powder, although the texture might be a bit different. For a more adventurous option, consider sourdough starter, which can provide a fantastic flavor. For more information on yeast alternatives, check out this guide on using substitutes.
How long can I store the bread?
This no-oven Turkish bread can be stored at room temperature for about 2-3 days, wrapped in a clean kitchen towel or stored in a breathable container. If you want to keep it longer, consider freezing individual pieces; just ensure they’re tightly wrapped. When you’re ready to enjoy them, simply thaw at room temperature or warm them in a skillet for a few minutes. Trust me, there’s nothing like freshly warmed bread!
Making no-oven Turkish bread is a great way to enjoy homemade goodness, and now you have all the tools to make it your own!
Conclusion on No-Oven Turkish Bread
Why You Should Try Making This Bread at Home
Making no-oven Turkish bread at home is not just about indulging in a delicious treat; it opens up a world of culinary creativity. It’s easy to prepare, requiring minimal ingredients and no fancy equipment. Plus, you can customize it to suit your taste by adding herbs, spices, or even toppings like turkey bacon or chicken ham.
Imagine the aroma of freshly baked bread wafting through your kitchen. This bread is perfect for pizzas, sandwiches, or to pair with hummus. So why wait? Dive into this rewarding experience and impress your friends at your next gathering! For more baking inspiration, check out resources like King Arthur Baking Company and BBC Good Food.
PrintNo-Oven Turkish Bread: Easy Recipe for Delightful Home Baking

Learn to make delicious No-Oven Turkish Bread at home with this easy recipe. Perfect for pairing with your favorite dishes!
- Prep Time: 15 minutes
- Cook Time: 10 minutes
- Total Time: 25 minutes
- Yield: 6 pieces 1x
- Category: Bread
- Method: Stovetop
- Cuisine: Turkish
- Diet: Vegetarian
Ingredients
- 2 cups all-purpose flour
- 1 tablespoon sugar
- 1 teaspoon salt
- 1 tablespoon baking powder
- 1 cup yogurt
- 2 tablespoons olive oil
Instructions
- In a large bowl, combine the flour, sugar, salt, and baking powder.
- Add the yogurt and olive oil to the dry ingredients, and mix until a dough forms.
- Knead the dough on a floured surface for about 5 minutes.
- Divide the dough into equal portions and roll them out into flat circles.
- Heat a non-stick skillet over medium heat and cook each circle for about 2-3 minutes on each side.
- Remove from heat and let cool before serving.
Notes
- For extra flavor, you can brush the bread with melted butter after cooking.
- Serve warm with dips or as a side to your meals.
Nutrition
- Serving Size: 1 piece
- Calories: 180
- Sugar: 1g
- Sodium: 200mg
- Fat: 6g
- Saturated Fat: 1g
- Unsaturated Fat: 5g
- Trans Fat: 0g
- Carbohydrates: 26g
- Fiber: 1g
- Protein: 5g
- Cholesterol: 0mg
Keywords: No-Oven Turkish Bread, Turkish Bread Recipe, Easy Bread Recipe


