
Introduction to Artisan Bread Recipe
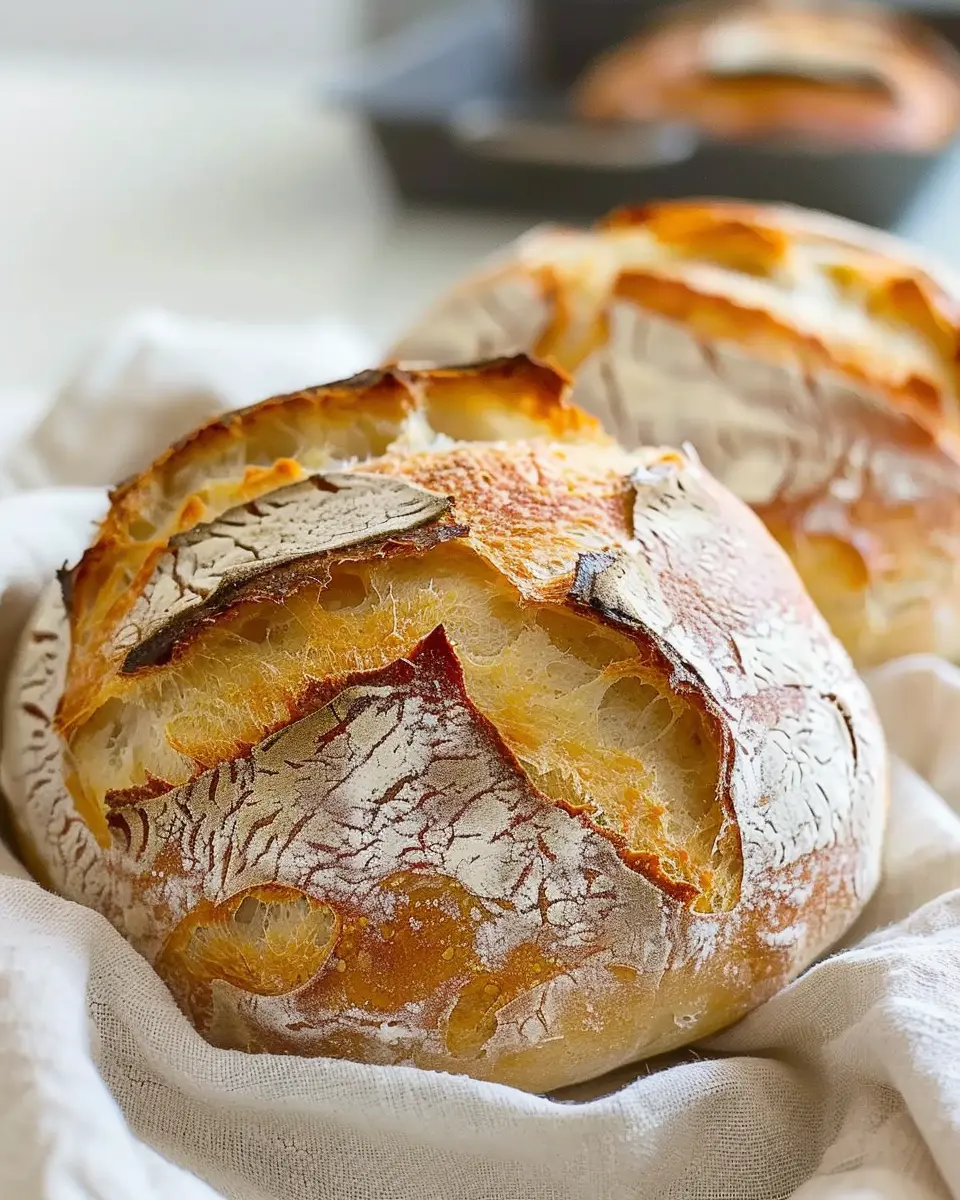
Have you ever wandered into a bakery, inhaled the delightful aroma of freshly baked bread, and thought, “I wish I could have this at home”? With a homemade artisan bread recipe, you can turn that simple desire into reality! Making your own bread not only elevates your meals but also transforms your entire dining experience.
Why Making Your Own Artisan Bread Can Transform Your Meals?
When you whip up a loaf of artisan bread from scratch, you’re not just baking; you’re creating an experience. Here’s how it can change your meals for the better:
-
Enhanced Flavor: Store-bought bread often lacks the complexity of flavor that comes from a hand-crafted loaf. When you take the time to bake, you can experiment with different types of flour, grains, and even spices, allowing you to create a taste that’s uniquely yours.
-
Healthier Ingredients: By making your own bread, you have complete control over the ingredients. You can opt for whole grains, omit preservatives, and choose the best quality ingredients. This means your bread can be not just tasty but also a healthier option.
-
Satisfaction and Accomplishment: There’s something incredibly rewarding about slicing into your warm, freshly baked bread. The smell of baking bread fills your home with a sense of comfort and creativity that can turn an ordinary meal into something special.
-
Versatile Pairings: Fresh artisan bread is incredibly versatile. Pair it with homemade dips, serve it alongside your favorite soups, or enjoy it as part of an elegant charcuterie board featuring turkey bacon, chicken ham, and assorted cheeses.
Incorporating a homemade artisan bread recipe into your cooking routine can bless your table with warmth and flavor. While it may take some practice and patience, the rewards far outweigh the effort. Plus, it creates a wonderful opportunity for family bonding or to impress friends at your next gathering.
Curious about the methods and ingredients? Check out resources from King Arthur Baking for expert advice and tips to finesse your baking skills. Alternatively, Serious Eats provides in-depth articles that can further inspire your baking journey.
Ready to roll up your sleeves and dive into the world of artisan bread baking? Trust me, your taste buds will thank you!
Ingredients for Artisan Bread Recipe
What you need for a perfect loaf:
Creating your own artisan bread at home is a rewarding and enjoyable experience. To achieve that perfect crust with a soft, flavorful interior, gather these essential ingredients:
- Flour: Use high-quality bread flour for the best structure. You can also experiment with whole wheat flour for a nutty flavor.
- Water: Filtered water is ideal to avoid any chlorine that can interfere with yeast. The temperature should be around 75°F (24°C) for optimal yeast activity.
- Yeast: Active dry yeast works excellently, but feel free to use instant yeast for a faster rise.
- Salt: Sea salt or kosher salt enhances flavor and strengthens gluten, contributing to a better texture.
- Sweetener: A small amount of honey or sugar can help activate the yeast and add a hint of sweetness.
Each ingredient plays a vital role, contributing to the unique character of your artisan bread recipe. For more baking tips and techniques, check out resources from the King Arthur Baking Company or the American Institute of Baking for expert advice. Happy baking!
Preparing Artisan Bread
If you’ve ever walked into a bakery and felt an overwhelming urge to capture that delicious aroma of freshly baked artisanal bread, you’re not alone! Creating your own bread at home is not only a rewarding experience but also a delightful way to brighten up your meals. Let’s dive into the step-by-step process of preparing an Artisan Bread Recipe that will have your kitchen smelling heavenly and your taste buds dancing in joy.
Gather Your Ingredients
Before you start your bread-making adventure, it’s essential to gather all your ingredients. Here’s what you’ll need:
- 3 cups all-purpose flour (plus extra for dusting)
- 1 ½ teaspoons sea salt
- 1 teaspoon sugar
- 1 teaspoon instant yeast
- 1 ½ cups warm water (about 110°F to 115°F)
You can find high-quality flour and yeast at your local grocery store or specialty shops. If you’re curious about the science behind yeast, this informative article gives great insight.
Mix the Dry Ingredients
In a large mixing bowl, combine the all-purpose flour, sea salt, sugar, and instant yeast. Stir them together with a whisk or a fork to ensure that the salt and yeast are evenly distributed throughout the flour. This initial blending is crucial; it allows the yeast and salt to interact correctly once you add the water, leading to that beautiful rise you’re aiming for.
Combine with Warm Water
It’s time to bring your mixture to life! Slowly pour in the warm water. Use a wooden spoon or your hands to mix until a shaggy dough forms. Don’t worry about perfect consistency at this point; it’s supposed to look a bit messy. You want the flour to hydrate, and it’s essential not to overwork your dough just yet. If you’re interested in kneading techniques, King Arthur Baking offers excellent guidance.
Let It Rise, Rise, Rise!
Once your dough is mixed, cover the bowl with a damp cloth or plastic wrap. Now comes the best part: let it rest for about 8 to 12 hours at room temperature. This slow fermentation is what gives your artisan bread its gorgeous flavor and texture. You’ll know it’s ready when it has doubled in size and has a nice, bubbly appearance. Curious about the science behind fermentation? Check out this insightful piece.
Shape Your Dough
After your dough has risen, it’s time for shaping. Sprinkle some flour on a clean surface and gently turn the dough out onto it. Using floured hands, shape it into a ball or a loaf, depending on your preference. Try to handle it gently to retain those precious air bubbles formed during the rise. While shaping, you can also incorporate flavors like herbs or cheese if you’re feeling adventurous!
Prepare for Baking
Line a baking sheet with parchment paper. Carefully transfer your shaped dough onto the prepared sheet. Cover it with a towel and let it rise for another 30 minutes to 1 hour. Meanwhile, preheat your oven to 450°F (232°C). If you want to achieve a crusty exterior, consider placing a cast iron skillet or baking dish filled with water in the oven while it preheats.
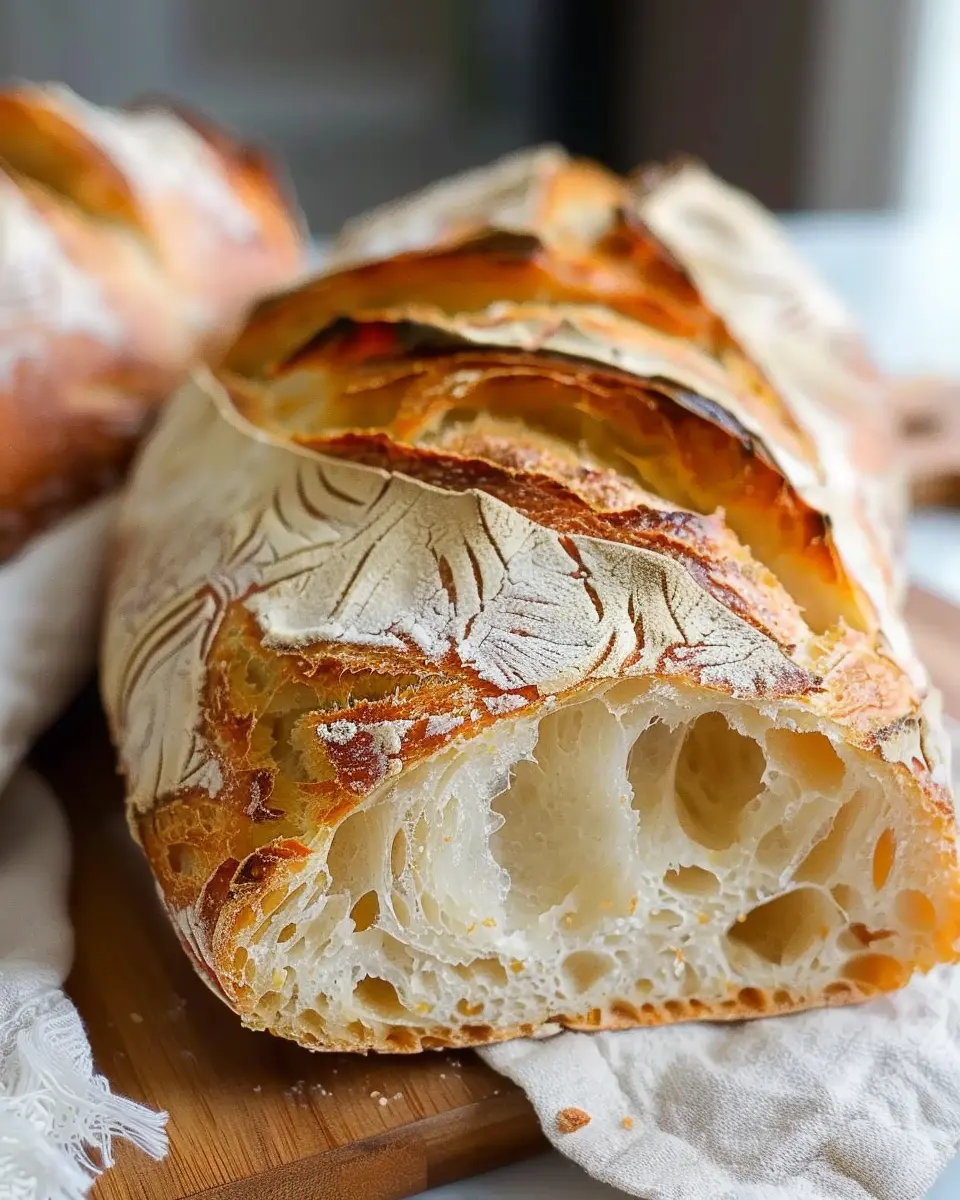
Bake to Perfection
Once your oven is ready, it’s showtime! Use a sharp knife or lame to score the top of your dough; this allows steam to escape and helps the bread rise further while baking. Bake in the preheated oven for about 25-30 minutes until the bread is a deep golden brown and sounds hollow when tapped on the bottom. Let it cool on a rack, and then enjoy your masterpiece with some olive oil, cheese, or even turkey bacon!
Enjoy your artisan bread recipe experience and remember, the best part of making bread is sharing it with friends and family!
Variations on Artisan Bread Recipe
How to Customize Your Artisan Bread
What I love most about artisan bread is its versatility. Once you’ve mastered the basic recipe, there are endless ways to put your personal spin on it. Think about your favorite flavors and let that inspire you. Want a nutty crunch? Consider adding seeds or nuts; pecans or sunflower seeds provide delicious texture. Herbs like rosemary or thyme can elevate your bread to gourmet levels. You can also mix in dried fruits like cranberries or apricots for a delightful surprise.
Adding Flavors: Herbs, Nuts, and More
Don’t be afraid to experiment! Adding unique flavors not only enhances your bread but also allows you to create a one-of-a-kind loaf that reflects your culinary voice. Here are a few ideas:
- Cheese: Try folding in shredded cheese like cheddar or crumbled feta for a savory twist.
- Seeds and Nuts: Incorporate a mix of sunflower seeds, walnuts, or even pumpkin seeds for extra nutrition and crunch.
- Vibrant Herbs: Fresh herbs can brighten up your bread—think chopped basil or oregano.
- Sweet Add-Ins: If you’re in the mood for something sweet, raisins or even a touch of honey can transform your loaf into a delightful breakfast treat.
After you’ve made your artisan bread, share your creations online and draw inspiration from others. Check out The Bread Lab for experiments in flavor and grains to expand your bread game. So, don’t just stick to the basics; go wild and make your artisan bread recipe uniquely yours!
Cooking Tips and Notes for Artisan Bread Recipe
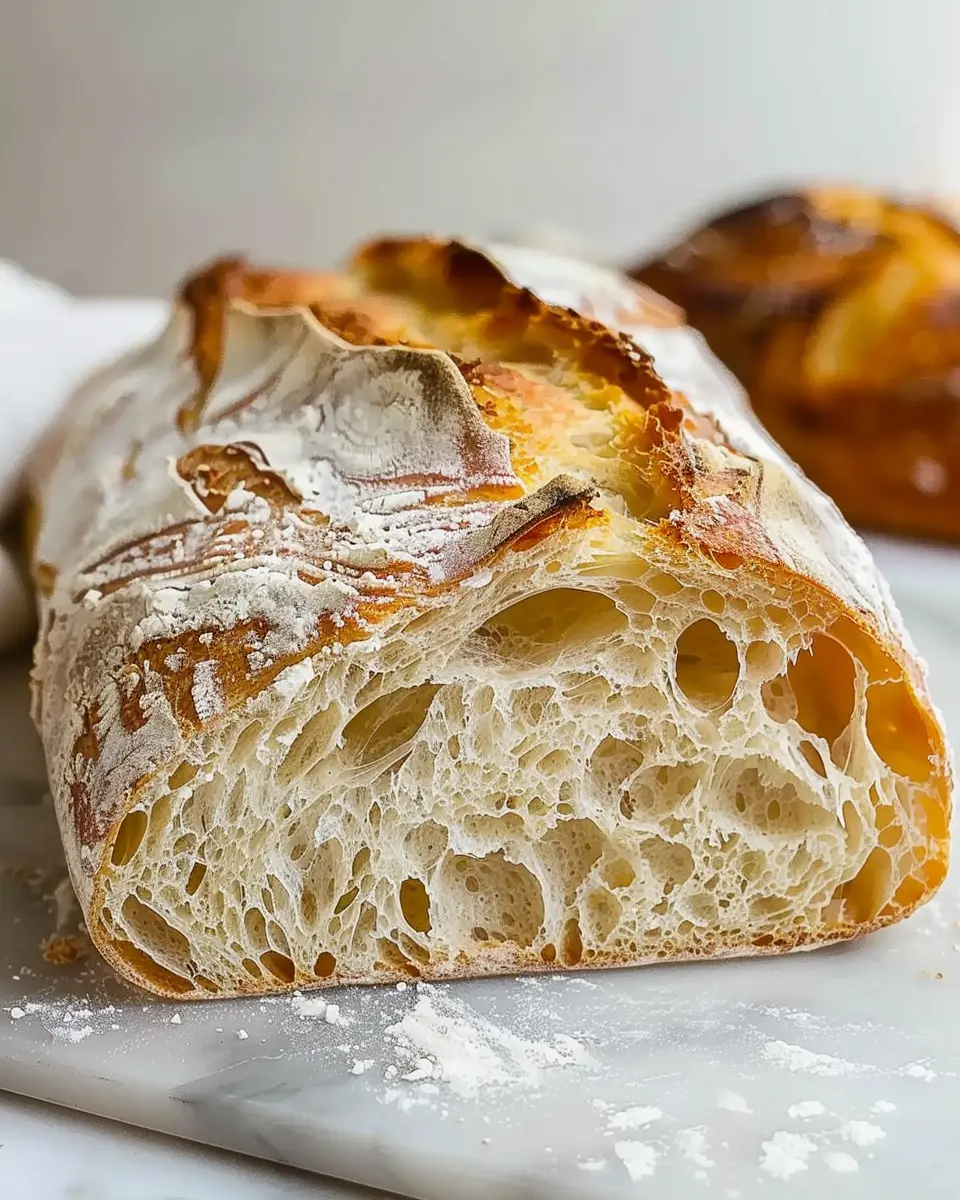
Pro Tips for Achieving Crusty Perfection
To unlock that beautiful crust you’ve seen in artisan bakeries, consider these tips:
- Use a baking stone or steel: This helps retain heat and creates a serious crust.
- Steam is your friend: Create steam in your oven during the first few minutes of baking. A simple way is to place a pan of hot water at the bottom.
- Let it rest: After shaping your dough, allow it to rest for at least 30 minutes to enhance flavor and texture.
For more in-depth methods, check this guide on baking techniques.
Common Mistakes to Avoid
Even seasoned bakers can overlook details. Here are some pitfalls to avoid while crafting your Artisan Bread Recipe:
- Don’t rush the proofing: It’s tempting to skip this step, but proper fermentation is key to flavor.
- Inaccurate measurements: Weighing your ingredients ensures consistency; a kitchen scale can be your best friend.
- Skipping instructions: Each step in the recipe is there for a reason. Trust the process for the best results.
With these simple tips, you’re well on your way to baking a loaf that will impress friends and family alike!
Serving Suggestions for Artisan Bread Recipe
Perfect Pairings for Your Artisan Loaf
When it comes to enjoying your Artisan Bread Recipe, the options are limitless. Freshly baked bread deserves the right companions to elevate your dining experience. Here are a few suggestions to enhance your meal:
-
Savory Spreads: Try a rich, creamy goat cheese or a tangy hummus spread. Both add a delightful contrast to the crusty exterior of your bread. You can learn more about easy homemade spreads here.
-
Hearty Toppings: Load up your slices with delicious turkey bacon or chicken ham for a satisfying breakfast or brunch. Pair it with a light drizzle of honey mustard for a hint of sweetness.
-
Salads & Soups: Serve your artisan bread alongside a fresh garden salad or a comforting bowl of tomato basil soup. The bread is perfect for soaking up flavors—delicious!
-
Cheese Board Essentials: Create a cheese board with various textures—sharp cheddar, creamy brie, and a handful of olives. The contrasting flavors beautifully complement the rustic taste of your bread.
How do you plan to serve your thick slices of artisan goodness? The adventure begins with the first bite!
Time Breakdown for Artisan Bread Recipe
When you’re ready to embark on your Artisan Bread Recipe journey, understanding the timing can make all the difference in your baking success. Let’s break it down:
Preparation Time
Getting started is a breeze! You’ll need about 20-30 minutes to mix your ingredients and form the dough. It’s the perfect time for you to gather your favorite toppings or a nice herb-infused olive oil for dipping.
Rising Time
This is where the magic happens. The dough will need 2-3 hours to rise, depending on your kitchen’s temperature. Don’t rush it—every minute counts in developing that lovely flavor and texture. Be sure to check out this guide on yeast activity for more tips!
Baking Time
Once your dough has risen beautifully, preheat your oven and bake for 30-40 minutes. During this time, your kitchen will fill with a tantalizing aroma that’s simply irresistible!
Total Time
All in all, you’re looking at about 3-4 hours from start to finish, largely due to the rising process. Perfectly timed, this is when to enjoy a cup of tea, catch up on a podcast, or plan a cozy dinner!
This isn’t just about making bread; it’s about creating an experience. So roll up your sleeves and let’s get baking!
Nutritional Facts for Artisan Bread Recipe
If you’re curious about the nutritional profile of your homemade Artisan Bread, here’s a quick breakdown:
Calories
A typical slice of this delicious Artisan Bread contains around 80-100 calories, making it an excellent choice for a filling snack or part of a balanced meal.
Protein Content
Each slice provides about 3-4 grams of protein. It’s a great way to incorporate more protein into your diet, especially when paired with toppings like Turkey Bacon or Chicken Ham for a wholesome breakfast.
Other Nutritional Details
In addition to calories and protein, this bread offers:
- Carbohydrates: Approximately 15-20 grams per slice, fueling your day with energy.
- Fiber: About 1-2 grams, helping to keep your digestive system on track.
- Vitamins and Minerals: Depending on the ingredients used, you might find a decent amount of B vitamins and iron, vital for your overall health.
You can explore more about the nutritional benefits of bread on Healthline. That knowledge can make your meals even more satisfying!
FAQs about Artisan Bread Recipe
How long does it take to make artisan bread?
Making an artisan bread is a rewarding experience, but it does take some time. Generally, you can expect the whole process to take about 5 to 8 hours. This includes mixing, resting, and baking. However, a significant chunk of this time involves letting the dough rise, which is when you can multitask! Some enthusiasts prefer to let their dough develop overnight in the fridge for an even deeper flavor—talk about flexibility!
Can I use whole wheat flour?
Absolutely! Whole wheat flour adds a nutty flavor and increases the nutritional value of your artisan bread. Just keep in mind that it may absorb more water than all-purpose flour. You might want to adjust the hydration level by adding a little extra water or try using a blend of both whole wheat and all-purpose flour for the best results.
What if I don’t have a Dutch oven?
Not to worry! While a Dutch oven creates that perfect steam environment for baking, you can achieve similar results using other methods. Try placing a shallow pan filled with hot water in the oven while your bread bakes to create steam. Alternatively, a heavy baking sheet can work, too. Just keep an eye on your bread as it bakes to ensure it reaches that golden perfection.
How should I store my artisan bread?
To keep your artisan bread fresh, it’s best to store it in a paper bag or wrap it in a clean kitchen towel at room temperature. This allows the crust to stay crisp while preventing the bread from becoming too dry. If you want to keep your bread for longer, consider slicing it and freezing it. Just wrap it tightly in plastic wrap or a freezer-safe bag and pop it in the freezer. When ready to enjoy, just toast the slices straight from the freezer!
For more tips on bread storage, check out this helpful guide by King Arthur Baking.
Embrace the art of baking, and enjoy the delightful process!
Conclusion on Artisan Bread Recipe
Your journey to homemade bread bliss
Congratulations on reaching the end of your Artisan Bread Recipe adventure! The fragrant aroma of freshly baked bread is one of life’s simple joys, and now you have the skills to create it right in your kitchen. Remember, each loaf is a chance to experiment—try different flours or toppings, and don’t hesitate to share your successes (and even some failures) with friends and family.
Whether you enjoy it with a warm bowl of soup or as the foundation for a hearty sandwich, homemade artisan bread can elevate any meal. For more tips on perfecting your bread-making skills, check out sources like King Arthur Baking for expert advice and inspiration. Happy baking!
PrintArtisan Bread Recipe: The Best Homemade Loaf for Every Meal
Discover how to make the perfect artisan bread at home with our easy and delicious recipe!
- Prep Time: 15 minutes
- Cook Time: 35 minutes
- Total Time: 2 hours 15 minutes
- Yield: 1 loaf 1x
- Category: Bread
- Method: Baking
- Cuisine: French
- Diet: Vegetarian
Ingredients
- 4 cups all-purpose flour
- 1 1/2 cups warm water
- 2 teaspoons salt
- 1 teaspoon sugar
- 2 teaspoons active dry yeast
Instructions
- In a large bowl, combine warm water, sugar, and yeast. Let it sit for 5 minutes until frothy.
- Add flour and salt to the yeast mixture. Stir until a shaggy dough forms.
- Cover and let rise for 1-2 hours until doubled in size.
- Preheat the oven to 450°F (230°C).
- Shape the dough and place it on a floured surface. Let it rest for 30 minutes.
- Transfer to a baking stone or sheet, and score the top with a sharp knife.
- Bake for 30-35 minutes or until golden brown.
Notes
- For a crustier loaf, add steam to the oven by placing a pan of water in the bottom.
- Experiment with different types of flour for unique flavors.
Nutrition
- Serving Size: 1 slice
- Calories: 120
- Sugar: 1g
- Sodium: 500mg
- Fat: 1.5g
- Saturated Fat: 0.3g
- Unsaturated Fat: 1g
- Trans Fat: 0g
- Carbohydrates: 24g
- Fiber: 1g
- Protein: 4g
- Cholesterol: 0mg
Keywords: Artisan Bread Recipe, Homemade Bread, Baking Bread


