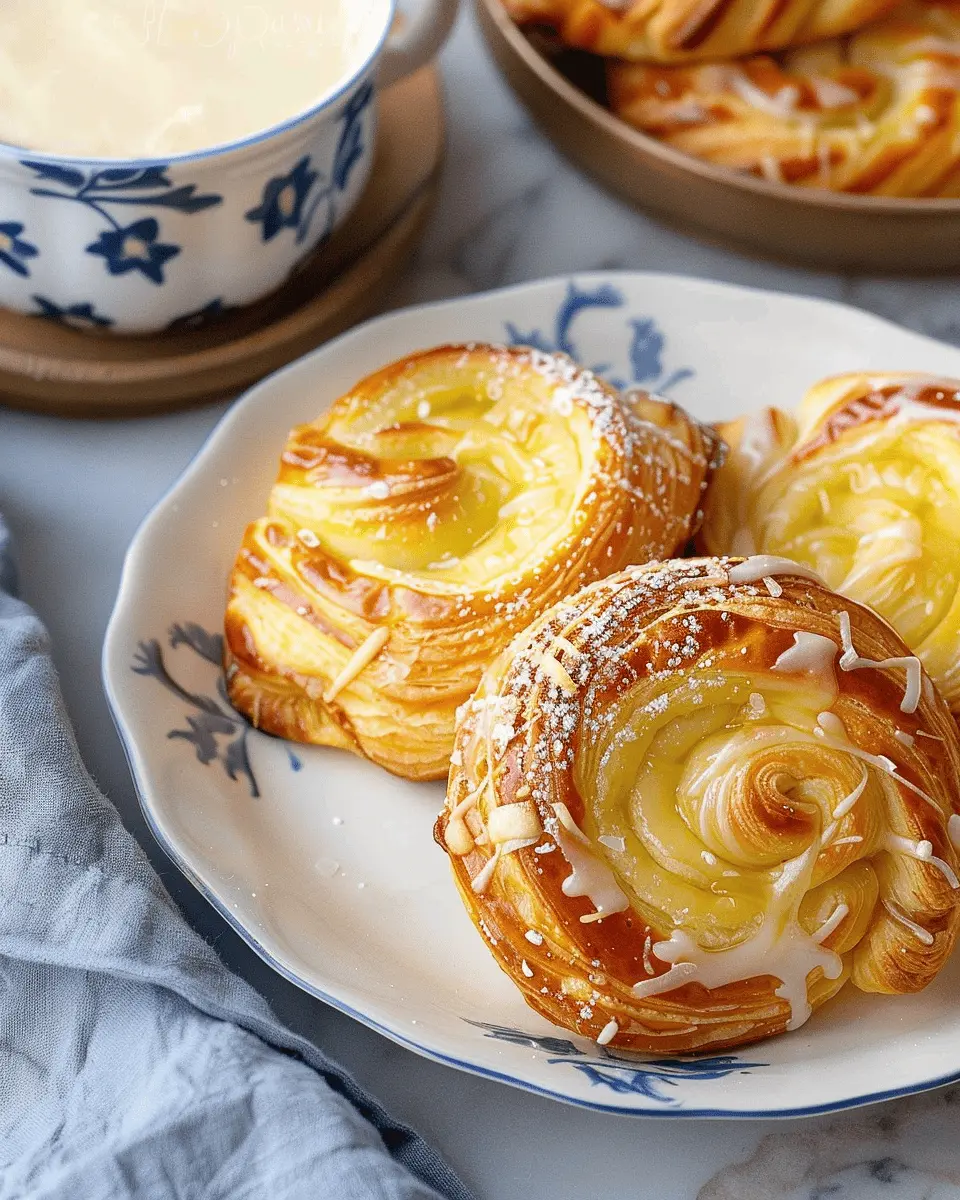
Introduction to Cheese Danish
When it comes to homemade delights, the cheese danish stands out as an absolute favorite. Picture this: a flaky, buttery pastry filled with a creamy cheese mixture that dances on your palate. It’s no wonder this treat has found a permanent home from bakeries to brunch tables and cozy breakfast nooks. But why should you consider making this delectable pastry at home? Let’s delve into some reasons that make the cheese danish the perfect homemade treat.
Why Cheese Danish is the Perfect Homemade Treat
-
A Touch of Elegance: There’s something incredibly satisfying about whipping up a pastry that looks and tastes fancy. When you bake your own cheese danish, you can impress your friends or even enjoy a moment of bliss for yourself. It’s a small indulgence that doesn’t require hours in the kitchen.
-
Customizable Fillings: While the classic cheese filling is divine, the beauty of making your own cheese danish is the opportunity for personalization. Want to add some fruit like blueberries or strawberries? Or perhaps a hint of lemon zest for a refreshing twist? The options are endless! Check out this fruit pairing guide for ideas.
-
Simple Ingredients, Big Flavors: You might think that making pastries involves complex techniques or hard-to-find ingredients. Not so with the cheese danish! Generally, all you need are simple pantry staples like cream cheese, sugar, and puff pastry. For a delightful touch, consider using local artisan cheeses. Trust me; it makes a world of difference.
-
Perfect for Any Occasion: Whether it’s a brunch with friends, a Sunday breakfast, or just a quiet morning at home, a cheese danish fits the bill. It’s versatile enough to serve with coffee or a refreshing herbal tea.
So, are you ready to give this delicious treat a try? Baking your own cheese danish can transform a regular day into something special. You’ll not only enjoy the process but also savor the delightful results! Keep reading for my full recipe; I promise it will be worth it.
Ingredients for Cheese Danish
Essential ingredients for the Danish
Creating a delicious cheese Danish relies on a few key ingredients that come together to form its flaky pastry and creamy filling. Here’s what you’ll need:
- Puff Pastry: The foundation of any great Danish! You can use store-bought for convenience or make your own if you’re feeling adventurous.
- Cream Cheese: This gives the filling its rich, creamy texture. Make sure it’s well-softened for easy blending.
- Sugar: A touch of sweetness balances the tanginess of the cheese. Feel free to adjust based on your taste.
- Egg: This acts as both a binder and gives your Danish a lovely golden color when baked.
- Vanilla Extract: Just a dash for enhanced flavor—adding aromatic notes without overwhelming the filling.
Optional ingredients for enhancing flavor
While the essentials are important, adding a few extra touches can elevate your cheese Danish to gourmet status. Consider mixing in:
- Lemon Zest: Brightens up the filling with a refreshing zing.
- Powdered Sugar: Perfect for dusting on top after baking for an elegant finish.
- Fresh Berries: Combine with the cheese mix for a fruity twist that complements the flavor beautifully.
Feeling inspired to get baking? These simple additions can make your cheese Danish stand out at your next brunch. For more tips and tricks, check out sources like King Arthur Baking for in-depth pastry advice!
Preparing Cheese Danish
Making a cheese danish is a delightful kitchen adventure that can easily brighten your morning or serve as a sweet treat during the day. Whether you’re hosting a brunch or treating yourself, this easy-to-follow guide will walk you through each step to create these flaky, cream cheese-filled pastries right in your own kitchen.
Gather Your Tools and Preheat the Oven
Before diving into the baking process, a little preparation goes a long way. Start by gathering your essential tools and ingredients. Here’s what you’ll need:
- Baking sheet
- Parchment paper
- Rolling pin
- Mixing bowls
- Whisk
- Knife or pastry cutter
Once you have everything in place, preheat your oven to 400°F (200°C). Preheating ensures your cheese danish will rise beautifully, giving you that perfect golden-brown crust.
Make the Cream Cheese Filling
The heart of any cheese danish lies in its delightful filling. Here’s how to whip it up:
- In a mixing bowl, combine 8 ounces of softened cream cheese, 1/4 cup granulated sugar, 1 teaspoon vanilla extract, and 1 egg yolk.
- Whisk the mixture until smooth and creamy, ensuring there are no lumps. The sweetness of the sugar nicely complements the tanginess of the cream cheese.
This filling is not just limited to cream cheese; feel free to experiment by adding a hint of lemon zest or a splash of almond extract for a unique twist. According to the American Institute of Baking, the balance of textures and flavors in pastries can significantly elevate their appeal.
Roll and Cut the Puff Pastry
Now that your filling is ready, it’s time to handle the pastry. Using store-bought puff pastry is a huge time-saver, but make sure you choose high-quality options for the best results. Here’s how to prepare it:
- Roll out the puff pastry sheet on a lightly floured surface to smooth out any creases.
- Cut the pastry into squares, around 4×4 inches each. If you want to keep things neat, using a ruler can help.
Remember, puff pastry can be tricky, so working quickly ensures it stays nice and cold, leading to better puffing during baking.
Assemble the Cheese Danish
Putting together your cheese danish is where the fun really begins! Follow these simple steps:
- Place a dollop of the cream cheese filling in the center of each pastry square.
- To give your danish a beautifully folded look, you have a couple of options:
- Fold the corners of the squares toward the center and pinch them together.
- Alternatively, you can leave the filling exposed and simply fold up two opposite edges to create a pocket.
Make sure to place each assembled cheese danish on a parchment-lined baking sheet to prevent sticking and for easy cleanup.
Bake to Golden Perfection
Once your danishes are assembled, it’s time to send them off to the oven. Here’s how to ensure they bake perfectly:
- Brush the tops of the pastries lightly with melted butter or an egg wash for a glossy finish.
- Bake in the preheated oven for 20-25 minutes or until they are puffed up and golden brown.
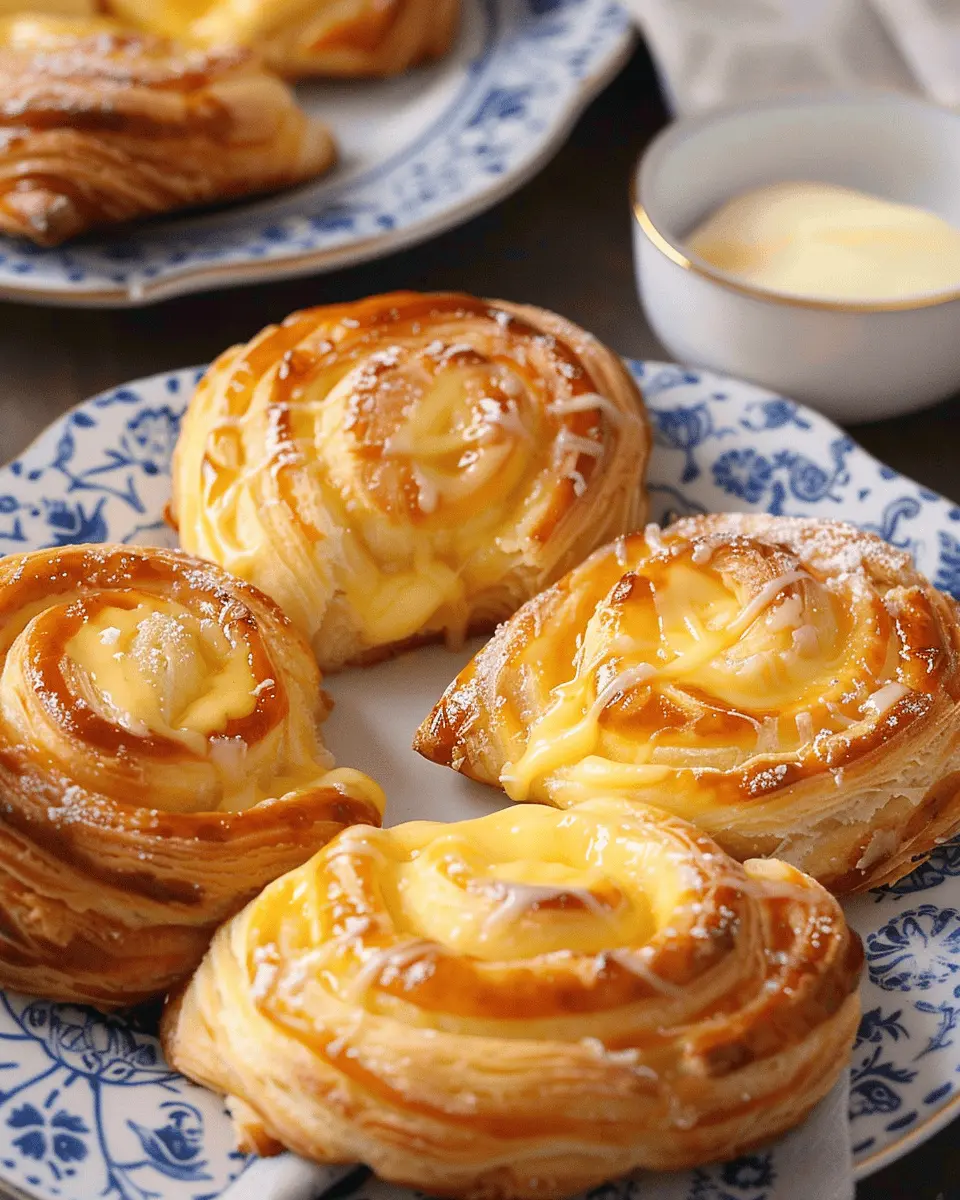
As they bake, your kitchen will fill with a heavenly aroma that’s bound to entice anyone nearby. Once they’re out of the oven, let them cool for a few minutes before diving in.
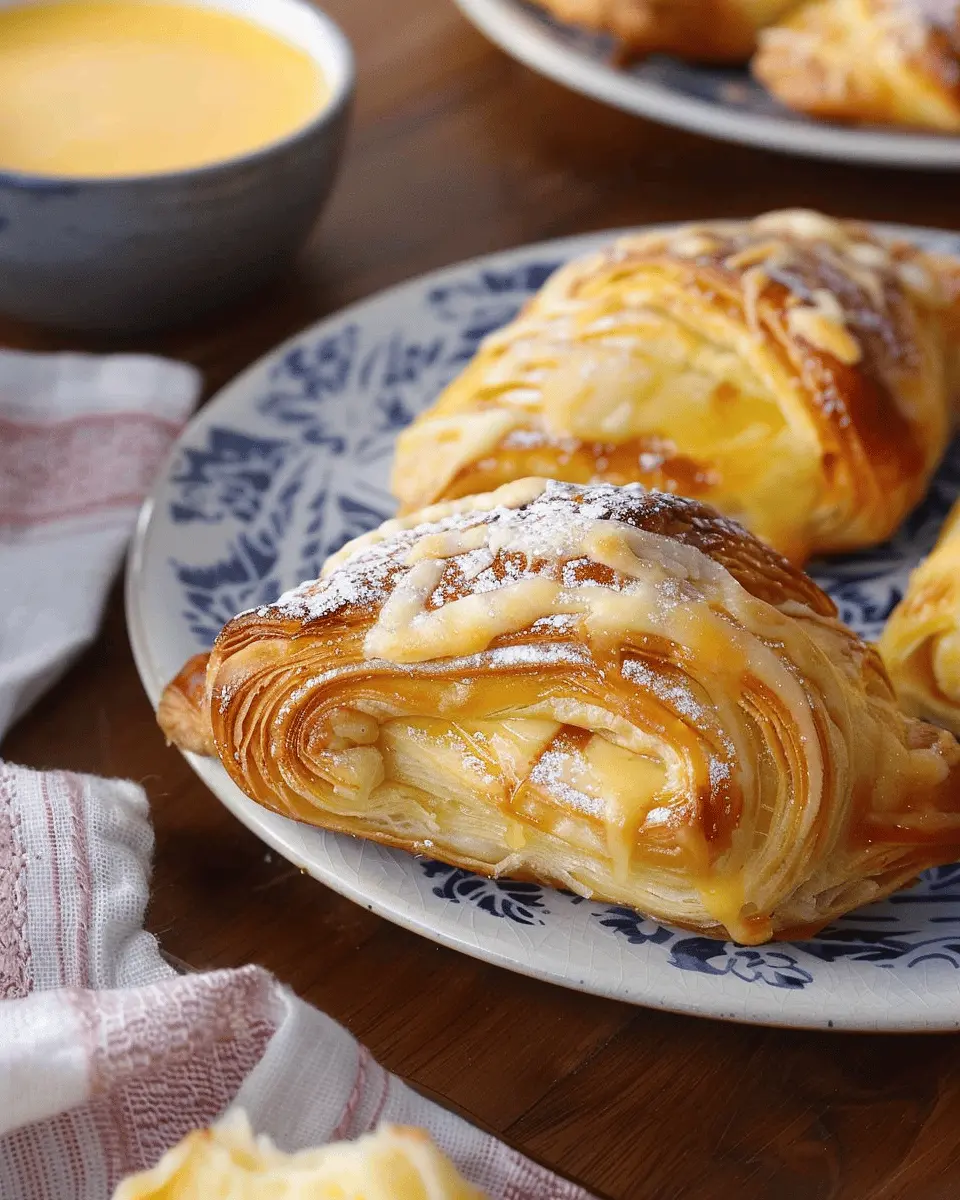
Now that you’ve perfected this cheese danish recipe, it’s time to indulge in the fluffy layers and the creamy filling. Pair your fresh-baked danish with a cup of coffee or herbal tea, and enjoy a moment of pure bliss. Happy baking!

Variations on Cheese Danish
When it comes to exploring cheese Danish, your creativity can take the lead! The classic recipe is fantastic on its own, but why not try some delicious variations to impress your friends or enhance your brunch menu?
Fruit-filled Cheese Danish
One of the most delightful twists on a traditional cheese Danish features a burst of fruity goodness. Imagine biting into flaky pastry, revealing a warm filling infused with your favorite fruits! Here are some popular choices:
- Berries: Blueberries, raspberries, or strawberries add a sweet-tart balance that pairs wonderfully with cream cheese.
- Peach or Apricot: These fruits contribute a lovely softness and a hint of natural sweetness.
- Apple Cinnamon: A classic combination that evokes cozy autumn vibes, mixing chunks of apple with cinnamon and sugar brings warmth to each bite.
To create these fruit-filled variations, simply drop a spoonful of your prepared fruit mixture on top of the cheese filling before folding or rolling the pastry.
Savory Cheese Danish with Herbs
For a more adventurous take, consider crafting a savory cheese Danish using fresh herbs and flavorful ingredients. This option is perfect for a chic appetizer or a delightful snack. Here’s how you can make it:
- Herbs Galore: Blend in herbs like dill, chives, or rosemary into the cream cheese mixture. Each herb adds a unique flavor profile.
- Protein Boost: Add fillings like Turkey Bacon or Chicken Ham for a protein-packed treat that’s sure to satisfy.
Savory cheese Danishes are versatile; you can easily experiment with any leftover ingredients in your fridge! Explore Taste of Home or The Kitchn for additional inspiration.
With these variations, you’ll never run out of ideas for a delicious cheese Danish. Try them all and discover your personal favorites!
Cooking tips for Cheese Danish
Creating the perfect cheese danish is all about the details. Follow these tips to elevate your baking game.
How to ensure flaky pastry
The cornerstone of a great cheese danish lies in its flaky pastry. Here’s how to nail it:
- Use cold ingredients: Start with cold butter and chilled water. This helps create those delicate layers.
- Don’t overwork the dough: Mix until just combined to keep the pastry tender.
- Rest the dough: Give it time to chill in the fridge. This relaxes the gluten, ensuring a flaky texture when baked.
If you’re eager to dive deeper into pastry-making techniques, check out this comprehensive guide from The Kitchn.
Tips for achieving the perfect glaze
A shiny, golden glaze takes your cheese danish from good to great. Here’s how to achieve it:
- Egg wash is key: Brush the pastry with an egg wash made of beaten egg and milk before baking. This creates a rich, golden color.
- Glaze while warm: After baking, drizzle a simple glaze (powdered sugar mixed with a splash of milk or lemon juice) over the danish while it’s still warm for a glossy finish.
By incorporating these tips into your baking, you’ll create a cheese danish that’s not only visually stunning but also deliciously satisfying!
Serving suggestions for Cheese Danish
Best accompaniments for a delightful breakfast
Start your day on a high note by enjoying your Cheese Danish with a variety of delightful accompaniments. Pair it with:
- Fresh fruit: Think juicy berries, slices of citrus, or even a banana. The natural sweetness of fruit contrasts beautifully with the creamy cheese filling.
- Turkey bacon: A crispy side of turkey bacon adds a savory touch to your breakfast, making it a well-rounded meal.
- Greek yogurt: A dollop of plain or honey-infused Greek yogurt brings a tangy and creamy texture that complements the Cheese Danish perfectly.
For a more satisfying drink, why not try a refreshing herbal tea or a rich cup of coffee? Both will elevate your breakfast experience.
Creative ways to enjoy Cheese Danish as a dessert
Don’t let the Cheese Danish be just for breakfast! Consider these fun dessert ideas:
- Topping options: Drizzle chocolate or caramel sauce over the pastry for an indulgent treat. A sprinkle of powdered sugar or a dash of cinnamon can add an extra layer of flavor.
- Ice cream sandwich: Place a couple of Cheese Danishes with some vanilla bean ice cream in between for a delicious spin on the classic ice cream sandwich.
Your palate will thank you for the creative twists you explore with this versatile pastry! For more dessert inspiration, check out this article from Food Network.
Time details for Cheese Danish
Preparation time
Creating a delightful cheese danish starts with a bit of prep! Expect to spend about 15 minutes gathering your ingredients and preparing the dough. If you’re using store-bought puff pastry, this step becomes even quicker.
Baking time
Once your pastries are ready, pop them in the oven for about 25 minutes. Keep an eye on them to ensure they turn that lovely golden brown that’s simply irresistible.
Total time
In total, you’re looking at around 40 minutes from start to finish. Isn’t it amazing how quickly you can whip up such a delicious treat? Whether it’s for breakfast or an afternoon pick-me-up, you’ll surely impress your friends and family with these homemade cheese danishes.
For further inspiration on baking times and techniques, check out this baking guide that dives deeper into achieving perfect pastries every time!
Nutritional Information for Cheese Danish
When indulging in a delicious Cheese Danish, it’s good to know what you’re savoring. Here’s a quick breakdown of the nutritional aspects:
Calories
A typical cheese danish contains around 250-350 calories, depending on the size and the ingredients used. Enjoying this delightful pastry as an occasional treat can fit nicely into your overall caloric intake.
Protein
In terms of protein, a cheese danish usually offers about 6-8 grams. While it won’t make a meal on its own, it’s a pleasant addition to your breakfast or afternoon snack.
Sugar and Fat Content
Expect around 10-15 grams of sugar and 12-20 grams of fat per serving. Opting for lighter versions can reduce these numbers without sacrificing taste. If you’re looking to balance your diet, consider pairing your cheese danish with a side of fresh fruit or greek yogurt for added nutrients (check out Nutritional Guidelines for more insights).
Enjoy your next cheese danish mindfully, relishing the flavors while keeping track of your nutritional goals!
FAQs about Cheese Danish
Understanding the ins and outs of making a delicious cheese danish can elevate your baking game. Here are some frequently asked questions that might help clear up any confusion!
Can I use low-fat cream cheese for this recipe?
Absolutely! Using low-fat cream cheese in your cheese danish will work just fine. However, keep in mind that the texture and flavor might be slightly different from using full-fat cream cheese. If you’re aiming for that rich and creamy experience, full-fat is ideal. But if you’re looking to cut some calories without sacrificing too much flavor, go for it! Many bakers have reported success with low-fat versions, so experiment and see what suits your taste best.
How can I store leftover Cheese Danish?
If you find yourself with leftover cheese danish, don’t worry! They can be stored easily. Simply place the danishes in an airtight container and keep them in the refrigerator for up to 3 days. For longer storage, you can wrap individual pieces in plastic wrap and freeze them for up to a month. Just make sure to let them cool completely before storing. For more tips, check out this detailed guide on pastry storage.
What’s the best way to reheat Cheese Danish?
Reheating your cheese danish can be done in several ways, but using the oven is preferred for optimal texture. Preheat your oven to 350°F and place the danish on a baking sheet for about 10-15 minutes until warmed through. If you’re short on time, a microwave works too—just be sure to cover it to prevent drying out, and heat in 10-second intervals until warm. Enjoy that melty goodness!
These tips should make your cheese danish experience even more enjoyable. Happy baking!
Conclusion on Cheese Danish
In wrapping up our delightful journey into the world of cheese danish, it’s clear that this pastry is a true treat for any occasion. Whether you’re enjoying it with a warm cup of coffee in the morning or as an afternoon snack, the balance of flaky pastry and creamy cheese filling is hard to resist.
If you’re ready to impress friends at your next gathering, consider making a batch. Experimenting with fillings like fruit preserves or even savory options can take your cheese danish to new heights. Dive deeper into pastry cooking with resources like King Arthur Baking or Serious Eats for tips and tricks. Enjoy every bite!
PrintCheese Danish: The Easy Indulgence Your Mornings Crave

Indulge in the delightful taste of homemade Cheese Danish, perfect for a comforting morning treat.
- Prep Time: 20 minutes
- Cook Time: 20 minutes
- Total Time: 40 minutes
- Yield: 8 servings 1x
- Category: Breakfast
- Method: Baking
- Cuisine: American
- Diet: Vegetarian
Ingredients
- 1 package puff pastry
- 8 ounces cream cheese
- 1/2 cup powdered sugar
- 1 teaspoon vanilla extract
- 1 egg
- 1 tablespoon milk
Instructions
- Preheat your oven to 400°F (200°C).
- Roll out the puff pastry and cut into squares.
- In a bowl, mix together cream cheese, powdered sugar, and vanilla extract until smooth.
- Place a spoonful of the cheese mixture in the center of each pastry square.
- Fold the corners of the pastry over the filling and press to seal.
- In a separate bowl, whisk together the egg and milk.
- Brush the egg wash over each sealed pastry.
- Bake for 15-20 minutes or until golden brown.
- Let cool before serving.
Notes
- For extra flavor, add lemon zest to the cream cheese filling.
- Serve warm for the best experience.
Nutrition
- Serving Size: 1 Danish
- Calories: 250
- Sugar: 10g
- Sodium: 200mg
- Fat: 15g
- Saturated Fat: 8g
- Unsaturated Fat: 6g
- Trans Fat: 0g
- Carbohydrates: 25g
- Fiber: 1g
- Protein: 4g
- Cholesterol: 35mg
Keywords: Cheese Danish, pastry, breakfast


