Outline for Indulge in Brownie Refrigerator Cake
Indulging in a deliciously rich and satisfying brownie refrigerator cake is one of the simplest pleasures in life, isn’t it? The best part? You don’t need to spend hours in the kitchen to whip up this scrumptious treat! Whether you’re gearing up for a casual get-together with friends or simply pampering yourself on a cozy night in, this no-bake dessert is sure to impress. Let’s dive into the delightful world of crafting this exquisite cake step by step!
Why Choose a No-Bake Dessert?
No-bake desserts like this brownie refrigerator cake offer a unique magic. They require minimal preparation and allow you to maintain that delightful, soft texture that baked desserts can sometimes lack. Plus, you’re saving time and energy, which we can all appreciate, right? Instead of heating up your oven on a hot summer day, use your refrigerator to create a delicious, chilled confection.
Essential Ingredients for Your Brownie Refrigerator Cake
To create this indulgent cake, you’ll need a handful of simple yet flavorful ingredients. Here’s what to gather:
- Brownies: Choose between homemade or store-bought, depending on your time constraints.
- Cream Cheese: This will provide an amazing creaminess that pairs beautifully with the brownie and enriches the overall flavor.
- Heavy Cream: Whipping this up transforms your cake into an airy delight.
- Confectioners’ Sugar: For added sweetness and smooth texture.
- Vanilla Extract: A hint of vanilla enhances the overall flavor profile.
- Chocolate Sauce: For drizzling on top — because why not add a little extra decadence?
Preparing the Brownie Base
Creating the brownie layer is undoubtedly one of the exciting parts of making a brownie refrigerator cake. Follow these steps:
-
Choose Your Brownies: If you’re going homemade, consider checking out this simple brownie recipe for the perfect balance of fudgy and cakey texture.
-
Layering:
- Cut your brownies into even squares. Try to make them a consistent size so that each piece holds together well.
- Place half of the brownie squares in the bottom of your prepared dish. This will serve as the sturdy base of your cake.
The Creamy Filling
Ah, the filling! Here’s where things get really dreamy. The combination of cream cheese, heavy cream, and sugar creates a luscious mixture that perfectly complements your brownie base. Here’s how to achieve that:
- Beat the Cream Cheese: Start by softening your cream cheese to room temperature. This allows for smoother blending.
- Whip the Heavy Cream: In another bowl, whip the heavy cream until soft peaks form. This gives the filling its signature lightness.
- Fold Together: Gently fold the whipped cream into the cream cheese mixture, being careful not to lose that airiness.
Assembling the Cake
Now it’s time to indulge in brownie refrigerator cake assembly! Here’s how to layer everything together:
-
Spread the Creamy Mixture: Evenly spread half of your cream filling over the brownie base.
-
Repeat: Add the remaining brownie squares and top with the rest of your cream mixture.
-
Chill Time: Don’t forget about the importance of chilling! Cover your cake and let it set in the refrigerator for at least four hours, or overnight if you can wait that long. The longer it chills, the better it will set!
Drizzling with Chocolate Sauce
Once your cake is perfectly chilled and ready to impress, consider giving it a visual pop with a drizzle of chocolate sauce. Whether you create a simple homemade sauce or use a store-bought variety, it adds that extra indulgence that everyone loves. Just the thought of that velvety, rich sauce cascading down the sides makes your tastebuds tingle, doesn’t it?
Serving and Enjoying the Cake
Now comes the best part: serving your beautiful brownie refrigerator cake.
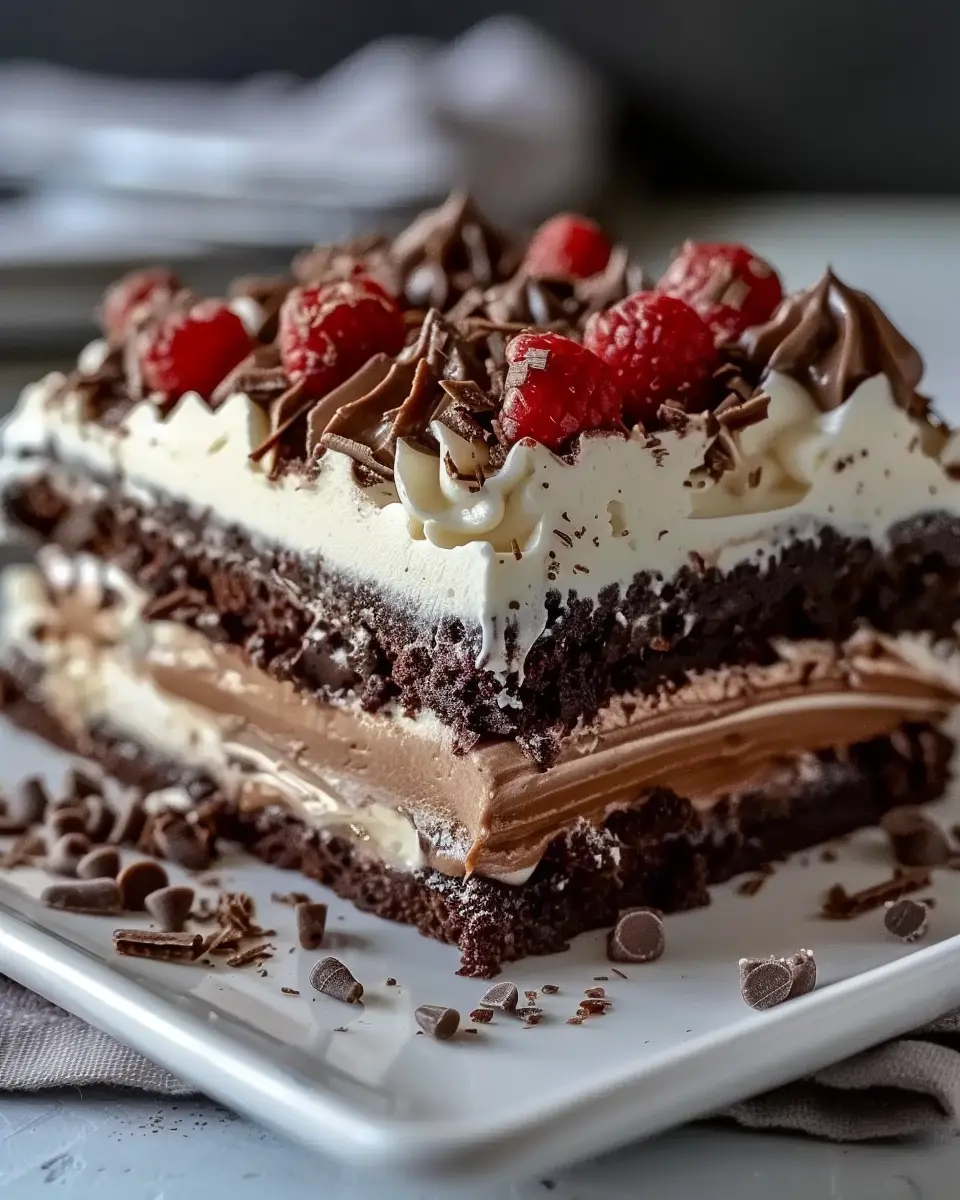
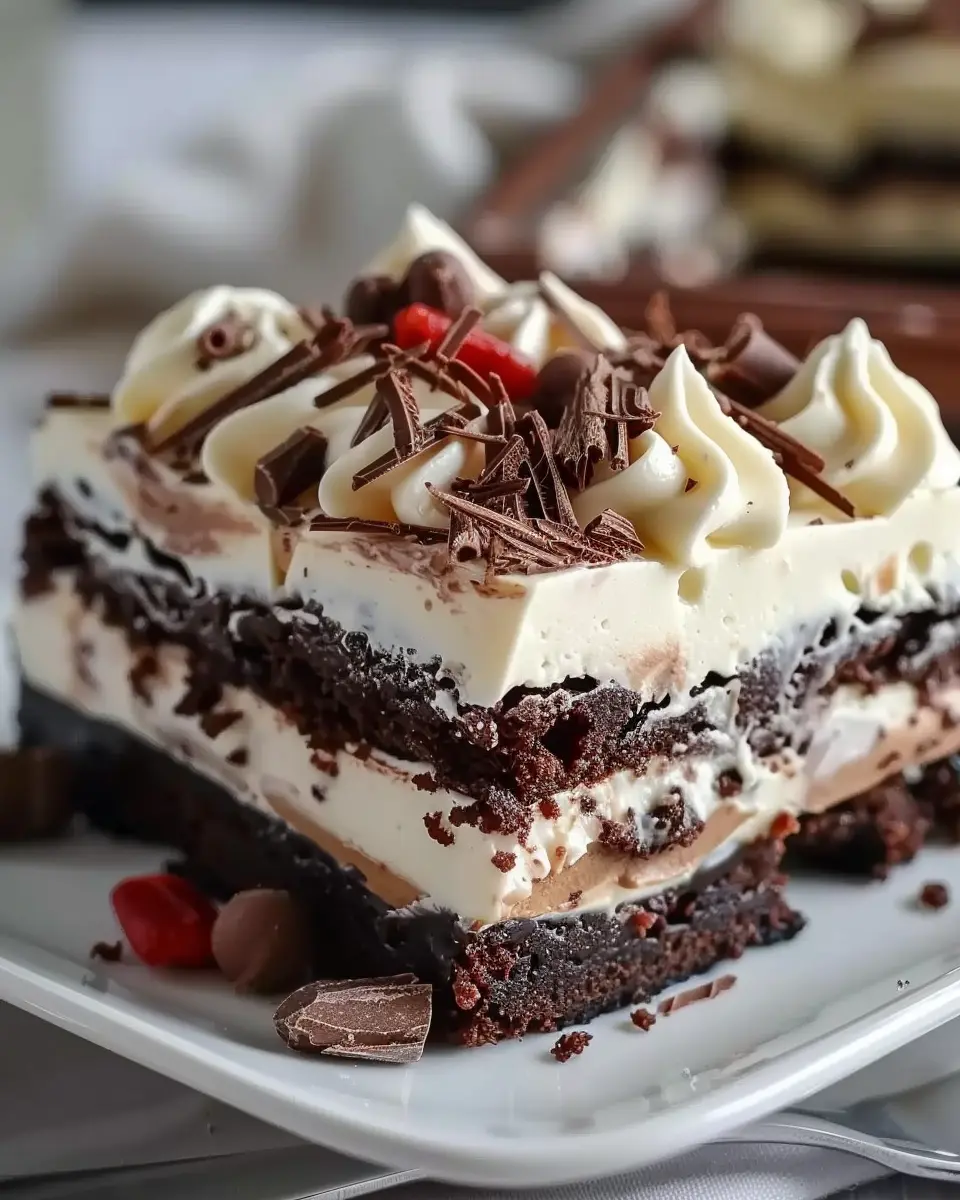
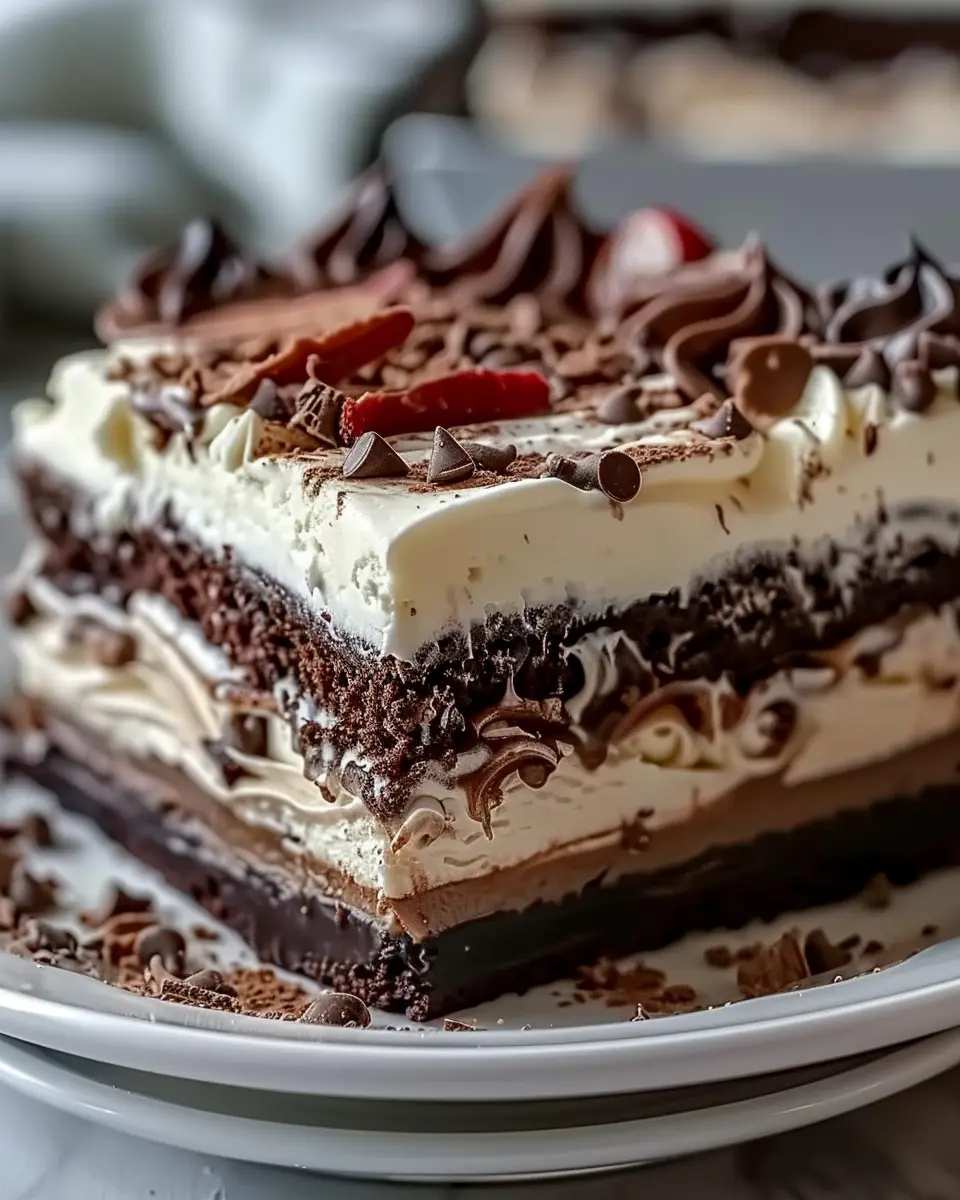
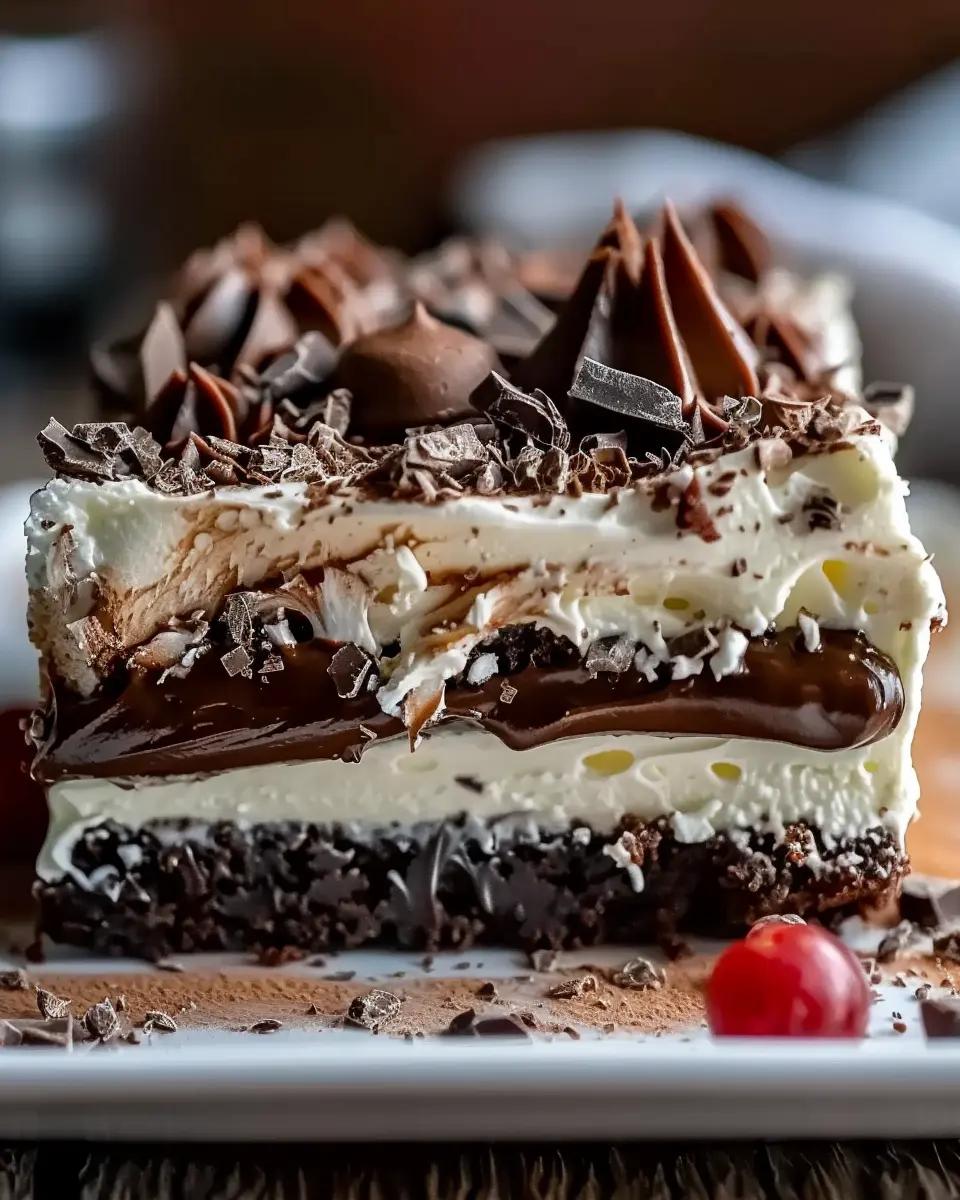
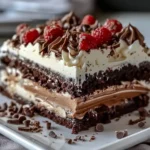
- Garnish: You can either leave it as is or sprinkle it with nuts, chocolate shavings, or even fresh berries for a touch of color.
- Slice and Serve: I recommend using a warm knife for cutting through the layers smoothly. The first slice might be a bit messy, but that adds to the homemade charm, don’t you think?
Tips for Personalizing Your Cake
What’s great about this no-bake creation is its versatility. Here are some ideas to customize your brownie refrigerator cake:
- Nut Additions: Fold in some chopped nuts for an added crunch.
- Flavor Variations: Consider substituting the vanilla extract with mint or almond extract for a fun twist.
- Fruit Layer: Add a layer of raspberry or strawberry puree between the brownie and cream layers for a fruity kick.
Enjoy with Your Favorite Beverage
When you serve your cake, consider pairing it with a refreshing beverage. A glass of cold milk, a fizzy soda, or even a fruity iced tea can complement the richness of your dessert beautifully.
Storing Leftovers
If you find yourself with leftovers (though I wouldn’t blame you if you devoured it all in one sitting), be sure to store them properly. Keep your brownie refrigerator cake covered in the fridge, and it should stay fresh for about two to three days.
Final Thoughts: Your New Go-To Dessert
By now, I hope you’re convinced that you need to indulge in brownie refrigerator cake for your next gathering or even just a cozy night at home. With its rich layers, creamy texture, and the ease of preparation, it has all the hallmarks of a dessert that will quickly become a staple in your household.
So, what are you waiting for? Gather your ingredients, and set aside some time to create this delightful masterpiece! You’ll be so glad you did—and your friends and family will thank you for the delicious treat!
For a more extensive range of no-bake recipes, be sure to check out BBC Good Food’s No-Bake Collection. Happy dessert-making!
Introduction to Indulging in Brownie Refrigerator Cake
A delicious twist on traditional desserts
Desserts have a unique way of bringing comfort and joy into our lives, especially in a fast-paced world. If you’re looking for something that captures the spirit of your childhood but adds a modern flair, indulge in brownie refrigerator cake. This delightful treat combines the rich chocolatey goodness of brownies with the creamy allure of a no-bake cake, making it the perfect dessert for any occasion. Imagine sinking your fork into a chilled slice, revealing layers of brownie bliss and velvety frosting—the ultimate combination!
Why no-bake desserts resonate with young professionals
In today’s busy lifestyle, many young professionals juggle demanding careers with personal lives and social commitments. As a result, quick and easy meal prep has become a lifesaver. According to a recent survey from the Pew Research Center, more than 60% of millennials listed convenience as a top priority when it came to cooking. No-bake desserts, like our brownie refrigerator cake, fit this need perfectly. With minimal preparation and no need for baking, you can whip up this scrumptious cake in no time. Plus, a no-bake recipe means fewer dishes to wash—who doesn’t appreciate that!
The joy of homemade treats over fast food
While fast food and store-bought desserts may tempt you with their convenience, there’s something uniquely satisfying about making a treat from scratch. Homemade desserts allow you to customize flavors and textures, ensuring that you’re indulging in something truly special. Moreover, you know exactly what goes into your creations—no preservatives or mystery ingredients. This sense of control can add an element of joy and pride to your culinary efforts.
So, the next time you’re looking for a quick yet indulgent dessert, remember that you can take a moment to indulge in brownie refrigerator cake. Your tastebuds (and your friends) will thank you!
Feel free to explore tips on enhancing your no-bake recipes at Serious Eats and check out dessert trends at Food52 for more inspiration. Making homemade treats has never been this satisfying or accessible!
Ingredients for Brownie Refrigerator Cake
Creating a delightful Brownie Refrigerator Cake is a breeze when you gather the right ingredients. Let’s break down what you’ll need!
Essential ingredients for the brownie base
For that rich fudgy foundation, you’ll want:
- 1 cup of unsweetened cocoa powder – it’s all about those deep chocolate tones.
- 1 cup of granulated sugar – sweetness is key.
- 1 cup of all-purpose flour – this gives your brownies structure.
- 1/2 cup of unsalted butter, melted – the secret to moistness.
- 3 large eggs – they help bind everything.
Creamy layer essentials
This layer adds a dreamy texture:
- 8 oz cream cheese, softened – for a rich, tangy flavor.
- 1 cup powdered sugar – because who can resist some sweetness?
- 1 cup whipped heavy cream – lightens up the mix.
Pudding layer ingredients
Bring in some creaminess with:
- 2 cups milk – the base for your pudding.
- 1 package instant chocolate pudding mix – the magic ingredient that makes everything luscious.
Optional toppings to personalize your dessert
Make it your own with:
- Chocolate shavings or chips – for that extra chocolate kick.
- Fresh fruits like strawberries or raspberries – a pop of freshness.
- Nuts – adding a crunch element.
Now that you’ve got the ingredients for your brownie refrigerator cake, you’re all set to indulge in brownie refrigerator cake goodness! Don’t forget to check out more tips on choosing high-quality ingredients from resources like thekitchn.com to elevate your dessert game.
Step-by-step Preparation of Brownie Refrigerator Cake
Ready to indulge in brownie refrigerator cake? This no-bake treat is an effortless yet impressive dessert that will leave your guests raving. With a rich brownie base, creamy layer, and luscious pudding topping, it’s an experience that’s almost too good to be true. Let’s dive into the prep process!
Making the brownie base
Creating the foundation of your cake is where the magic begins.
Ingredients:
- 1 box of brownie mix (plus ingredients listed on the package)
- Cooking spray
Instructions:
- Preheat your oven as per the brownie mix package instructions.
- Grease a 9×9 inch baking pan with cooking spray. This will ensure your brownies release easily, making assembly a breeze.
- Prepare the brownie mix according to the instructions, mixing in any additional ingredients like nuts or chocolate chunks if you desire.
- Pour the brownie batter into the pan and bake until a toothpick inserted comes out fudgy yet not wet (check the package for specific time—usually around 20-25 minutes).
- Once baked, let the brownies cool completely before you cut them into squares. This cooling time is crucial; it allows the brownies to set, making them easier to layer later.
Always remember: A perfect brownie base sets the stage for a delightful dessert.
Crafting the creamy layer
Next up is the creamy layer that adds a luxurious twist to your cake.
Ingredients:
- 1 package (8 oz) cream cheese, softened
- 1 cup powdered sugar
- 1 cup whipped topping
Instructions:
- Beat the softened cream cheese in a mixing bowl until it’s smooth and creamy.
- Gradually add the powdered sugar, continuing to mix until fully incorporated. This adds sweetness and balances the tangy cream cheese.
- Fold in the whipped topping; this will give your layer a light, airy feel.
- Spread this creamy mixture evenly over the cooled brownie base. Make sure to reach every corner for the best flavor in every bite!
This layer adds depth to your cake, creating that delightful contrast in textures.
Preparing the pudding layer
Let’s add some serious flavor with the pudding layer.
Ingredients:
- 2 packages (3.4 oz each) instant chocolate pudding mix
- 4 cups milk (any kind you prefer)
Instructions:
- In a bowl, whisk together the instant pudding mix and milk. Keep whisking until the mixture thickens, which usually takes about 2 minutes.
- Once thickened, pour the pudding over the cream layer, smoothing the top with a spatula for an even finish.
This layer is the star of the show, providing that rich chocolate flavor we all crave.
Assembling the cake with the whipped topping
With all your layers prepared, it’s time to assemble your masterpiece.
- Take your already layered brownie and creamy layer, then carefully spread the prepared pudding on top.
- Finish with a generous topping of whipped topping, smoothing it out once again.
- Feel free to garnish with chocolate shavings, crushed nuts, or even a drizzle of chocolate syrup for that extra flair.
Your cake is shaping up beautifully and is almost ready to be enjoyed!
Chilling to perfection
The final touch? Chilling your cake to let those flavors meld together.
- Cover your assembled masterpiece with plastic wrap and refrigerate for at least 4 hours, or ideally overnight. This waiting period is essential for all the layers to fuse together, creating an incredible flavor profile.
- When you’re ready to serve, simply cut into squares, plate, and indulge!
The beauty of a brownie refrigerator cake is that it can be made ahead of time, making it a perfect choice for gatherings or a cozy night in. Each bite is a delicious reminder of why we love no-bake treats.
For a visual guide, check out this easy brownie guide to enhance your baking skills. Happy baking, and enjoy every delicious bite!
Variations on the Brownie Refrigerator Cake
When you think about how to indulge in brownie refrigerator cake, the possibilities are endless! Let’s explore some delightful variations that can elevate this no-bake treat to the next level.
Gluten-Free Brownie Options
For those looking to keep things gluten-free, you don’t have to miss out on this delicious dessert. Opt for gluten-free brownie mixes available at your local grocery store, or try making your own with almond flour or coconut flour. Not only do these alternatives provide a similar texture and flavor, but they also cater to the dietary needs of your friends and family. Be sure to check reliable sources like Gluten-Free Girl for tips on baking gluten-free.
Different Pudding Flavors to Try
While chocolate pudding is a classic choice, feel free to get experimental! Here are a few flavors that might surprise you:
- Vanilla: A simple and creamy base that lets the brownie shine.
- Caramel: Adds a rich sweetness that pairs wonderfully with chocolate.
- Peanut Butter: For a flavorful twist, blend some peanut butter into your pudding mix for a creamy, nutty layer.
These variations not only provide diverse flavors but also cater to differing taste preferences.
Seasonal Toppings for a Fresh Twist
Seasonal ingredients can add a fresh flair to your brownie refrigerator cake. Consider topping your dessert with:
- Fresh Berries: Strawberries, raspberries, or blueberries make vibrant additions during warmer months.
- Pumpkin Spice: In the fall, a sprinkle of pumpkin spice on top can evoke autumn vibes.
- Coconut Flakes: Perfect for summer, toasted coconut flakes add a tropical feel.
These toppings not only enhance flavor but also create a visually appealing dessert. Experimenting with seasonal toppings is a fun way to change up your brownie refrigerator cake each time you serve it!
Tips and Notes for Successful Brownie Refrigerator Cake
Importance of Allowing Brownies to Cool
One critical step in making a delightful brownie refrigerator cake is to let your brownies cool completely. This ensures they set properly and won’t crumble when you layer your cake. Cooling helps the flavors meld together beautifully, creating that rich, fudgy texture we all crave. Don’t rush; patience pays off here!
Personalizing the Dessert with Toppings
Feel free to get creative! One of the joys of this no-bake treat is how versatile it can be. Whether you prefer crushed nuts, fresh fruit, or a drizzle of caramel sauce, personalizing your cake turns it into a masterpiece. Think about seasonal flavors or favorite treats to add that special touch. Explore ideas on Food Network’s dessert section for more inspiration.
Storage Tips for Leftovers
If you find yourself with any leftovers (which is rare!), store your brownie refrigerator cake in an airtight container in the fridge. This allows the flavors to enhance over time, so don’t hesitate to enjoy it again the next day! It can last up to a week, but trust me—you’ll likely finish it much sooner.
Serving Suggestions for Brownie Refrigerator Cake
Creative Plating Ideas
When it’s time to indulge in brownie refrigerator cake, presentation matters! Start by slicing the cake into neat squares. You can elevate the look by stacking two pieces and drizzling chocolate or caramel sauce over the top. A sprinkle of crushed nuts or powdered sugar adds the perfect finishing touch. Consider using fun shaped plates or serving dishes to add a playful element.
Pairing with Non-Alcoholic Beverages
To complement the rich flavors, serve your cake with a refreshing glass of iced tea or sparkling lemonade. These beverages balance the brownie’s sweetness and create a delightful experience. For something cozy, a warm cup of chai latte works wonderfully as well.
Best Occasions to Serve This Dessert
Whether it’s a casual weekend gathering, a birthday party, or even a cozy movie night at home, this no-bake treat fits seamlessly into many occasions. Its easy preparation makes it perfect for spontaneous celebrations. You could also whip it up for a potluck; a crowd-pleaser, indulge in brownie refrigerator cake to create memorable moments shared with friends.
Time Breakdown for Brownie Refrigerator Cake
Preparation Time
Getting started on this decadent treat is a breeze! You’ll only need about 15 minutes to gather your ingredients and whip everything together. If you’re multitasking or have a cozy kitchen setup, this part will fly by.
Baking Time
Now, you might be surprised to learn that the beauty of this Brownie Refrigerator Cake is that it doesn’t require any baking! Instead, you’ll simply prepare your brownie base and layer it with luxurious filling—easy and stress-free.
Chilling and Total Time
After prepping, the key step is the chilling phase, which takes around 4 to 6 hours. For the best texture and flavor, aim for an overnight chill. So, total time from prep to enjoying this incredible no-bake dessert? About 4 to 6 hours, but trust me, a little patience goes a long way when you indulge in brownie refrigerator cake!
For more no-bake dessert ideas, check out this great resource on no-bake recipes here. And if you’re curious about storing your cake, check out these tips on how to keep treats fresh here.
Nutritional Facts for Brownie Refrigerator Cake
Calories per serving
Indulging in brownie refrigerator cake is a delightful experience, and knowing the caloric content can help you enjoy it guilt-free. Each generous slice typically contains about 200-250 calories, making it a satisfying yet manageable treat.
Key nutritional highlights
This no-bake dessert isn’t just a feast for your taste buds; it also packs some nutritional benefits:
- Fats: While it does contain fats from the chocolate and cream, these can be balanced with healthier options if you choose.
- Carbohydrates: The cake is rich in carbs, providing a quick source of energy.
- Proteins: Depending on your ingredients, you might sneak in some protein, especially if you opt for Greek yogurt or other high-protein elements.
Considerations for dietary restrictions
Worried about dietary needs? Don’t sacrifice flavor. You can easily modify the recipe for various preferences:
- Gluten-free: Use almond or oat flour.
- Vegan options: Swap the dairy ingredients for plant-based alternatives like coconut cream.
- Sugar concerns: Try substituting refined sugar with natural sweeteners like honey or maple syrup.
Embrace the deliciousness while keeping your nutritional goals in mind! For more tips on healthy baking, check out this guide on healthy dessert alternatives.
FAQs about Brownie Refrigerator Cake
Can I use a box mix for the brownies?
Absolutely! If you’re short on time or just want to keep things simple, using a box mix for the brownies is a fantastic option. Many great brands out there offer delicious mixes, and they can save you some prep time. Just follow the package instructions, let the brownies cool completely, and then proceed with the layering for your indulge in brownie refrigerator cake.
How long can the cake be stored in the refrigerator?
Your delicious brownie refrigerator cake can be stored in the fridge for about 3 to 5 days. Just make sure to cover it well with plastic wrap or store it in an airtight container to preserve its moisture and flavor. The longer it sits, the more the flavors meld together, making it an even more delightful treat!
What if I don’t have pudding mix on hand?
No worries at all! If you find yourself without pudding mix, you can still create a creamy layer by using alternatives like whipped cream, Greek yogurt, or even cream cheese blended with some sugar and vanilla extract. These substitutes will take your indulge in brownie refrigerator cake to the next level while keeping it delightful and delicious. If you’re interested in DIY alternatives, consider checking resources on making your own pudding mix for an even fresher approach.
Feel free to get creative and customize your cake with your favorite ingredients or toppings! Do you have any other burning questions about this cake? Just drop them in the comments below!
Conclusion on Indulging in Brownie Refrigerator Cake
Recap of the Delight of Homemade Desserts
There’s something undeniably special about homemade desserts that elevates any gathering. This Brownie Refrigerator Cake is a prime example, melding rich chocolate flavors with a delightful creaminess. Not only is it easy to make, but it also offers the satisfaction of indulging in something made from scratch, tailored to your taste.
Encouragement to Try the Recipe
If you haven’t yet jumped on the bandwagon to indulge in brownie refrigerator cake, now’s your chance! Embrace the simplicity and deliciousness of this no-bake treat—it’s perfect for any occasion or just a cozy evening at home. You won’t regret it!
Invitation for Reader Feedback and Sharing Experiences
Have you tried making this cake? I’d love to hear your thoughts! Share your experiences or variations in the comments below. Connecting over our culinary creations is one of the joys of cooking, so don’t hold back. Let’s create a community of dessert lovers! For more delicious recipes and tips on home baking, check out resources like Bon Appétit and Serious Eats.
Remember, each bite of this cake holds the chance to create lasting memories!
PrintIndulge in Brownie Refrigerator Cake: The Best No-Bake Delight
Indulge in Brownie Refrigerator Cake: The Ultimate No-Bake Treat
- Prep Time: 20 minutes
- Cook Time: 0 minutes
- Total Time: 4 hours 20 minutes
- Yield: 12 servings 1x
- Category: Desserts
- Method: No-Bake
- Cuisine: American
- Diet: Vegetarian
Ingredients
- 1 cup graham cracker crumbs
- 3/4 cup unsweetened cocoa powder
- 1 cup powdered sugar
- 1/2 cup unsalted butter, melted
- 1 teaspoon vanilla extract
- 2 cups whipped topping
- 1/2 cup chocolate chips
Instructions
- In a large bowl, combine graham cracker crumbs, cocoa powder, and powdered sugar.
- Add melted butter and vanilla extract, mixing until well combined.
- Fold in the whipped topping and chocolate chips until evenly distributed.
- Press the mixture into a greased baking dish and refrigerate for at least 4 hours.
- Once set, cut into squares and serve chilled.
Notes
- For an extra touch, drizzle with chocolate sauce before serving.
- Serve with fresh berries for additional flavor.
Nutrition
- Serving Size: 1 square
- Calories: 250
- Sugar: 18g
- Sodium: 150mg
- Fat: 12g
- Saturated Fat: 7g
- Unsaturated Fat: 3g
- Trans Fat: 0g
- Carbohydrates: 35g
- Fiber: 2g
- Protein: 3g
- Cholesterol: 30mg
Keywords: brownie cake, no-bake dessert, refrigerator cake


