Introduction to Key Lime Pie Bars
The Sweet and Tangy Allure of Key Lime Pie Bars
Picture this: a sunny day, a gentle ocean breeze, and a slice of the iconic Key Lime Pie in hand. Now, imagine that same blissful experience concentrated into an easy-to-eat bar. Welcome to the delicious world of key lime pie bars! These delectable treats encapsulate everything you love about classic key lime pie but in a convenient and shareable dessert form.
So why are these key lime pie bars a hit among dessert lovers? For starters, they harmoniously balance the sweetness of graham cracker crust and the tanginess of fresh key lime juice. A recent survey showed that bright, citrusy flavors are increasingly popular among millennials, affirming our craving for lighter dessert options that pack a flavor punch. Utilizing fresh ingredients not only enhances taste but also brings a touch of nostalgia—a nod to sunny vacations and family gatherings.
These bars are incredibly versatile. Whether you’re hosting a summer barbecue, planning a potluck, or simply indulging in a weekend treat, key lime pie bars are sure to impress. They can be prepped ahead of time and served chilled, making them a perfect make-ahead dessert. Plus, they’re easy to customize! Add a dollop of whipped cream on top or sprinkle with shredded coconut for that extra flair.
Creating these sweet treats can be an adventure in your own kitchen. You’ll be surprised at how simple it is to whip up a batch. Ingredients like fresh lime juice, eggs, and sweetened condensed milk transform into a luscious filling that pairs beautifully with a buttery graham cracker crust. Just imagine: your friends and family savoring every bite as they bask in the delight of your homemade creation!
If you’re curious about crafting your own key lime pie bars, stick around for the full recipe, and let’s take a dive into the delightful world of these scrumptious delights! For more tips on elevating your baking game, check out Baking Basics for additional resources.
Ingredients for Key Lime Pie Bars
Creating delicious key lime pie bars starts with gathering the right ingredients. These bars are a delightful twist on the classic pie, and trust me, they won’t disappoint! Here’s a breakdown of what you’ll need.
Crust Ingredients
For the perfect crust, you will need:
- 1 cup graham cracker crumbs – This is the foundation of your bars.
- 1/4 cup granulated sugar – A little sweetness goes a long way.
- 1/2 cup unsalted butter, melted – This adds that rich, buttery flavor.
Filling Ingredients
The filling is where the magic happens! Grab these:
- 1 cup freshly squeezed lime juice – Fresh limes make all the difference.
- Zest of 2 limes – For that vibrant, zesty kick.
- 1 can (14 oz) sweetened condensed milk – This gives your filling that creamy texture.
- 3 large egg yolks – They provide structure and richness.
Whipped Cream Ingredients
Lastly, don’t skip the whipped cream toppings! You’ll need:
- 1 cup heavy whipping cream – For that luscious finish.
- 1/4 cup powdered sugar – Sweeten it just right.
- 1 tsp vanilla extract – Because vanilla makes everything better.
Not sure where to find fresh limes or high-quality graham crackers? Check out cooking supplies from Good Housekeeping for reliable sources. Happy baking!
Preparing Key Lime Pie Bars
If you’re craving a sweet treat that perfectly balances tangy and sweet flavors, look no further than these delightful key lime pie bars. The zesty filling paired with a crunchy crust makes for a dessert that’s as fun to make as it is to eat. Let’s dive right into the steps required to create this delicious dessert!
Preheat the oven and prepare the pan
Getting started, it’s essential to preheat your oven to 350°F (175°C). You want to create that perfect baking environment. While your oven warms up, take a moment to prepare your baking pan.
- Grab a 9×9 inch baking pan and line it with parchment paper, letting it hang over the edges. This will make it a breeze to lift the bars out once they’re cooled.
- A quick spray with non-stick cooking spray will prevent any sticking issues, ensuring your key lime pie bars come out perfectly.
Create the Biscoff cookie crust
Next up, we’re making the crust. Instead of the classic graham cracker crust, I like to use Biscoff cookies for a delicious twist. They add a hint of caramel and spice that pairs perfectly with key lime.
- Ingredients: You’ll need about 1 ½ cups of crushed Biscoff cookies, ¼ cup of granulated sugar, and ½ cup of unsalted melted butter.
- Process:
- In a medium bowl, combine the crushed cookies and sugar.
- Pour in the melted butter and mix until it resembles wet sand.
- Press the mixture evenly into the bottom of your prepared pan.
This crust will set beautifully and provide a sturdy base for your key lime pie bars.
Make the luscious key lime filling
Now, let’s whip up the filling. This is where the magic happens!
- Ingredients: You’ll need 1 cup of fresh key lime juice, 1 can (14 oz) of sweetened condensed milk, 3 large egg yolks, and the zest of 2 key limes.
- Process:
- In a medium bowl, whisk together the egg yolks and sweetened condensed milk until smooth.
- Stir in the key lime juice and zest, blending well.
This filling is not only tart and refreshing, but it’s also incredibly easy to prepare—perfect for those busy weekdays!
Assemble and bake the bars
With both components ready, it’s time to bring everything together:
- Pour the key lime filling over the crust in your baking pan.
- Bake for approximately 20 minutes, or until the filling is just set (a slight jiggle is okay).
- Allow it to cool in the pan for about 10 minutes, then transfer it to the refrigerator to cool further.
Baking is truly a science—a great study from the American Chemical Society dives into why balancing flavors improves your dessert, but don’t worry, I won’t bog you down with the details!
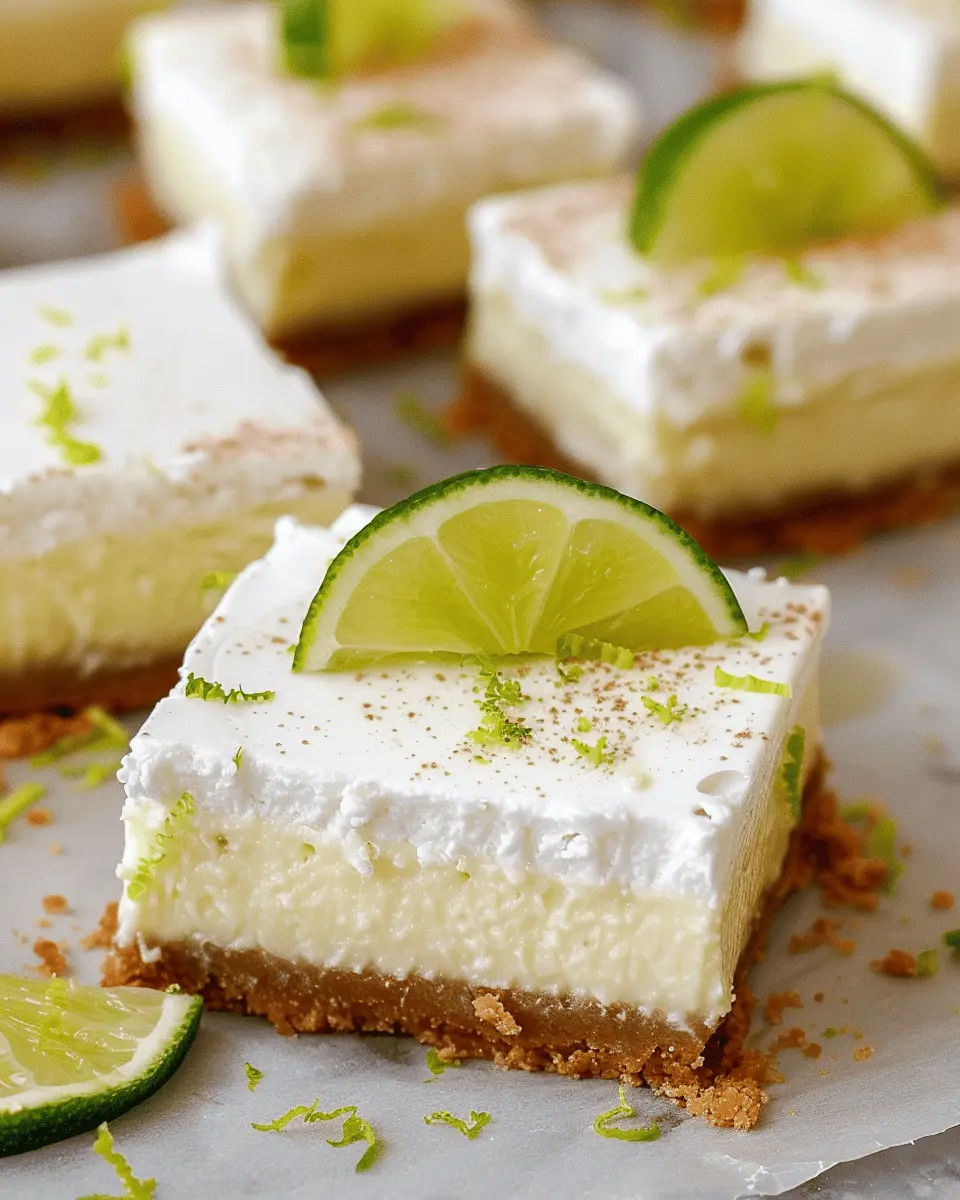
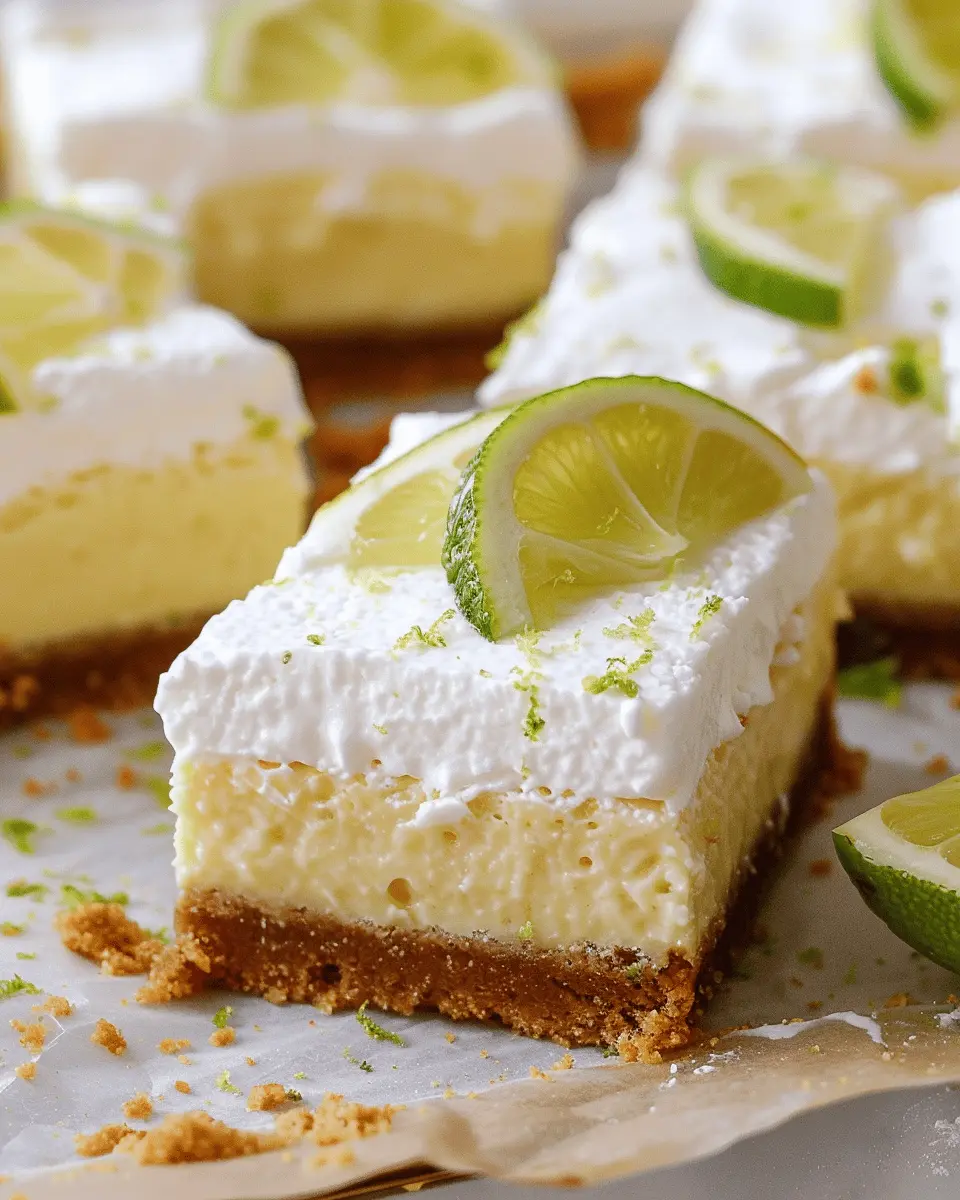
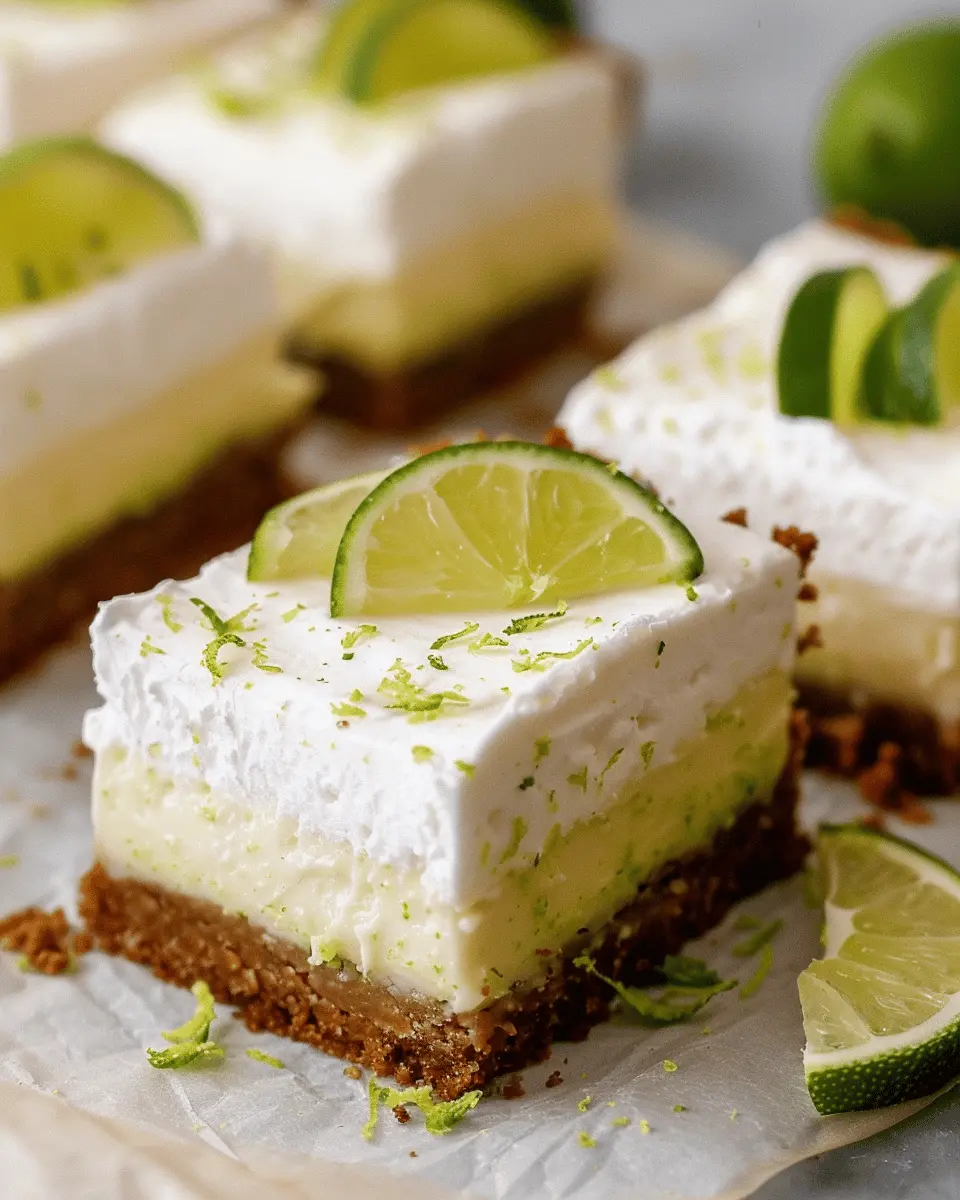
Chill and top with whipped cream
Once cooled completely, it’s finally time to enjoy your key lime pie bars!
- Chill in the fridge for at least a couple of hours to help the flavors meld and set beautifully.
- When you’re ready to serve, cut into squares and top with freshly whipped cream.
- For an extra touch, consider some lime zest or a sprinkle of graham cracker crumbs on top!
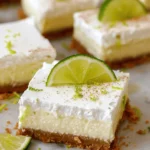
These bars are a visually appealing and mouthwatering delight, and trust me, they’ll be a hit whether you’re hosting friends or just treating yourself.
For more dessert recipes, be sure to check out Baker’s Journal for expert tips and sweet inspirations that suit your baking style. Now, roll up your sleeves and start baking; your taste buds will thank you!
Variations on Key Lime Pie Bars
When it comes to key lime pie bars, there’s plenty of room for creativity! These delightful treats can easily cater to various diets and flavor preferences. Whether you crave something tropical or need to accommodate dietary restrictions, you’ve got options.
Coconut Key Lime Pie Bars
If you’re a fan of the tropical vibe, try Coconut Key Lime Pie Bars. The creamy tang of the key lime blends beautifully with the sweetness of coconut. To make this variation, simply add a cup of shredded coconut to the crust mix and a hint of coconut extract to the filling. This not only enhances the texture but also offers a luscious flavor that transports you to a sun-soaked beach. Plus, topping the bars with toasted coconut flakes adds a satisfying crunch!
Gluten-free Key Lime Pie Bars
For those who are gluten-sensitive, you can whip up Gluten-free Key Lime Pie Bars effortlessly. Substitute the standard graham cracker crust with crushed gluten-free cookies or oats mixed with melted butter, ensuring everyone can enjoy these zesty delights. Not only do they taste amazing, but they also hold their shape beautifully, making them perfect for gatherings.
Vegan Key Lime Pie Bars
Want to make a plant-based version? Say hello to Vegan Key Lime Pie Bars. By replacing eggs and dairy with silken tofu or cashew cream, you can maintain the dreaminess of the traditional recipe while making it completely cruelty-free. The lime juice will still provide that zest, while a natural sweetener like maple syrup keeps everything balanced.
These variations of key lime pie bars keep things exciting and delicious while ensuring everyone can enjoy them! If you’re looking for more inspiration, check out Minimalist Baker for additional gluten-free and vegan ideas!
Baking notes for Key Lime Pie Bars
Tips for achieving a perfect crust
A great crust is essential for your key lime pie bars. Start with freshly crushed graham crackers, ideally mixed with a bit of sugar and melted butter. Make sure to pack the crust tightly into the pan—this helps it hold its shape when cut. A quick pre-bake for about 10 minutes at 350°F will help set the crust and prevent it from becoming soggy.
Importance of fresh ingredients
Using fresh ingredients, especially key limes, elevates the flavor of your bars. If you can find fresh key limes, they will give you that zesty punch that bottled juice just can’t replicate. Fresh eggs also help achieve a creamier filling. A combination of quality ingredients will truly make your key lime pie bars shine.
Storage tips for leftovers
If you’re lucky enough to have leftovers, store them in an airtight container in the refrigerator. They should keep well for up to three days. If you’re planning to make them ahead, consider freezing pieces. Wrap each bar tightly in plastic wrap and store in a freezer-safe container. Simply thaw in the fridge overnight before serving!
For more cooking tips, check out resources like Food Network or Serious Eats. Happy baking!
Serving suggestions for Key Lime Pie Bars
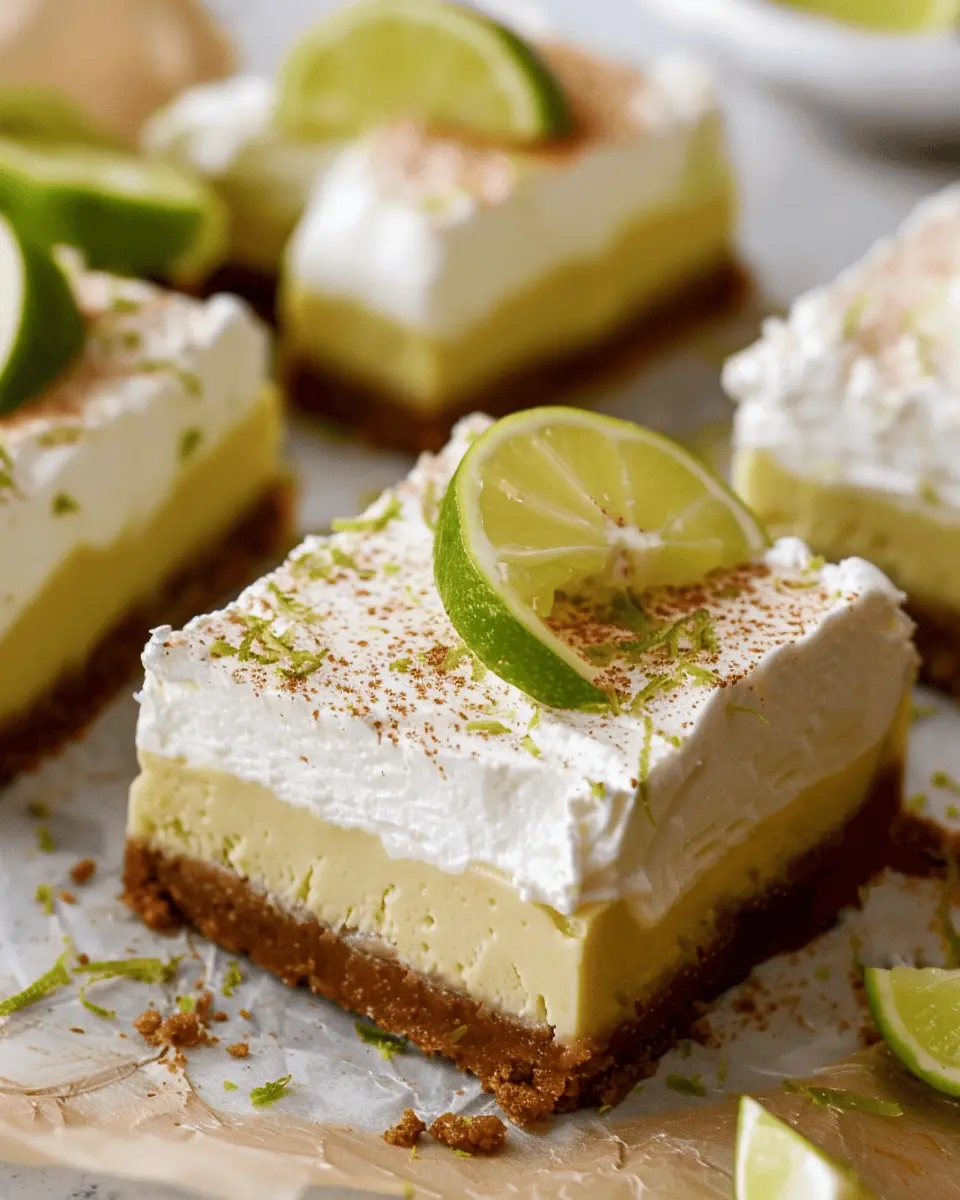
Garnishes to elevate your dessert
To truly make your key lime pie bars stand out, consider garnishing them with a dollop of freshly whipped cream. The lightness of the cream will beautifully contrast the tartness of the lime. You can take it a step further by zesting a bit of lime over the top for that vibrant pop of color and additional citrus aroma. Another delightful option is to sprinkle some crushed graham crackers, adding a satisfying crunch to every bite.
Ideal accompaniments to serve alongside
Pairing your key lime pie bars with complementary flavors can take your dessert experience to new heights. Here are a few suggestions:
- Fresh fruit: Serve with slices of ripe strawberries or a refreshing fruit salad for a burst of color and sweetness.
- Coconut sorbet: This light, tropical treat will enhance the lime’s zing and is perfect for balancing the creamy bars.
- Herbal tea: Opt for a refreshing mint or chamomile tea to cleanse the palate and provide a soothing finish to your meal.
For more serving ideas, check out this guide on dessert pairings. Embrace your creativity—experiment and tailor your serving suggestions to make them uniquely yours!
Cooking Tips and Notes for Key Lime Pie Bars
Mastering the Whipped Cream
For the perfect topping on your key lime pie bars, start with cold equipment. Chill your mixing bowl and beaters in the freezer for about 15 minutes. Once you’re ready, whip heavy cream on medium speed until soft peaks form, then gradually add powdered sugar and a splash of vanilla extract. This method creates a stable, fluffy whipped cream that beautifully complements the tartness of the bars. Remember, if you prefer extras, you can incorporate flavors like lime zest or a hint of coconut for a tropical twist!
Tailoring the Sweetness
The balance of flavors is key in key lime pie bars. Some prefer a sweeter treat while others might lean towards tartness. Taste the filling before baking, and don’t hesitate to adjust the sweetness to your liking by adding more or less sugar. If you want a healthier option, consider using honey or maple syrup—both can bring a unique flavor profile to your dessert. Check out this article from Serious Eats for tips on sweetening citrus desserts.
Essential Kitchen Tools
Having the right tools makes life easier in the kitchen! For key lime pie bars, you’ll need:
- A mixing bowl and whisk
- An 8×8-inch baking dish
- A citrus juicer for maximum lime juice extraction
- A silicon spatula for effortless mixing and spreading
These tools will ensure that you whip up these delicious bars with ease. Happy baking!
Time breakdown for Key Lime Pie Bars
Preparation time
Getting started on your delicious key lime pie bars takes about 20 minutes. This is when you’ll gather your ingredients, whip up the crust, and mix together that perfect zesty filling.
Baking time
Once your crust and filling are ready, it’s time to bake! Allow about 25 minutes for your key lime pie bars to set in the oven. Keep an eye on them, as you want them just right—not overcooked or underbaked.
Chill time
After baking, patience is key. Let them chill in the fridge for at least 2 hours to fully develop their flavor and texture. This step makes all the difference!
Total time
In total, you’re looking at about 2 hours and 45 minutes from start to finish. But trust me, every minute is worth it for that refreshing burst of lime goodness! For more tips on timing and serving suggest alternatives like coconut whipped cream to elevate your dessert experience. Who’s ready to dig in?
Nutritional Facts for Key Lime Pie Bars
When indulging in delicious key lime pie bars, it’s good to know what you’re enjoying! Here are some nutritional highlights to consider:
Calories
A typical serving of key lime pie bars contains around 200 to 250 calories. While they are a treat, it’s manageable when balanced with your daily intake.
Protein
These delightful bars pack a protein punch with about 3 grams per serving. This helps contribute to muscle repair and overall health—a nice bonus for dessert!
Fat Content
The fat content in key lime pie bars hovers around 10 to 15 grams, primarily from the crust and any creamy layer. Choosing lighter options can help you enjoy this dessert guilt-free.
For more insights, you can check out the USDA’s FoodData Central for detailed nutritional information. Enjoying dessert doesn’t have to be unhealthy; it just requires a bit of awareness!
FAQs about Key Lime Pie Bars
Curious about making the perfect key lime pie bars? You’re not alone! Here are some common questions that come up, and I’m here to help.
Can I use regular lime juice instead of key lime juice?
Absolutely! While key limes have a unique flavor that’s more aromatic and acidic than regular limes, you can substitute regular lime juice. Just keep in mind that your bars may taste slightly different—less tart and more citrusy. If you want to mimic that tangy flavor, consider adding a splash of lemon juice for extra zing.
How do I store the bars for later?
Storing your key lime pie bars is easy! Just make sure they are completely cooled before cutting and transferring them to an airtight container. They can be kept in the refrigerator for up to a week. For longer storage, you can freeze them! Just wrap each bar individually in plastic wrap and then place them in a freezer-safe bag. They’ll stay fresh for about three months. Whenever you crave a sweet treat, simply thaw in the refrigerator overnight.
What are the best substitutions for allergens?
If you have dietary restrictions, you can still enjoy these key lime pie bars! Here are a few substitutions:
- Gluten-free: Use a gluten-free graham cracker alternative or almond flour for the crust.
- Dairy-free: Swap the butter for coconut oil or a dairy-free butter substitute.
- Egg-free: Replace the eggs with a flaxseed meal or a chia seed mixture (1 tablespoon mixed with 2.5 tablespoons of water per egg).
Feel free to get creative with ingredients and check out more tips on food substitutions at The Kitchn for inspiration. Happy baking!
Conclusion on Key Lime Pie Bars
Embracing homemade goodness with a refreshing twist
There’s something truly special about key lime pie bars. They capture the essence of summer in every bite, making them the perfect dessert for gatherings or a cozy night in. Embracing homemade goodness not only allows you to control the ingredients but also fills your home with delightful aromas.
Imagine treating friends to your own creation, each bite bursting with a zesty flavor that dances on the palate. Plus, these bars are easy to make and customize—consider adding a dollop of whipped cream or a sprinkle of lime zest for that final touch. So why not whip up a batch today and indulge in a slice of sunshine?
For more baking inspiration, check out Serious Eats or Bon Appétit for creative twist suggestions!
PrintKey Lime Pie Bars: Easy, Tangy Treats Perfect for Home Baking
Indulge in the delightful and tangy goodness of Key Lime Pie Bars that are perfect for any occasion.
- Prep Time: 15 minutes
- Cook Time: 20 minutes
- Total Time: 35 minutes
- Yield: 16 bars 1x
- Category: Dessert
- Method: Baking
- Cuisine: American
- Diet: Vegetarian
Ingredients
- 1 ½ cups graham cracker crumbs
- ½ cup unsalted butter, melted
- 1 cup sweetened condensed milk
- ½ cup fresh key lime juice
- 2 large egg yolks
- 1 tablespoon lime zest
Instructions
- Preheat the oven to 350°F (175°C).
- In a medium bowl, combine the graham cracker crumbs and melted butter. Press the mixture into the bottom of a greased 9×9 inch baking dish.
- In another bowl, whisk together the sweetened condensed milk, key lime juice, egg yolks, and lime zest until smooth.
- Pour the filling over the crust and spread evenly.
- Bake for 15-20 minutes or until set. Let cool completely before cutting into bars.
- Serve chilled and enjoy your delicious Key Lime Pie Bars!
Notes
- For extra creaminess, chill the bars for at least two hours before serving.
- Feel free to top with whipped cream for added flavor.
Nutrition
- Serving Size: 1 bar
- Calories: 180
- Sugar: 10g
- Sodium: 150mg
- Fat: 8g
- Saturated Fat: 5g
- Unsaturated Fat: 3g
- Trans Fat: 0g
- Carbohydrates: 25g
- Fiber: 1g
- Protein: 2g
- Cholesterol: 60mg
Keywords: Key Lime Pie Bars, desserts, baking


