Introduction to Red Velvet Cake Roll Recipe
What is a Red Velvet Cake Roll?
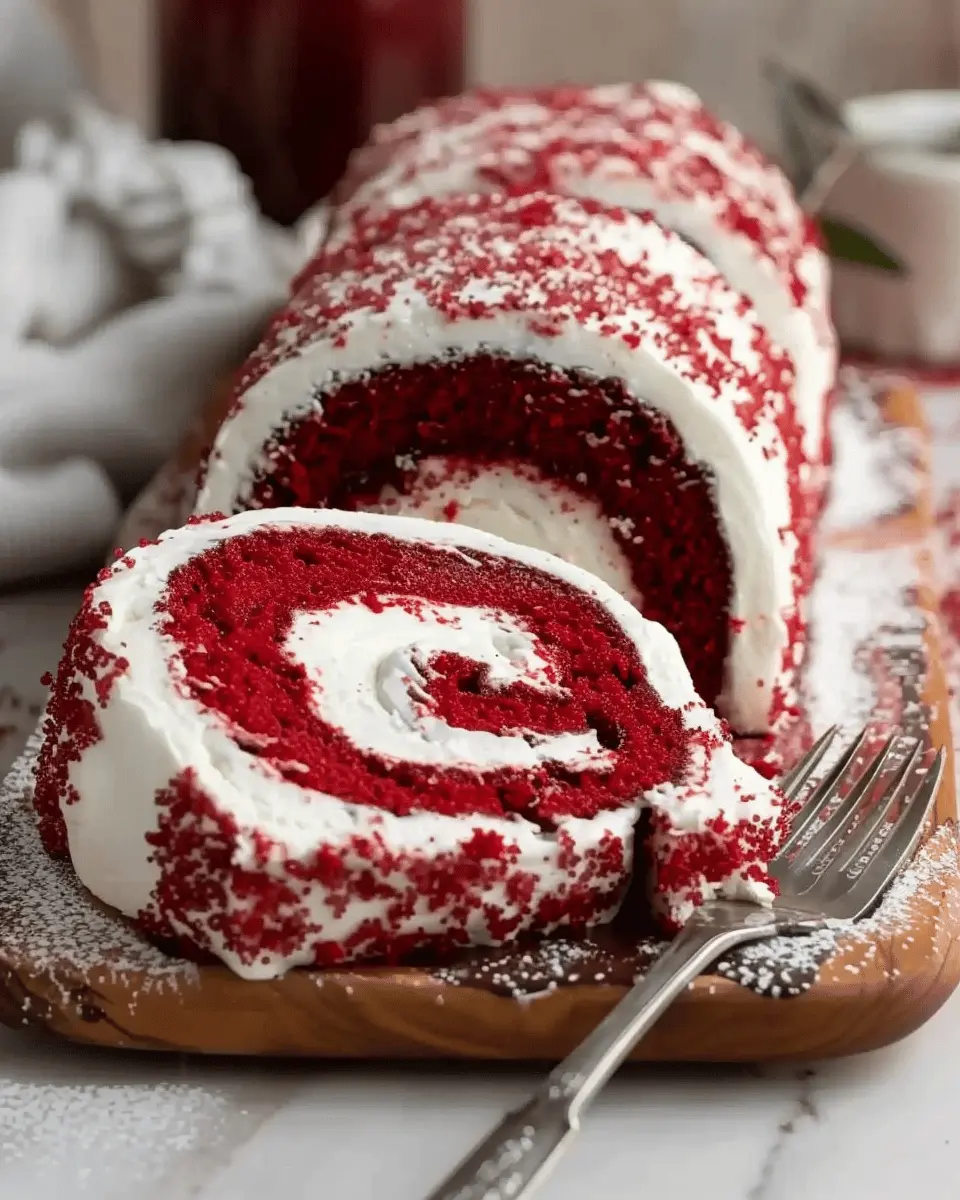
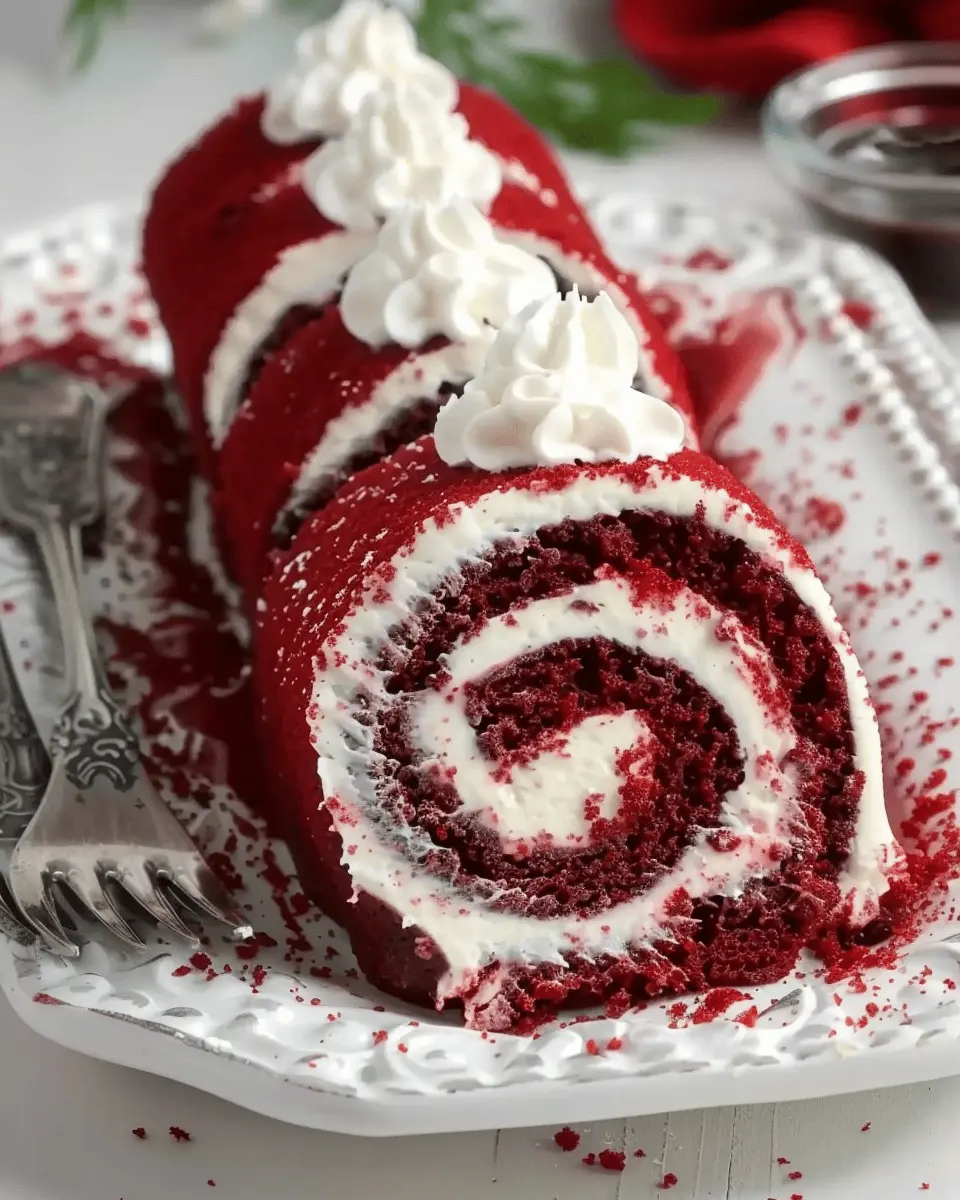
A red velvet cake roll is a delightful twist on the classic red velvet cake that many of us know and love. Imagine soft, sponge-like red velvet cake expertly rolled up with a luscious cream cheese filling, creating a striking dessert that is as beautiful as it is delicious. The vibrant red color—thanks to cocoa powder and a hint of food coloring—combined with the smooth white filling, makes this treat a stunning centerpiece for any gathering.
This elegant dessert has a lightness that sets it apart from other cakes, making it perfect for celebrations, holiday gatherings, or even just a special treat after a long week. The cake’s subtle cocoa flavor, along with the unmistakable tang of cream cheese frosting, is sure to impress your friends and family. Do you remember the last time you had a slice of red velvet cake? Now, envision enjoying that taste, but in a neat, roll format that’s not only Instagram-worthy but also surprisingly easy to slice and serve.
Why This Recipe Is Perfect for Young Professionals
For busy young professionals, the thought of baking might feel overwhelming. Between hectic work schedules and social lives, who has the time—or energy—to whip up an intricate dessert? This red velvet cake roll recipe is designed with you in mind. It’s quick, straightforward, and doesn’t require a mastery of complex baking techniques.
Here are a few reasons why this recipe fits perfectly into your busy lifestyle:
- Time-Efficient: With a prep time of just about 30 minutes, you can easily roll this cake up even on a weeknight.
- Impressive Yet Simple: It allows you to wow your friends without needing advanced baking skills. It’s the perfect way to show off your culinary prowess!
- Portioned for Sharing: The roll format makes it easy to share at work or with friends, and it looks beautiful sliced into rounds.
So, whether you’re looking to impress at a dinner party or simply treat yourself, this red velvet cake roll is a delightful choice. For more baking tips, you might find resources like King Arthur Baking helpful!
Ingredients for Red Velvet Cake Roll
Baking a red velvet cake roll is not just about following a recipe; it’s about bringing together a few essential ingredients that work in perfect harmony to create that iconic flavor and texture. Below, you’ll find a breakdown of what you’ll need to whip up this delightful dessert.
Essential Ingredients for the Cake
To create the base of your cake roll, stock up on these essentials:
- All-purpose flour
- Granulated sugar
- Cocoa powder
- Baking powder
- Baking soda
- Salt
- Vegetable oil
- Eggs
- Buttermilk
- Vanilla extract
- Red food coloring
These ingredients will help you achieve that signature velvety texture with a hint of cocoa. For additional tips and tricks, you can check out resources like King Arthur Baking for expert advice.
Ingredients for the Cream Cheese Filling
What’s a red velvet cake roll without a luscious filling? Here’s what you need:
- Cream cheese
- Unsalted butter
- Powdered sugar
- Vanilla extract
Combining these will give you the rich, creamy filling that complements the soft cake perfectly.
Optional Dusting Ingredients
For that final touch, consider these optional ingredients:
- Powdered sugar for dusting
- Cocoa powder for a chocolate touch
These simple additions can elevate the presentation, making your dessert not only delicious but visually appealing too.
Now that you have your ingredients ready, it’s time to bring them together and create something truly special! If you’re eager to learn more about techniques for a successful bake, exploring Food Network can provide extra insights.
Step-by-Step Preparation of Red Velvet Cake Roll
Making a red velvet cake roll is a delightful way to impress your friends or elevate your dessert game at any gathering. It combines the classic flavors of red velvet with a show-stopping presentation. Let’s dive into each step of the process to ensure your cake roll turns out perfectly!
Preheat the Oven and Prepare Your Pan
Start by preheating your oven to 350°F (175°C). This initial step is crucial for getting your cake to rise beautifully. While the oven is heating, prepare a 15×10 inch jelly roll pan by lining it with parchment paper. This will make it much easier to roll your cake later on. Don’t forget to lightly grease the parchment paper to prevent sticking. Aim for that non-stick magic—nobody wants to fight with their dessert!
Make the Red Velvet Cake Batter
Now, let’s whip up that signature red velvet cake batter! Here’s what you’ll need:
- 1 cup all-purpose flour
- 1 cup granulated sugar
- 1/4 cup unsweetened cocoa powder
- 1 teaspoon baking powder
- 1/2 teaspoon baking soda
- Pinch of salt
- 3 large eggs
- 1/2 cup vegetable oil
- 2 tablespoons buttermilk (or yogurt for a healthier alternative)
- 1 tablespoon red food coloring
- 1 teaspoon vanilla extract
- 1 teaspoon white vinegar
In a mixing bowl, combine the dry ingredients and whisk until well-blended. In another bowl, mix the wet ingredients thoroughly. Then, gently fold the wet mixture into the dry, being careful not to overmix. The vibrant color of the red velvet cake batter will get you excited about the next steps!
Bake the Cake to Perfection
Pour the cake batter into your prepared pan and spread it evenly. Place it in the preheated oven and bake for about 12-15 minutes or until a toothpick inserted in the center comes out clean. This step is critical; if you overbake it, the cake will crack while rolling. Start watching it closely around the 10-minute mark.
Roll the Cake for the Classic Shape
Once baked, remove the cake from the oven and let it cool for a few minutes. Carefully flip the cake onto a clean kitchen towel dusted with powdered sugar. This part can be tricky, but don’t panic! The towel will help absorb any excess moisture, preventing cracking. Then, gently peel off the parchment paper. Starting from one short end, roll the cake tightly with the towel inside. This creates the characteristic spiral shape that defines a red velvet cake roll. Let it cool completely in this rolled shape.
Prepare the Luxurious Cream Cheese Filling
While the cake is cooling, let’s make that irresistible cream cheese filling. Here’s what you’ll need:
- 8 oz cream cheese, softened
- 1/4 cup unsalted butter, softened
- 1-2 cups powdered sugar (adjust to taste)
- 1 teaspoon vanilla extract
In a mixing bowl, beat together the cream cheese and butter until creamy. Gradually add the powdered sugar, mixing until smooth and fluffy. The filling should be rich but not overly sweet. Trust me, this cream cheese filling is the pièce de résistance!
Assemble the Cake Roll Like a Pro
Unroll the cooled cake gently and spread the cream cheese filling evenly over the surface. Leave about half an inch at the edges to prevent overflow. Slowly roll the cake back up without the towel, creating that spiral we all love. Use the parchment paper to assist you in this step, and roll tightly to maintain the form. Wrap the cake roll in plastic wrap and chill in the fridge for at least an hour. This will help set the filling and flavor the cake further!
Chill and Get Ready to Serve
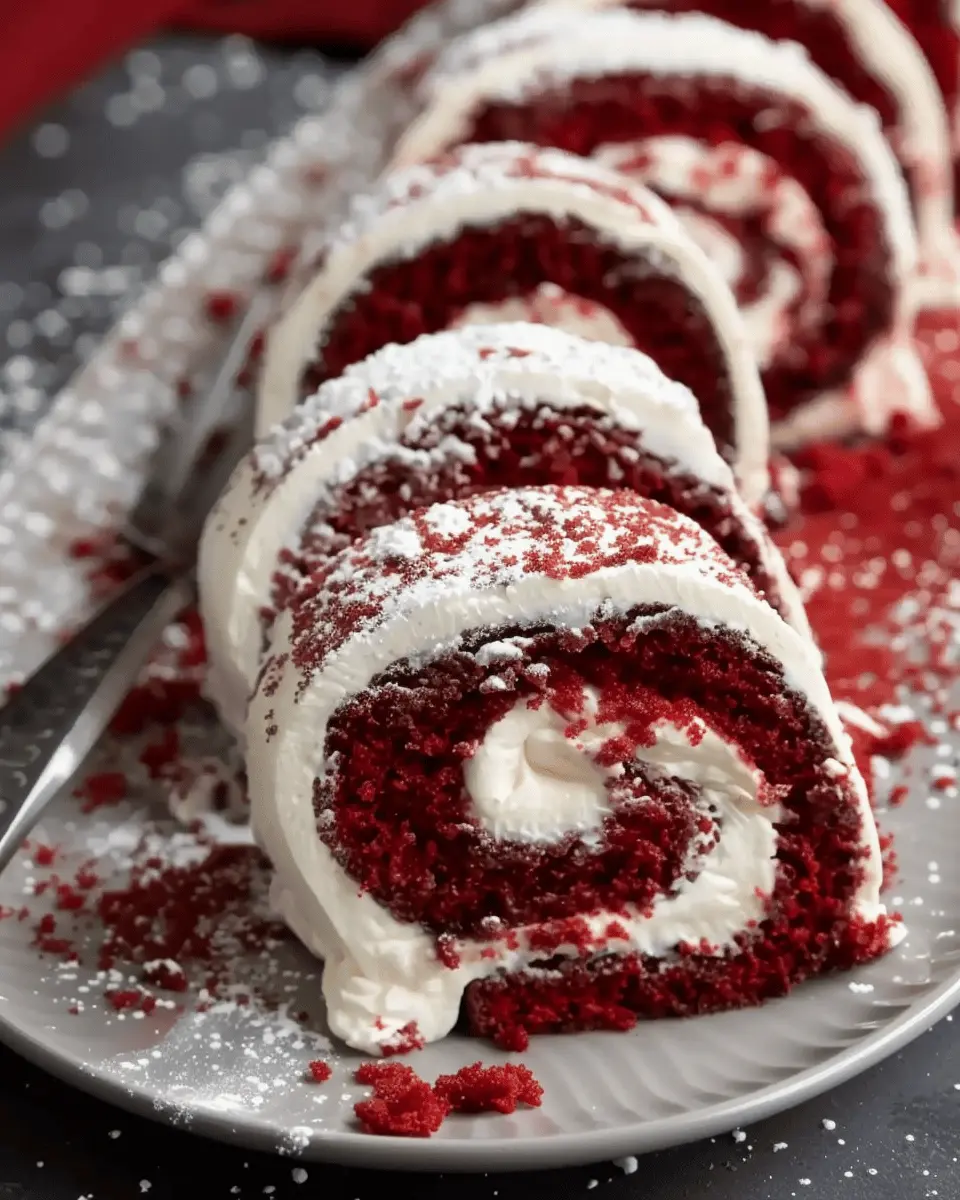
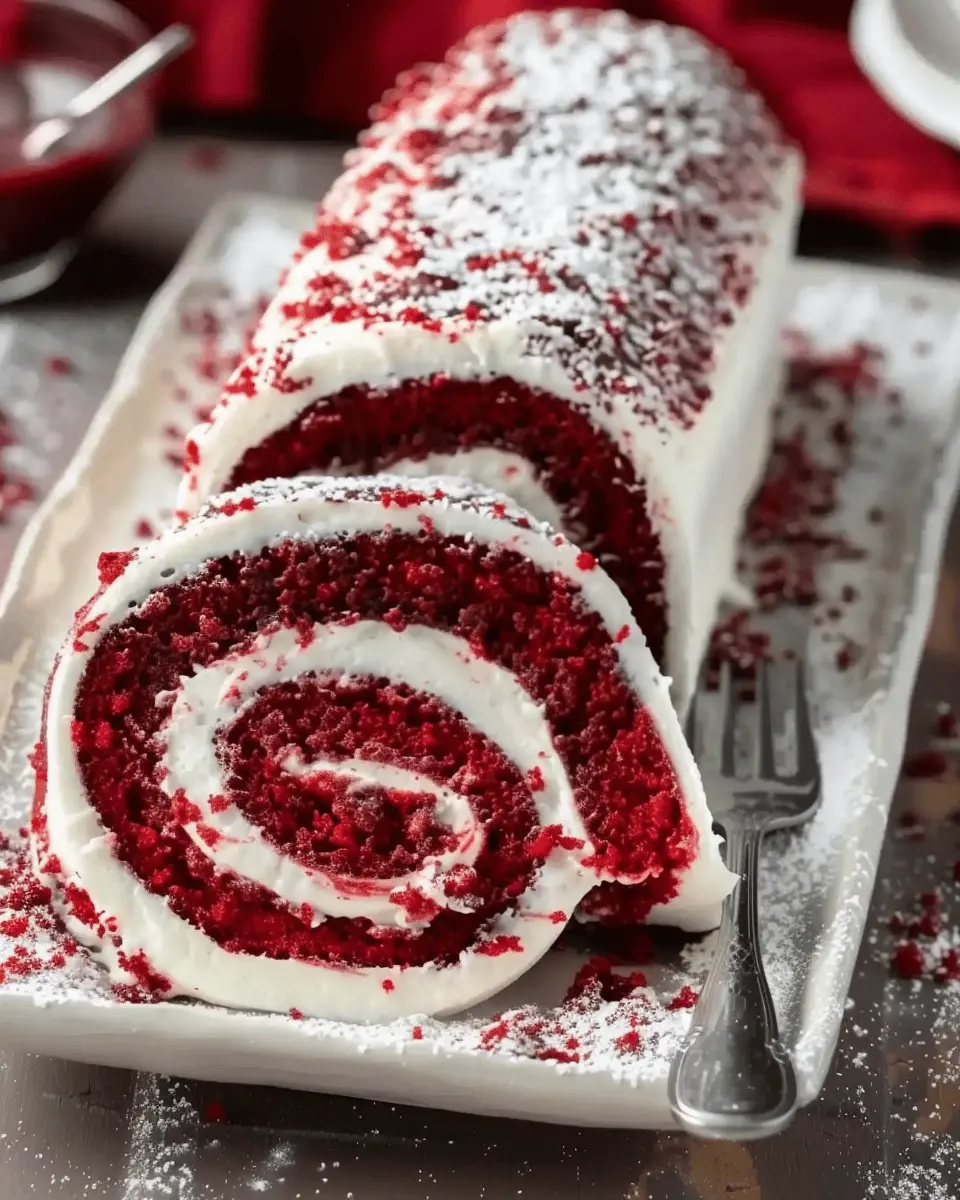
Finally, remove your chilled red velvet cake roll from the fridge. Carefully unwrap it and give it a light dusting of powdered sugar for that perfect finish. Slice it into rounds, revealing the stunning spiral within. Your guests will be in awe of your skills!
Now, sit back and enjoy the fruits of your labor. This red velvet cake roll recipe is not only a treat for your taste buds but also a visual delight—perfect for sharing during brunch, birthdays, or just because you deserve it!
For additional tips on perfecting your baking skills, consider exploring resources like Serious Eats or Joy of Baking to enhance your baking repertoire. Happy baking!
Variations on Red Velvet Cake Roll
Fun Flavor Twists
Who says you have to stick to tradition? The classic red velvet cake roll recipe is a versatile canvas just waiting for your creative touch. Consider adding different flavors to both the cake and filling. How about a hint of espresso powder in the batter for a mocha twist? Or, mix in some coconut flakes for a tropical vibe. If you’re feeling adventurous, a touch of peppermint extract in your cream cheese filling can bring a refreshing kick, perfect for the holiday season!
Gluten-Free Option
For those with dietary restrictions, a gluten-free red velvet cake roll recipe is easier than you might think! Simply swap regular flour for a high-quality gluten-free blend. Look for blends that include xanthan gum, as this will help mimic the texture of traditional flour. You won’t lose any of that beloved flavor, while ensuring that everyone can enjoy this delightful dessert. Check out the Gluten-Free Baking Association for tips on selecting the best gluten-free flour.
Mini Cake Rolls for Bite-Sized Delights
Want to impress at your next gathering? Try making mini red velvet cake rolls! Slice the cake into smaller portions before rolling, or use a mini baking sheet to create individual rolls. These bite-sized treats are not only adorable but allow your guests to indulge without overdoing it. You can fill them with various fillings—think whipped cream, fruit-flavored gel, or even a decadent chocolate ganache.
With these variations, your red velvet cake roll recipe can become a crowd-pleaser that fits any occasion!
Baking Tips and Notes for Red Velvet Cake Roll
Common Mistakes to Avoid
When trying out your red velvet cake roll recipe, it’s easy to make a few blunders. One common mistake is overmixing the batter. This can lead to a tough cake, which is far from the light and airy texture you want. Make sure to fold the ingredients gently after adding the flour.
Another pitfall is not greasing your baking pan properly. A cake that sticks is not only frustrating but can also ruin that beautiful swirl. Additionally, if you bake the cake for too long, it may become dry and brittle. Keep a close eye on the oven and do the toothpick test a minute or two before the recommended time is up.
Tools You’ll Need for Success
Equip yourself with the right tools to nail your red velvet cake roll recipe. Here’s what you’ll need:
- Jelly Roll Pan: This specific pan is designed for making rolled cakes.
- Parchment Paper: To line the pan for easy removal.
- Electric Mixer: For smooth and fluffy batter.
- Offset Spatula: Perfect for spreading the batter evenly.
- Kitchen Towel: Use it to roll the cake while it’s still warm, helping it maintain its shape.
For more insights on kitchen tools, you can check out Serious Eats.
With these handy tips and tools, you’re well on your way to creating a stunning red velvet cake roll that’s sure to impress! Remember, practice makes perfect—don’t hesitate to make adjustments based on your experience. Happy baking!
Serving Suggestions for Red Velvet Cake Roll
Perfect Pairings for a Lovely Dessert Spread
When crafting the ultimate dessert table, a red velvet cake roll shines with elegance—especially when paired with delightful accompaniments. Consider adding:
- Fresh Berries: Strawberries, raspberries, or blueberries not only offer a burst of flavor but also complement the rich cocoa in the cake.
- Cream Cheese Frosting: A small bowl of this classic frosting for dipping enhances the cake’s texture while staying true to its roots.
- Whipped Cream: Light and airy, whipped cream can balance the sweet notes and make each slice feel indulgent.
- Nutty Finishes: Toasted pecans or walnuts sprinkled over the top can provide a lovely crunch.
For more inspiration, check out this guide on dessert pairings that perfectly match your cake roll!
Ideas for Serving at Parties or Gatherings
Hosting friends? Personalize your red velvet cake roll recipe presentation! Slice it into bite-sized pieces and arrange them on a beautiful platter for easy serving. You can also add decorative picks for a fun touch. If it’s a themed party, consider serving mini versions or even a cake roll bar, where guests can customize their toppings with options like sprinkles, chocolate shavings, or a drizzle of caramel. This interactive element can make your gathering feel even more special.
Ultimately, the key is to celebrate the beauty of your cake roll while encouraging your guests to savor every delightful bite. Happy hosting!
Time Breakdown for Red Velvet Cake Roll
Preparing a delightful red velvet cake roll recipe is all about good planning! Here’s how long you can expect to spend on each step of the process.
Preparation Time
Set aside about 20-25 minutes to gather your ingredients and mix everything together. This is a great time to get your kitchen ready, grab your favorite baking tunes, and perhaps even taste-test a little cocoa!
Baking Time
Let your creation bake for 12-15 minutes. Keep an eye on it, and use a toothpick to check for doneness. The cake should spring back slightly when touched.
Total Time
In total, you’re looking at around 35-45 minutes, which is perfect for a weekday treat or a fancy weekend dessert! For more tips on cake rolls and other desserts, check out resources like The Spruce Eats for inspiration and ideas.
With this breakdown, you can confidently dive into making your red velvet cake roll, knowing exactly how to fit it into your busy schedule. Happy baking!
Nutritional Facts for Red Velvet Cake Roll
When indulging in a red velvet cake roll recipe, it’s helpful to understand its nutritional profile. Here’s a quick breakdown to keep you informed and guilt-free while you enjoy this delightful treat.
Calories
A typical serving of a red velvet cake roll contains approximately 250-300 calories. Keep in mind that portion size can greatly affect this number, so be mindful of how much you slice!
Sugar Content
In terms of sweetness, each serving generally has around 20-25 grams of sugar. While it does satisfy that sweet tooth, balancing it with wholesome meals throughout the day can help.
Protein
Lastly, a slice of this delicious roll offers about 4-5 grams of protein. While it’s not a high-protein dessert, enjoying it occasionally as part of a balanced diet can be a delightful choice.
For more on balancing your treats and maintaining a nutritious lifestyle, check out resources from the USDA and Healthline. Happy baking!
FAQs about Red Velvet Cake Roll
How can I store leftover cake roll?
Storing your red velvet cake roll properly ensures that it stays fresh and delicious for days! To keep your leftover cake roll moist, wrap it tightly in plastic wrap or aluminum foil. Then, place it in an airtight container in the refrigerator. It should last for about 3 to 5 days. If you want to store it longer, consider freezing the slice. Just make sure to wrap it well, and it can keep for up to 2 months. When you’re ready to enjoy it, let it thaw in the fridge overnight.
Can I use a different filling for this recipe?
Absolutely! While the classic cream cheese filling is incredibly popular, feel free to get creative with your red velvet cake roll recipe. Here are some delightful alternatives:
- Chocolate Ganache: Rich and decadent, it adds an indulgent twist.
- Whipped Cream: Light and airy, perfect for a softer bite.
- Fruit filling (such as raspberry or strawberry): Adds a tart contrast that pairs nicely with the sweetness.
Experimenting with different fillings can make each roll unique and tailored to your taste!
How do I make the cake less sweet?
If you prefer a less sweet cake roll, there are a few simple adjustments you can make:
- Reduce sugar: You can cut down the sugar in both the cake and the filling by about 25% without compromising texture.
- Opt for dark cocoa powder: It has a rich flavor and can help balance sweetness.
- Use unsweetened whipped cream: This keeps the balance while still providing that light filling option.
Remember, taste as you go, and find the perfect sweetness level for your palate!
For more tips on baking and storage, check out this comprehensive guide on food preservation techniques.
Conclusion on Red Velvet Cake Roll Recipe
Why You Should Try This Recipe Today
This red velvet cake roll recipe is not just a dessert; it’s an experience! With its vibrant color and delightful cream cheese filling, it’s perfect for any occasion. Imagine impressing your friends and family with a stunning cake that looks as good as it tastes. Plus, it’s a fun baking activity that can brighten up your weekend.
Did you know that red velvet cake has origins dating back to the 1800s? The unique flavor combination of cocoa and buttermilk creates a moist texture that’s simply irresistible. So why wait? Grab your ingredients and start rolling this delicious treat today! You can find more on the history of red velvet cake and other entertaining facts at Serious Eats or Food & Wine. Happy baking!
PrintRed Velvet Cake Roll Recipe: Easy Indulgence for Your Home Baking

Experience the delightful taste of red velvet in a beautiful cake roll that’s perfect for any occasion.
- Prep Time: 20 minutes
- Cook Time: 20 minutes
- Total Time: 40 minutes
- Yield: 8 servings 1x
- Category: Desserts
- Method: Baking
- Cuisine: American
- Diet: Vegetarian
Ingredients
- 1 cup all-purpose flour
- 1 cup granulated sugar
- 1 teaspoon baking soda
- 1 teaspoon cocoa powder
- 1 cup buttermilk
- 2 large eggs
- 1 tablespoon red food coloring
- 1 teaspoon vanilla extract
- 1/2 cup cream cheese, softened
- 1/4 cup powdered sugar
- 1 teaspoon vanilla extract (for frosting)
Instructions
- Preheat the oven to 375°F (190°C).
- Grease and flour a 15×10 inch jelly roll pan.
- In a bowl, mix flour, sugar, baking soda, and cocoa powder.
- In another bowl, whisk together buttermilk, eggs, red food coloring, and vanilla extract.
- Combine the wet and dry ingredients and mix until smooth.
- Pour the batter into the prepared pan and spread evenly.
- Bake for 15-20 minutes or until a toothpick comes out clean.
- Once baked, let the cake cool slightly, then roll it up in a clean kitchen towel.
- For the frosting, mix cream cheese, powdered sugar, and vanilla extract until smooth.
- Unroll the cake, spread the frosting, and roll it back up. Chill before slicing.
Notes
- Make sure to use a light hand when rolling the cake to prevent cracking.
- For an extra touch, drizzle melted chocolate over the top before serving.
Nutrition
- Serving Size: 1 slice
- Calories: 250
- Sugar: 18g
- Sodium: 210mg
- Fat: 10g
- Saturated Fat: 6g
- Unsaturated Fat: 3g
- Trans Fat: 0g
- Carbohydrates: 35g
- Fiber: 1g
- Protein: 4g
- Cholesterol: 55mg
Keywords: Red Velvet, Cake Roll, Recipe, Easy Baking


