Introduction to Red Velvet Cupcakes
Red velvet cupcakes have become a darling of the dessert world, celebrated not just for their stunning appearance but also for their unique flavor profile. So, what exactly sets red velvet cupcakes apart from your standard cupcake?
The Allure of Red Velvet Cupcakes
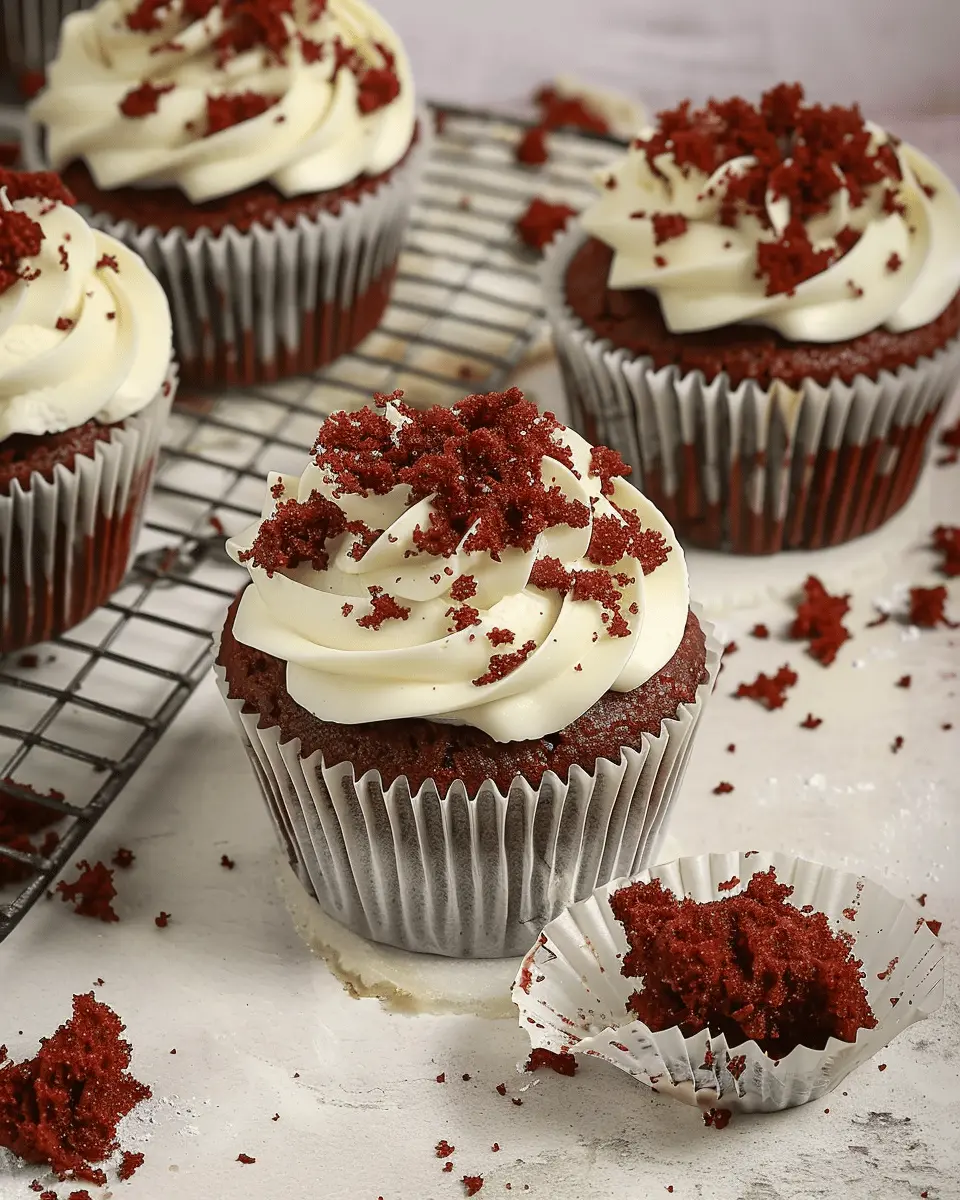
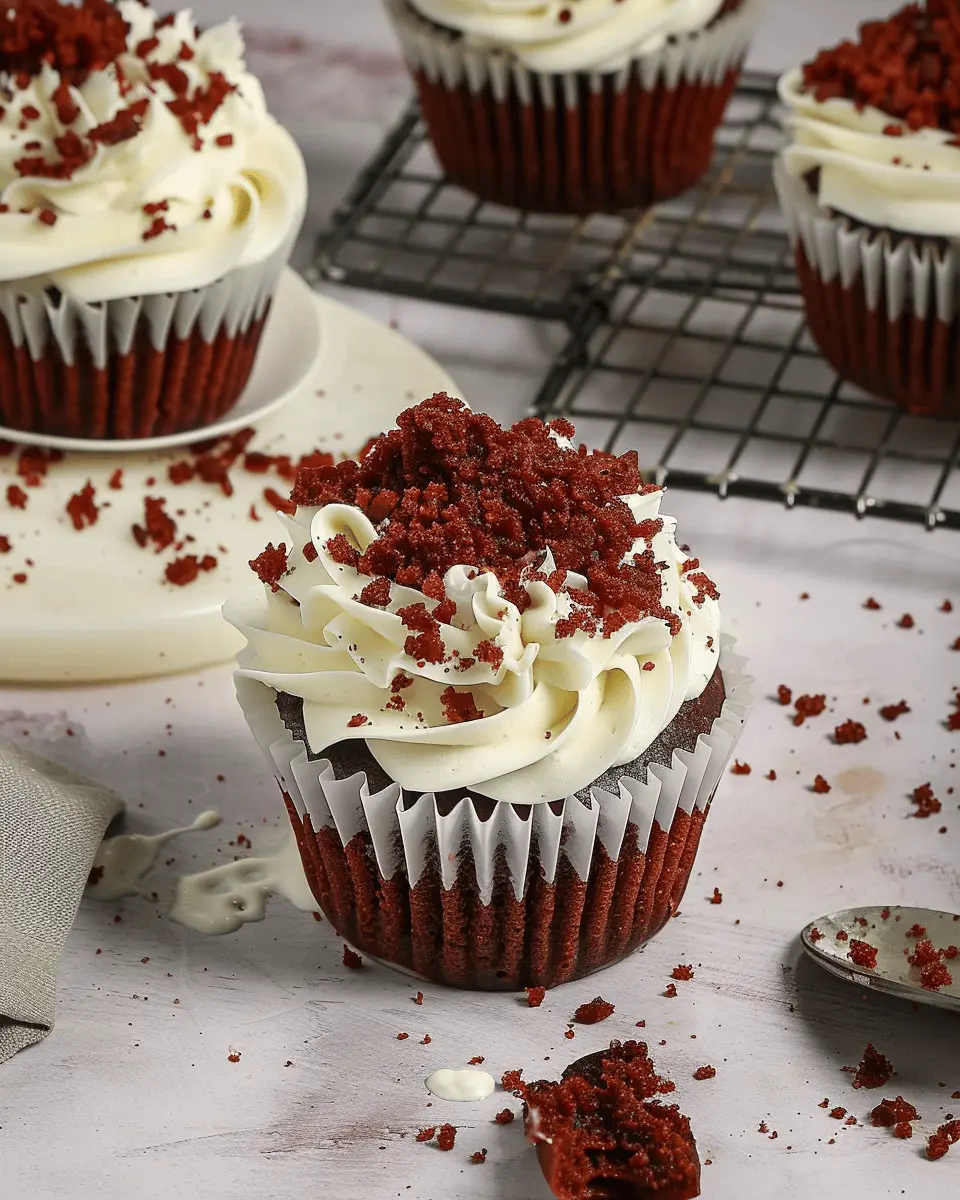
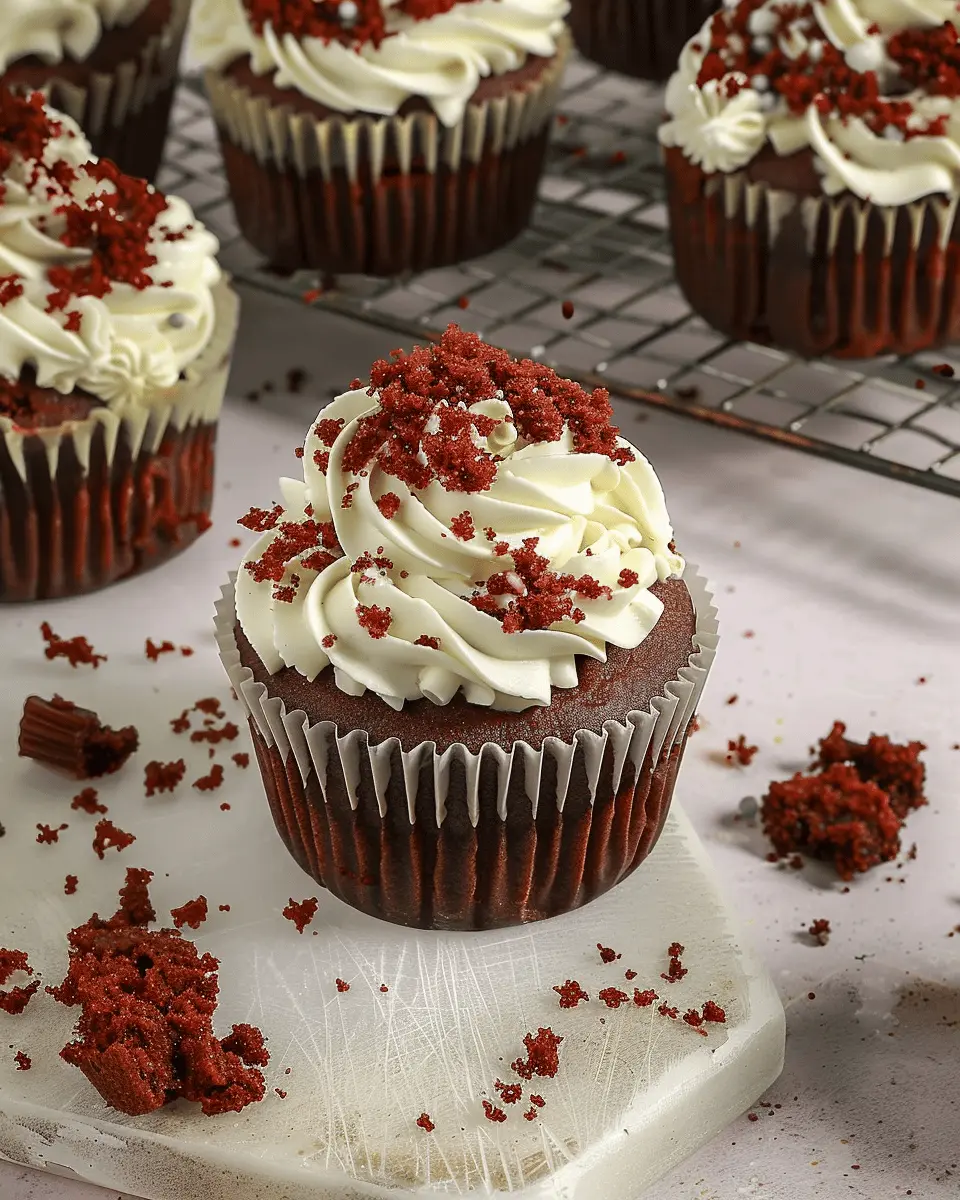
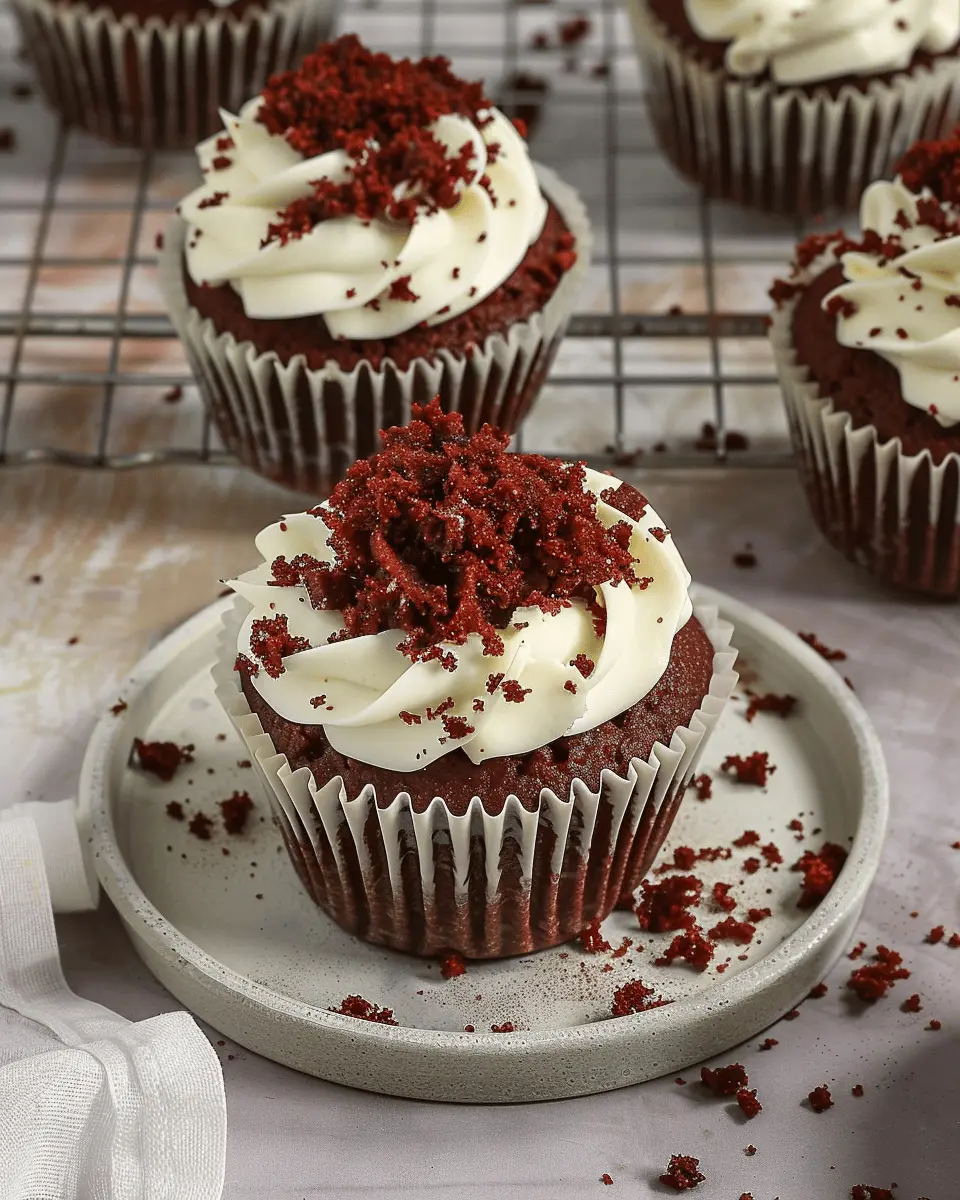
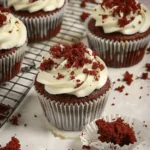
One of the first things that catches your eye about red velvet cupcakes is their vibrant, deep red color. This visually striking hue is often enhanced with a touch of cocoa powder, giving these treats their signature mild chocolate flavor. Contrarily, the cake is fluffy, moist, and often topped with a luscious cream cheese frosting that balances sweetness with tang.
But the allure of red velvet cupcakes goes beyond just aesthetics and taste. Did you know that the cake’s origins trace back to the 1800s, with some sources linking it to the famous Waldorf-Astoria Hotel in New York? Over the years, it has evolved, becoming a beloved staple at weddings, birthdays, and just about any celebratory occasion you can think of.
Flavor and Texture
When you bite into a red velvet cupcake, you’ll notice a delightful contrast of flavors. The slight cocoa taste mixed with tang from the cream cheese frosting creates a rich experience that is hard to forget. The fluffy texture, often highlighted by the use of buttermilk in the recipe, makes each bite feel indulgent and satisfying.
The frosting, typically made with cream cheese, is another standout feature. The combination of creaminess and tanginess perfectly complements the moist crumbs of the cupcake, making it a winning duo.
Why Bake Red Velvet Cupcakes?
- Perfect for Any Occasion: These cupcakes can impress at both casual gatherings and formal events, making them incredibly versatile.
- Simple Ingredients: Surprisingly, red velvet cupcakes can be made with basic pantry items like flour, cocoa powder, sugar, and buttermilk, yet the result feels extravagant.
- A Wonderful Conversation Starter: Their intriguing color and rich history often spark conversations, perfect for social gatherings.
In summary, whether you’re baking for a special celebration or just craving a sweet treat, red velvet cupcakes are sure to delight. For more about cupcake history and fun variations, the Spruce Eats is an excellent place to explore. Happy baking!
Ingredients for Red Velvet Cupcakes
Essential ingredients needed
Baking red velvet cupcakes is not just about the colors; it’s a delightful mix of flavors that create an unforgettable treat. To get started, here’s what you’ll need:
- All-purpose flour: 1 ½ cups for that perfect texture.
- Granulated sugar: 1 cup to bring in sweetness.
- Unsweetened cocoa powder: 1 tablespoon for a subtle chocolate flavor.
- Baking soda: 1 teaspoon to help them rise.
- Salt: ½ teaspoon to enhance flavor.
- Vegetable oil: ½ cup for moisture.
- Buttermilk: 1 cup for that signature tang.
- Large eggs: 2 for structure.
- Red food coloring: 2 tablespoons to achieve that iconic hue.
- Vanilla extract: 1 teaspoon for aromatic depth.
- White vinegar: 1 teaspoon to react with baking soda.
Equipment you’ll need
Before you dive into baking these delicious red velvet cupcakes, make sure you have the right tools:
- Mixing bowls: Preferably in various sizes.
- Measuring cups and spoons: Precision is key!
- Whisk and spatula: For blending and folding.
- Cupcake liners: To keep them tidy.
- Muffin tin: A standard size works best.
With these ingredients and equipment ready, you’re set to create the fluffiest, most flavorful red velvet cupcakes! For more tips on ultra-moist cakes, consider checking out resources like Serious Eats. Happy baking!
Step-by-step Preparation of Red Velvet Cupcakes
Preparing red velvet cupcakes is not just about the end product; it’s a delightful journey in the kitchen. These cupcakes are rich with flavor, beautifully colored, and sure to impress at any gathering. Let’s dive into the step-by-step process, ensuring a delightful baking experience!
Prepare your work area
Before any mixing begins, it’s crucial to set up a tidy work environment. Start by gathering all your ingredients and tools:
- All-purpose flour
- Cocoa powder
- Baking soda
- Salt
- Vegetable oil
- Sugar
- Eggs
- Buttermilk (or a buttermilk substitute made by adding vinegar to milk)
- Red food coloring
- Vanilla extract
- Cream cheese frosting (store-bought or homemade)
A clean counter or workspace allows for a more enjoyable baking experience. Ensure you have your mixing bowls, measuring cups, spatula, and cupcake liners ready to go. And don’t forget to preheat your oven to 350°F (175°C)—that way, it’s perfectly warmed when you’re ready to bake.
Combine dry ingredients
In a large mixing bowl, sift together your dry ingredients. This step isn’t just for show; sifting can help break up any clumps and ensure an even distribution of the cocoa powder. Here’s the breakdown:
- 1 ½ cups all-purpose flour
- 1 tablespoon unsweetened cocoa powder
- 1 teaspoon baking soda
- ½ teaspoon salt
Whisk them together until fully blended, creating a light and airy mixture. Not only does this help with texture, but it’s essential for the structure of your red velvet cupcakes. If you’re interested in the science behind baking, check out this informative article for deeper insights.
Mix wet ingredients
In a separate bowl, mix the wet ingredients. This is where the magic happens in terms of flavor and moisture. Combine these:
- 1 cup vegetable oil
- 1 cup sugar
- 2 large eggs
- 1 cup buttermilk
- 1 tablespoon red food coloring
- 1 teaspoon vanilla extract
Using a whisk, combine these ingredients until you have a smooth and vibrant mixture. The rich color of the food coloring will start to come to life! Is there anything more exciting than that bright pop of red?
Combine dry and wet mixtures
Now comes the fun part—combining what you’ve worked on. Gradually add the dry mixture to the wet one, stirring gently until just combined. Be cautious not to overmix—this can lead to dense cupcakes instead of the light, fluffy texture we all love.
As you fold the mixtures together, take a moment to savor the inviting aroma developing in your kitchen. The smell of cocoa and vanilla wafting through the air is simply irresistible!
Bake the red velvet cupcakes
Once your batter is ready, it’s time to fill the cupcake liners. Fill each liner about two-thirds full to give them room to rise. Place them in your preheated oven and bake for about 18-20 minutes. You can use a toothpick to check for doneness—stick it into the center of a cupcake, and if it comes out clean, you’re good to go!
Cool the cupcakes
Patience is a virtue here! After pulling out the cupcakes from the oven, let them cool in the pan for about 5-10 minutes before transferring them to a wire rack. This step is essential to avoid sogginess and ensures that they maintain their shape. Once they are completely cool, it’s time for the pièce de résistance—frosting!
Whether you opt for a luscious cream cheese frosting or a simple buttercream, your red velvet cupcakes are sure to steal the show. Enjoy this process, and don’t forget to take a moment to appreciate the beautiful outcome of your culinary adventure!
Variations of Red Velvet Cupcakes
Vegan Red Velvet Cupcakes
Looking to indulge in red velvet cupcakes while sticking to a plant-based diet? You’re in luck! Vegan red velvet cupcakes are not just a trend; they’re a delicious option for everyone. Instead of eggs, you can use flaxseed meal or applesauce as a binding agent. And for a dairy-free touch, swap out traditional buttermilk for almond milk mixed with a splash of vinegar. These simple substitutions can deliver the same moist and velvety texture we all adore. Plus, you still get that eye-catching red hue!
For a fabulous recipe, consider checking out Minimalist Baker. They have a great selection of vegan recipes that won’t skimp on flavor!
Gluten-Free Red Velvet Cupcakes
Are gluten-free options on your radar? You can still relish that rich flavor of red velvet cupcakes. Using a gluten-free flour blend, which you can find in most grocery stores, makes this a breeze. Look for blends that include almond flour or coconut flour, as they’ll add a delightful flavor profile while keeping things light. Don’t forget to include a little xanthan gum to help maintain the structure that gluten typically provides.
Wondering where to find high-quality gluten-free recipes? Visit King Arthur Baking Company for insights on how to make gluten-free baking enjoyable and stress-free!
By exploring these variations, you can customize your red velvet cupcakes to fit your dietary needs without sacrificing that lush taste. So, which one are you excited to try first? Whether it’s vegan, gluten-free, or just the classic version, there’s a delightful treat waiting for you!
Cooking Tips and Notes for Red Velvet Cupcakes
Common Mistakes to Avoid
Making red velvet cupcakes can be a delightful experience, but there are a few pitfalls to watch out for:
- Using the wrong cocoa: Ensure you select unsweetened cocoa powder for that rich flavor. Dutch-processed can alter the color and taste.
- Under-mixing the batter: This is key for achieving that fluffy texture. Don’t be afraid to mix well, but avoid overmixing as it can lead to dense cupcakes.
- Not measuring ingredients accurately: Baking is a science. Use a kitchen scale or measuring cups for precision. A little too much flour can affect the outcome!
Storage Tips for Freshness
Want to keep those red velvet cupcakes moist and tasty? Here’s how:
- Room Temperature: Store them in an airtight container for up to 3 days. This allows for that perfect, soft texture.
- Refrigeration: If you need to keep them longer, pop them in the fridge for up to a week.
- Freezing: For even longer storage, freeze them without frosting. Thaw at room temperature when you’re ready to enjoy.
For more baking insights, explore sources like King Arthur Baking for expert tips.
Serving Suggestions for Red Velvet Cupcakes
Creative Frosting Ideas
When it comes to red velvet cupcakes, the frosting is just as vital as the cake itself! Traditional cream cheese frosting is a classic choice, but why not get adventurous? Consider these creative options:
- Chocolate Ganache: A rich, glossy finish that pairs perfectly with the subtle flavors of red velvet.
- Peanut Butter Frosting: A sweet and slightly salty alternative that adds a unique twist.
- Vanilla Buttercream Swirls: Light and airy, these swirls can be tinted with natural food colors to create beautiful designs.
For an extra touch, try drizzling with a fruit coulis or sprinkling with chopped nuts for texture.
Pairing with Beverages
Thinking about what to sip alongside your red velvet cupcakes? You have plenty of delicious options:
- Coffee or Espresso: The bitterness balances out the sweetness, making it a perfect match.
- Milkshakes: An indulgent, creamy shake brings out the flavors beautifully—try strawberry or vanilla!
- Herbal Teas: A refreshing cup of chamomile or hibiscus tea not only complements the flavor but also adds a comforting experience.
With these suggestions, your red velvet cupcakes will shine at any gathering. Enjoy experimenting with flavor and pairing to elevate your dessert game!
For more ideas on dessert pairings, check out Serious Eats or Epicurious.
Time Breakdown for Red Velvet Cupcakes
Preparation Time
Getting started on your red velvet cupcakes is half the fun! You’ll spend about 20 minutes gathering your ingredients and setting up your kitchen. Make sure to cream that butter and sugar well for a fluffy texture. For specific tips, check out this baking fundamentals guide.
Baking Time
Once your batter is ready, it’s time for the oven magic! Bake your red velvet cupcakes for approximately 18-20 minutes. Keeping an eye on them is crucial; they’re done when a toothpick inserted comes out clean.
Total Time
In total, you’re looking at around 40-45 minutes from start to finish. Perfect for a quick dessert or surprise treat! Enjoy the process and those delicious smells wafting through your kitchen as you create these delightful cupcakes.
Nutritional Facts for Red Velvet Cupcakes
When indulging in delicious red velvet cupcakes, knowing the nutritional facts can help you enjoy them without guilt. Let’s break down the numbers.
Calories per cupcake
Each cupcake typically contains around 300 calories, making it a delightful treat to enjoy in moderation.
Sugar content
One cupcake can have about 20 grams of sugar. This sweetness is what makes red velvet cupcakes so irresistible, but it’s wise to keep your daily intake in check. Consider looking at the American Heart Association’s guidelines for sugar recommendations.
Fat details
You might find around 15 grams of fat in a single cupcake. Most of this is from butter and cream cheese frosting, which gives them that rich flavor. Understanding your fats can be important for maintaining a balanced diet, so don’t hesitate to explore more about healthy fats from resources like the FDA.
Incorporating red velvet cupcakes into your special occasions can bring joy, and being aware of their nutritional content allows you to enjoy them even more responsibly!
FAQs about Red Velvet Cupcakes
What makes a red velvet cupcake different from regular cupcakes?
Red velvet cupcakes stand out from regular cupcakes primarily due to their unique flavor and stunning appearance. The key ingredients include cocoa powder, vinegar, and buttermilk, which combine to create a subtly chocolatey taste paired with a soft and moist texture. The vibrant red hue typically comes from food coloring, making them visually impressive. For some interesting insights on the history of red velvet, check out this article that delves into its Southern origins and cultural significance.
How can I store my red velvet cupcakes?
To keep your red velvet cupcakes fresh and delicious, follow these simple storage tips:
- Room Temperature: If you plan to eat them within a day or so, simply cover them with plastic wrap or place them in an airtight container at room temperature.
- Refrigeration: For longer storage, especially if they’re frosted, place them in the fridge. Be sure to cover them well to prevent them from drying out.
- Freezing: You can freeze unfrosted cupcakes for up to three months. Place them in a single layer in an airtight container or wrap them tightly in plastic wrap. When you’re ready to enjoy, simply thaw at room temperature and frost!
Can I use food coloring alternatives for red velvet cupcakes?
Absolutely! If you’re not keen on using artificial food coloring, there are alternative options available. You can use beet juice or powder for a more natural approach. This not only adds a hint of sweetness but also imparts a lovely reddish color. If you’re curious, there are numerous tutorials on how to extract your dye here.
By following these guidelines, you’ll ensure that your red velvet cupcakes remain a delightful treat, whether for a special occasion or a simple weeknight dessert!
Conclusion on Red Velvet Cupcakes
Why you should try making these cupcakes at home!
There’s something truly special about making red velvet cupcakes from scratch. First, you can customize them to your taste—experiment by adding a hint of mint or swapping traditional cream cheese frosting for a chocolate ganache! Plus, there’s a certain nostalgia that comes from the rich history of red velvet cake, dating back to the 1920s.
Home-baked treats are a fantastic way to unwind after a long workday, and who wouldn’t enjoy the sight of your friends’ faces lighting up when they see these stunning cupcakes? Try a batch at home and let your inner baker shine! For further inspiration, check out Joy of Baking for more delightful recipes.
PrintRed Velvet Cupcakes: Indulgent Treats for Your Sweet Tooth
Delight in the rich and velvety flavors of red velvet cupcakes, perfect for any occasion.
- Prep Time: 20 minutes
- Cook Time: 25 minutes
- Total Time: 45 minutes
- Yield: 12 servings 1x
- Category: Desserts
- Method: baking
- Cuisine: American
- Diet: Vegetarian
Ingredients
- 1 ½ cups all-purpose flour
- 1 cup granulated sugar
- 1 teaspoon baking soda
- 1 teaspoon cocoa powder
- ½ teaspoon salt
- 1 cup vegetable oil
- 1 cup buttermilk
- 2 large eggs
- 2 tablespoons red food coloring
- 1 teaspoon vanilla extract
- 1 teaspoon white vinegar
- 1 cup cream cheese frosting
Instructions
- Preheat your oven to 350°F (175°C).
- In a mixing bowl, combine flour, sugar, baking soda, cocoa powder, and salt.
- In another bowl, mix oil, buttermilk, eggs, food coloring, vanilla, and vinegar.
- Combine the wet and dry ingredients and mix until smooth.
- Fill cupcake liners with the batter and bake for 20-25 minutes.
- Let them cool before frosting with cream cheese frosting.
Notes
- Ensure the ingredients are at room temperature for better mixing.
- For a richer flavor, let the cupcakes sit for a day before serving.
Nutrition
- Serving Size: 1 cupcake
- Calories: 250
- Sugar: 20g
- Sodium: 200mg
- Fat: 12g
- Saturated Fat: 2g
- Unsaturated Fat: 8g
- Trans Fat: 0g
- Carbohydrates: 30g
- Fiber: 1g
- Protein: 3g
- Cholesterol: 40mg
Keywords: red velvet cupcakes


